Installation
Dräger Polytron 8100 11
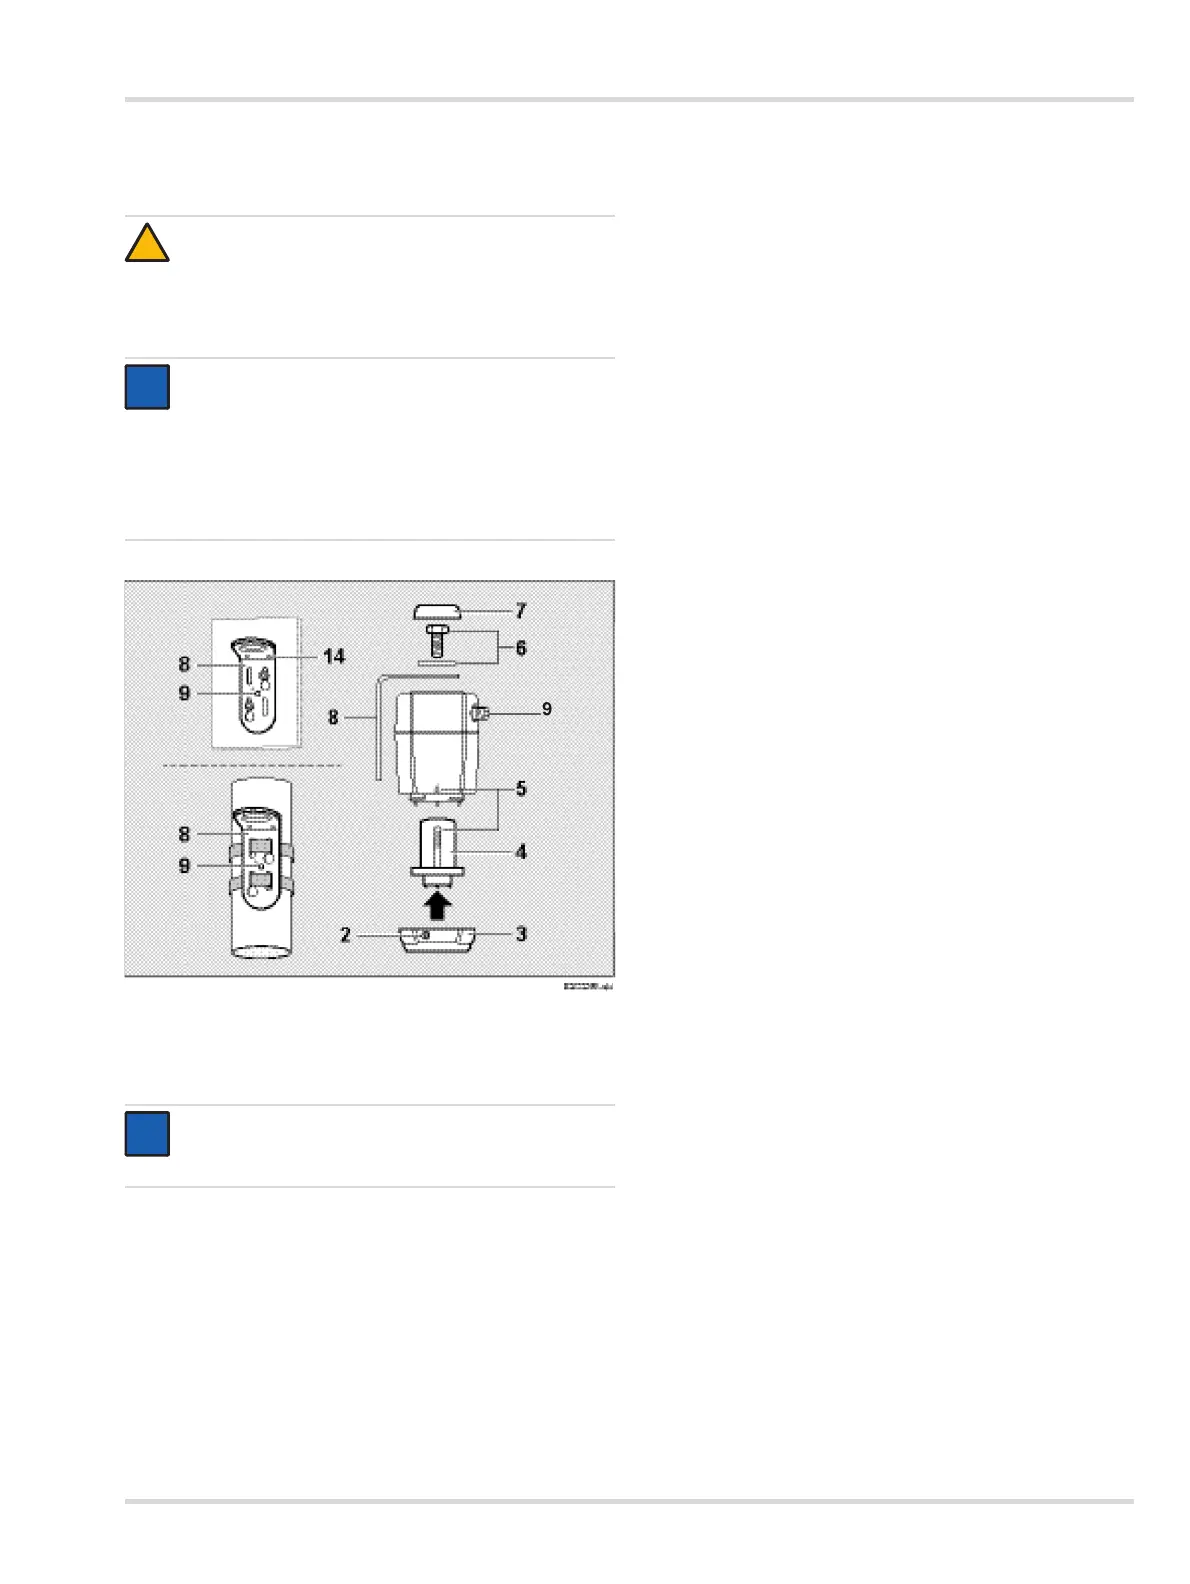
3.8 Installation of EC sensing head remote
3.8.1 Wall or pipe mounting kit
Install wall or pipe mount set (8) as specified in the
assembly instructions.
Screw the EC sensing head to the wall or pipe mount
bracket (8) using screw and washer (6).
Select the appropriate protection cap (7) and place it on the
screw.
3.8.2 Installing sensor
Loosen set-screw (2), 2 mm Allen screw.
Unscrew bayonet ring (3) and remove blank.
Remove sensor from packaging.
Insert sensor (4) into the opening. The Dräger logo on the
sensor must point to the mark on the sensing head housing
(5).
Lock sensor with bayonet ring.
Tighten set-screw (2). Mandatory for Zone 22 installations.
CAUTION
Observe the general installation information, see
Section 3 on Page 8.
Multiple EC sensing heads remote must not be daisy-
chained.
NOTICE
The EC sensor wall or pipe mount kit (part
number. 45 44 213) is required to mount the EC
sensor on a wall or pipe.
The sensing head should be mounted at a low-
vibration location at even temperature near a potential
leakage point (avoid direct sunlight).
NOTICE
Pay attention to the orientation of the cable
connector (9)!