JOB Entry
20
4. Touch
NEXT
.
Layout
Enter the width of the fi nished product in
1
with the
NUMERIC keys and touch
SET
.
Enter the length of the fi nished product in
2
with the
NUMERIC keys.
Touch
NEXT
.
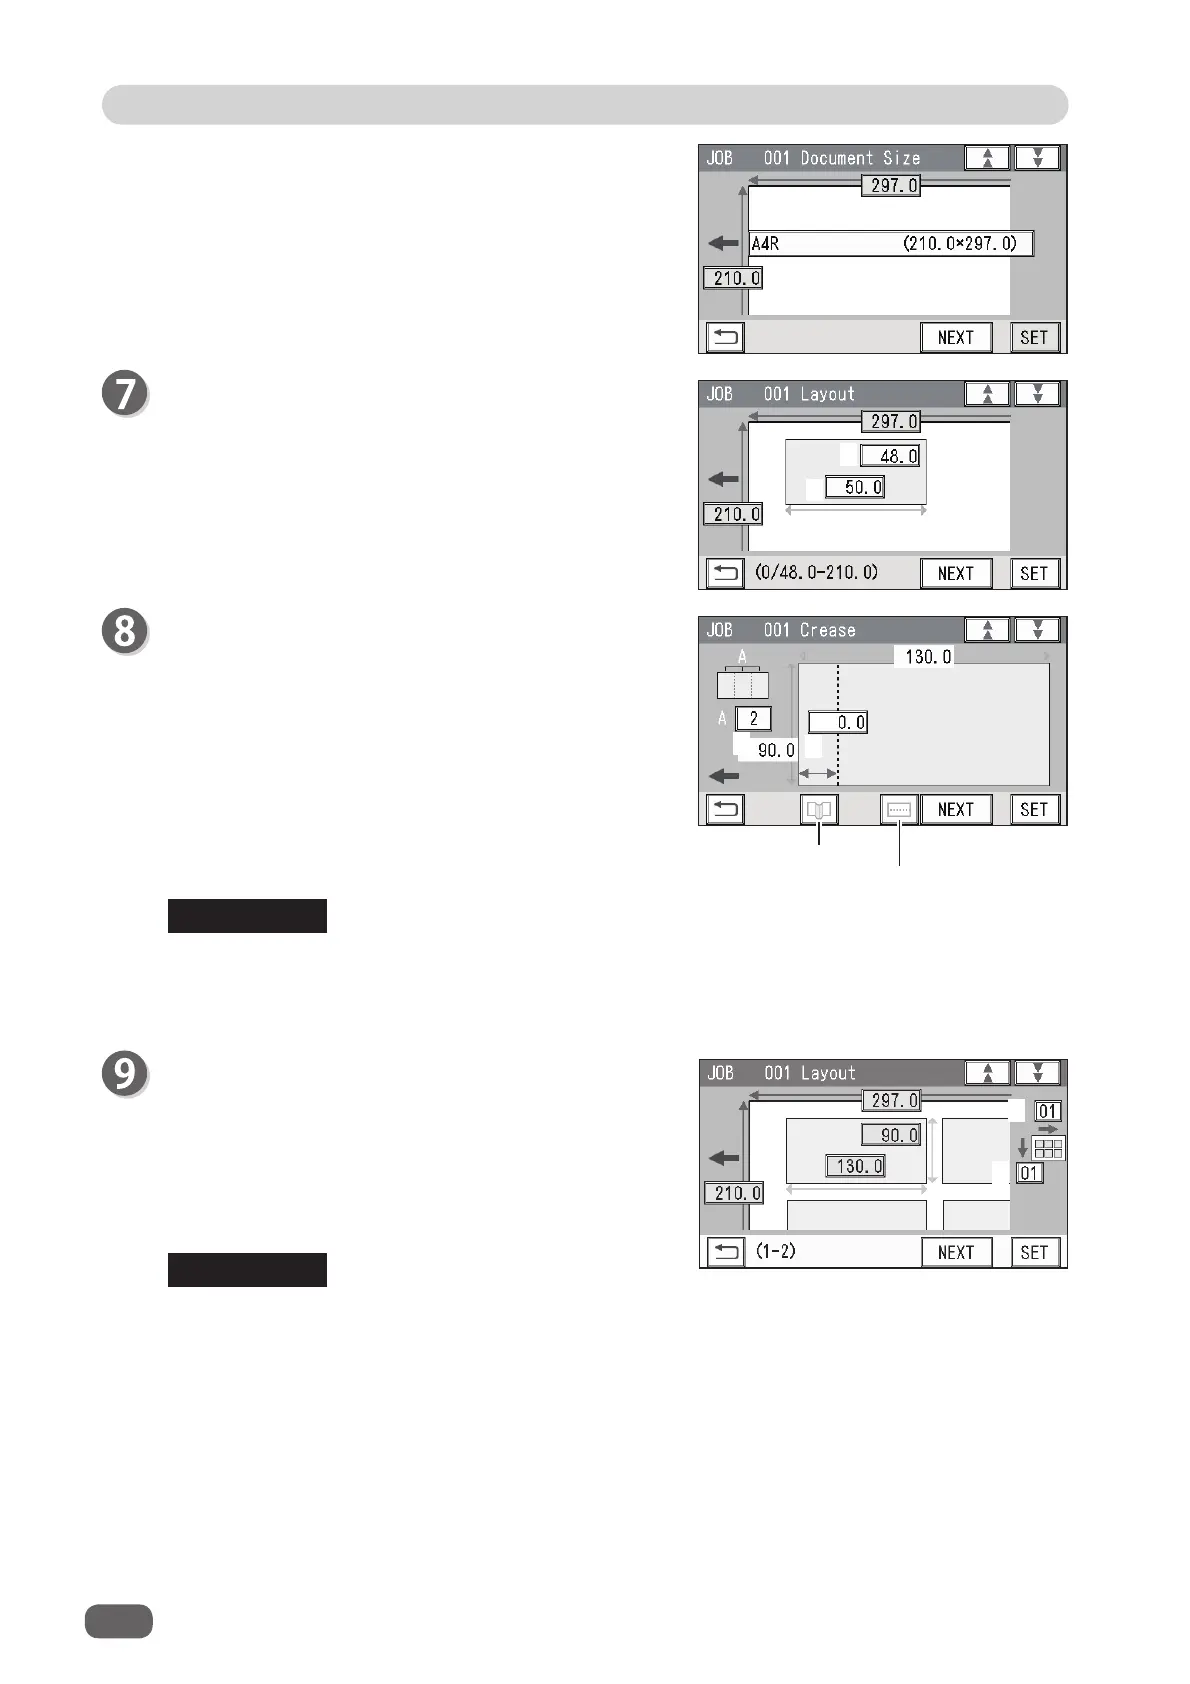
Crease
Touch
1
and enter the distance from the lead edge of
the fi nished product to the position of
Crease1
with
the NUMERIC keys.
To allocate creases evenly on fi nished products, touch
2
and enter the number of creases with the NUMERIC
keys. Then touch
SET
.
You can set two to seven creases evenly.
When having fi nished crease setting, touch
NEXT
.
You can set up to 20 creases on one document.
You can set up to six creases on one fi nished product.
To set seven or more creases on one fi nished product, select
Direct
.
Layout
Enter the number of fi nished products in a length
direction in
1
with the NUMERIC keys and touch
SET
.
Enter the number of fi nished products in a width
direction in
2
with the NUMERIC keys.
Touch
SET
.
To process the fi nished product with the rotary tool in
Wizard
, you cannot set three or
more cards in the X direction.
REFERENCE
REFERENCE
1
2
1
2
Crease
RTM
1
2