JOB Entry
25
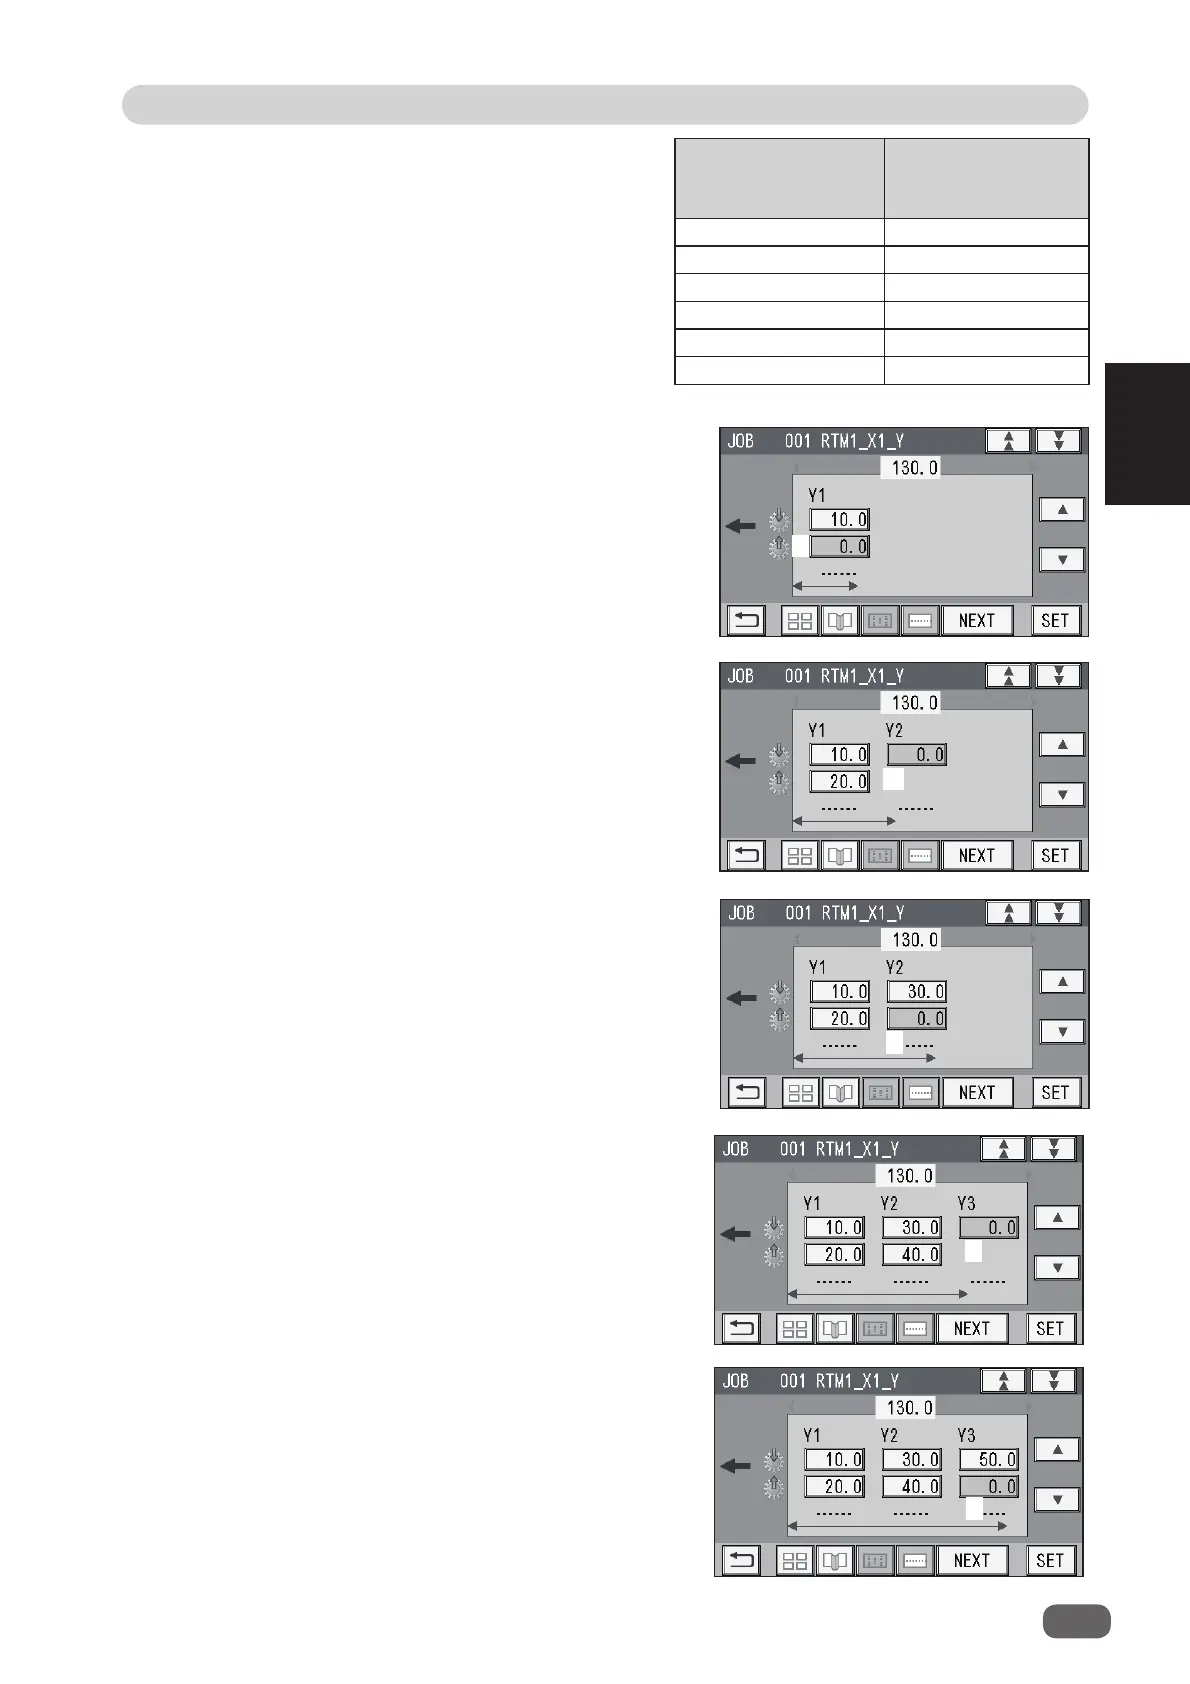
Programming a JOB on the Control Panel
2
2. Enter the distance between the lead edge of
the fi nished product and
2
(
Off
position: the
processing stop position of the rotary tool) of
Y1
(
Set 1
in the Y direction) with the NUMERIC
keys.
Touch
SET
.
If the number of cards in the Y direction is 4 to 6,
go to step
17.
3. Enter the distance between the lead edge of
the fi nished product and
3
(
On
position: the
processing start position of the rotary tool) of
Y2
(
Set 2
in the Y direction) with the NUMERIC
keys.
Touch
SET
.
You can set up to six sets on one
document in the Y direction.
In
Wizard
, the number of sets that can be
set varies depending on the number of
cards in the Y direction.
Even if two
RTM (Rotary Tool Module)
s
are installed, the total of processing
positions
for one
RTM (Rotary Tool
Module)
is as shown in the table on the
right.
The number of cards
in the Y direction
Processing
positions of rotary
tool
1 Y1 to Y6 6 sets
2 Y1 to Y3 3 sets
3 Y1 to Y2 2 sets
4 Y1 1 set
5 Y1 1 set
6 Y1 1 set
2
3
4. Enter the distance between the lead edge of
the fi nished product and
4
(
Off
position: the
processing stop position of the rotary tool) of
Y2
(
Set 2
in the Y direction) with the NUMERIC
keys.
Touch
SET
.
If the number of cards in the Y direction is 3, go
to step 18.
6. Enter the distance between the lead edge of
the fi nished product and
6
(
Off
position: the
processing stop position of the rotary tool) of
Y3
(
Set 3
in the Y direction) with the NUMERIC
keys.
Touch
SET
.
If the number of cards in the Y direction is 2, go
to step
17.
5. Enter the distance between the lead edge of
the fi nished product and
5
(
On
position: the
processing start position of the rotary tool) of
Y3
(
Set 3
in the Y direction) with the NUMERIC
keys.
Touch
SET
.
4
6
5