JOB Entry
37
Programming a JOB on the Control Panel
2
Slot2 RTM
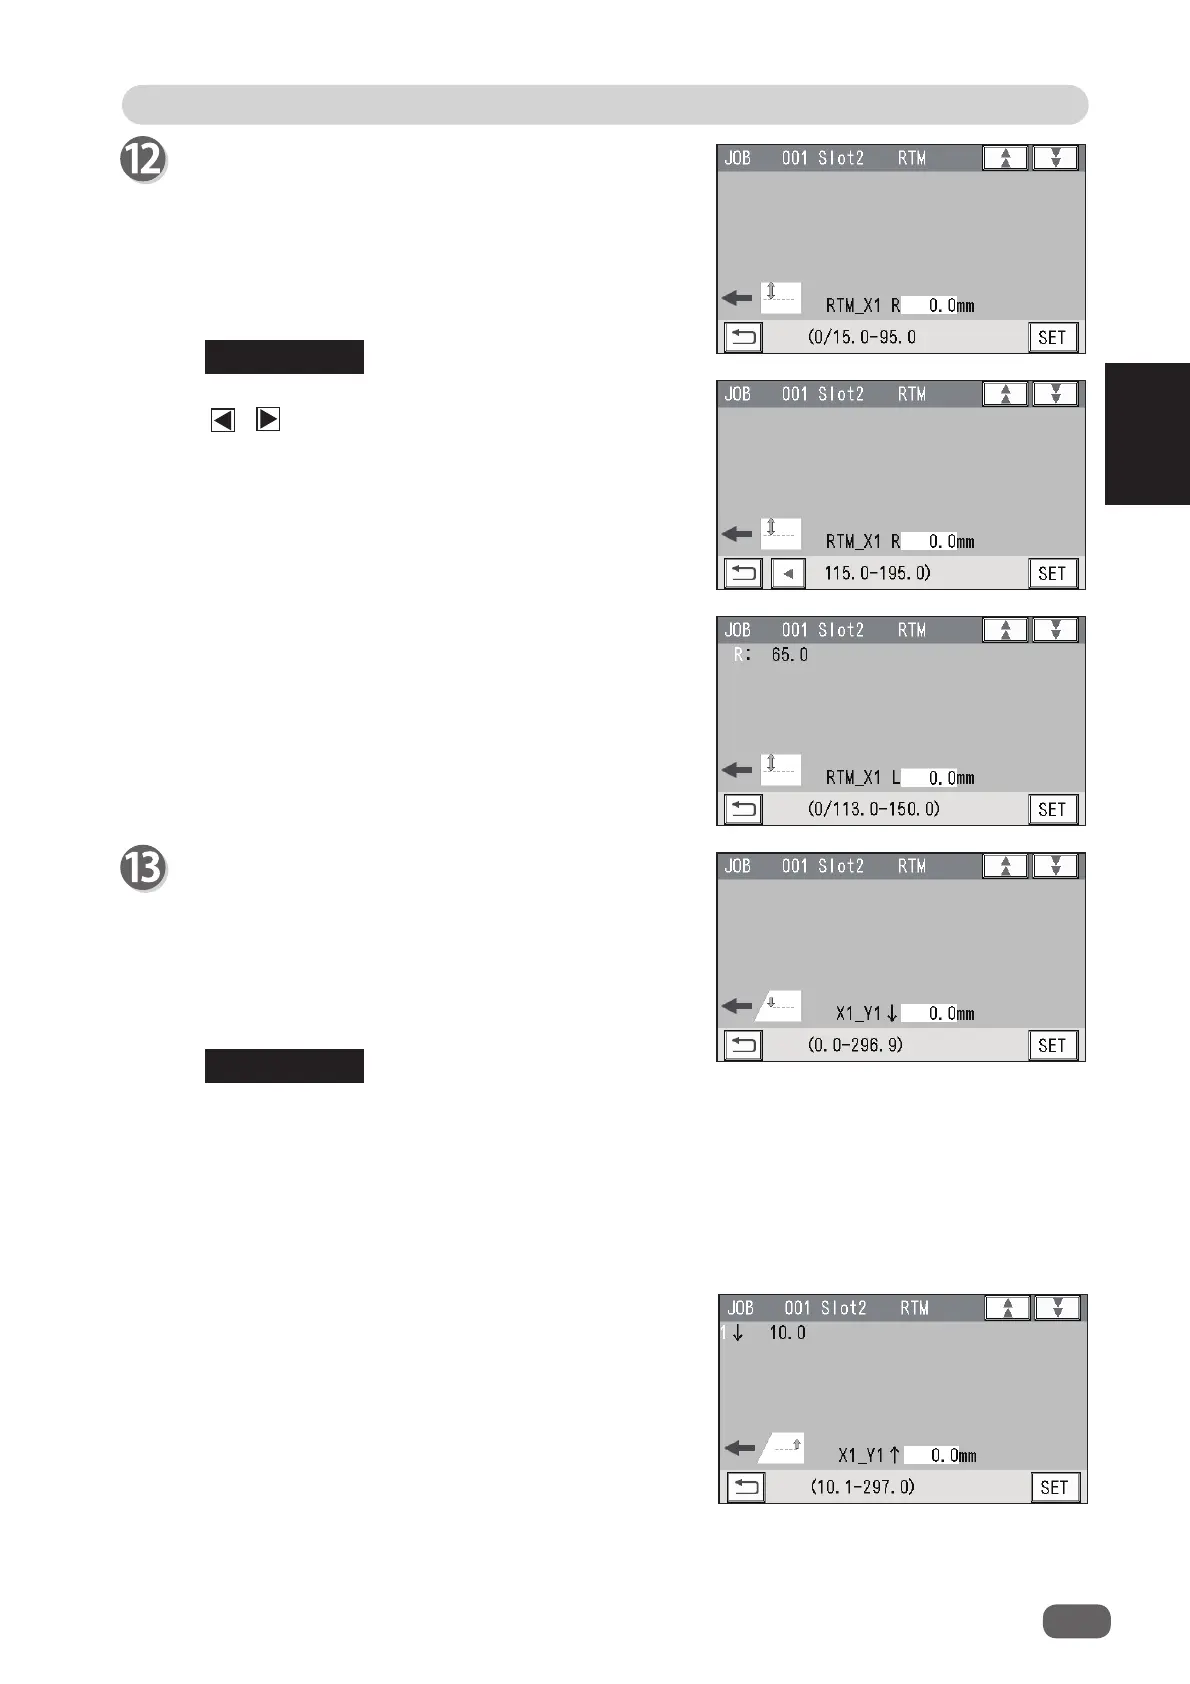
1.
X1_Y1↓
Enter the distance between the lead edge of the
document and the
On
position (the processing start
position of the rotary tool) of
Y1
(
Set 1
in the Y
direction) with the NUMERIC keys. Touch
SET
.
2.
X1_Y1 ↑
Enter the distance between the lead edge of the
document and the
Off
position (the processing
stop position of the rotary tool) of
Y1
(
Set 1
in the Y
direction) with the NUMERIC keys. Touch
SET
.
Slot2 RTM
X1
(Pattern 1 in the X direction)
1.
RTM_X1 R
Enter the distance between the right edge of the
document and the rotary tool on the right side (
R
) of
the
RTM (Rotary Tool Module)
with the NUMERIC
keys. Touch
SET
.
If you have set gutter slit(s) in step 9, touching
/ switches the value that can be entered for
the positions of the rotary tool for the fi nished product
on the right and for those on the left.
2.
RTM_X1 L
Enter the distance between the right edge of the
document and the rotary tool on the left side (
L
) of
the
RTM (Rotary Tool Module)
with the NUMERIC
keys. Touch
SET
.
The tools on the left side (
L
) and the right side (
R
) skip at the same time.
You can program up to six sets (
Y1
to
Y6
) in the Y direction each for
X1
(Pattern 1 in the
X direction) and
X2
(Pattern 2 in the X direction).
To fi nish setting for the Y direction with less than six sets, enter a value for the last
processing position and touch
SET
.
Then touch
SET
again, which proceeds to the screen in step 16.
REFERENCE
REFERENCE