Machine head
Service Instructions 745-35-10 S/745-35-10 A - 02.0 - 04/2017 59
10. Loosen the screw (8).
11. Shift the plate (1).
The distance between the holding lug (7) and the edge of the throat
plate cutout must range between 0.6 mm and 1 mm.
12. Tighten the screw (8).
3.10 Middle knife
3.10.1 Disassembling the drive motor
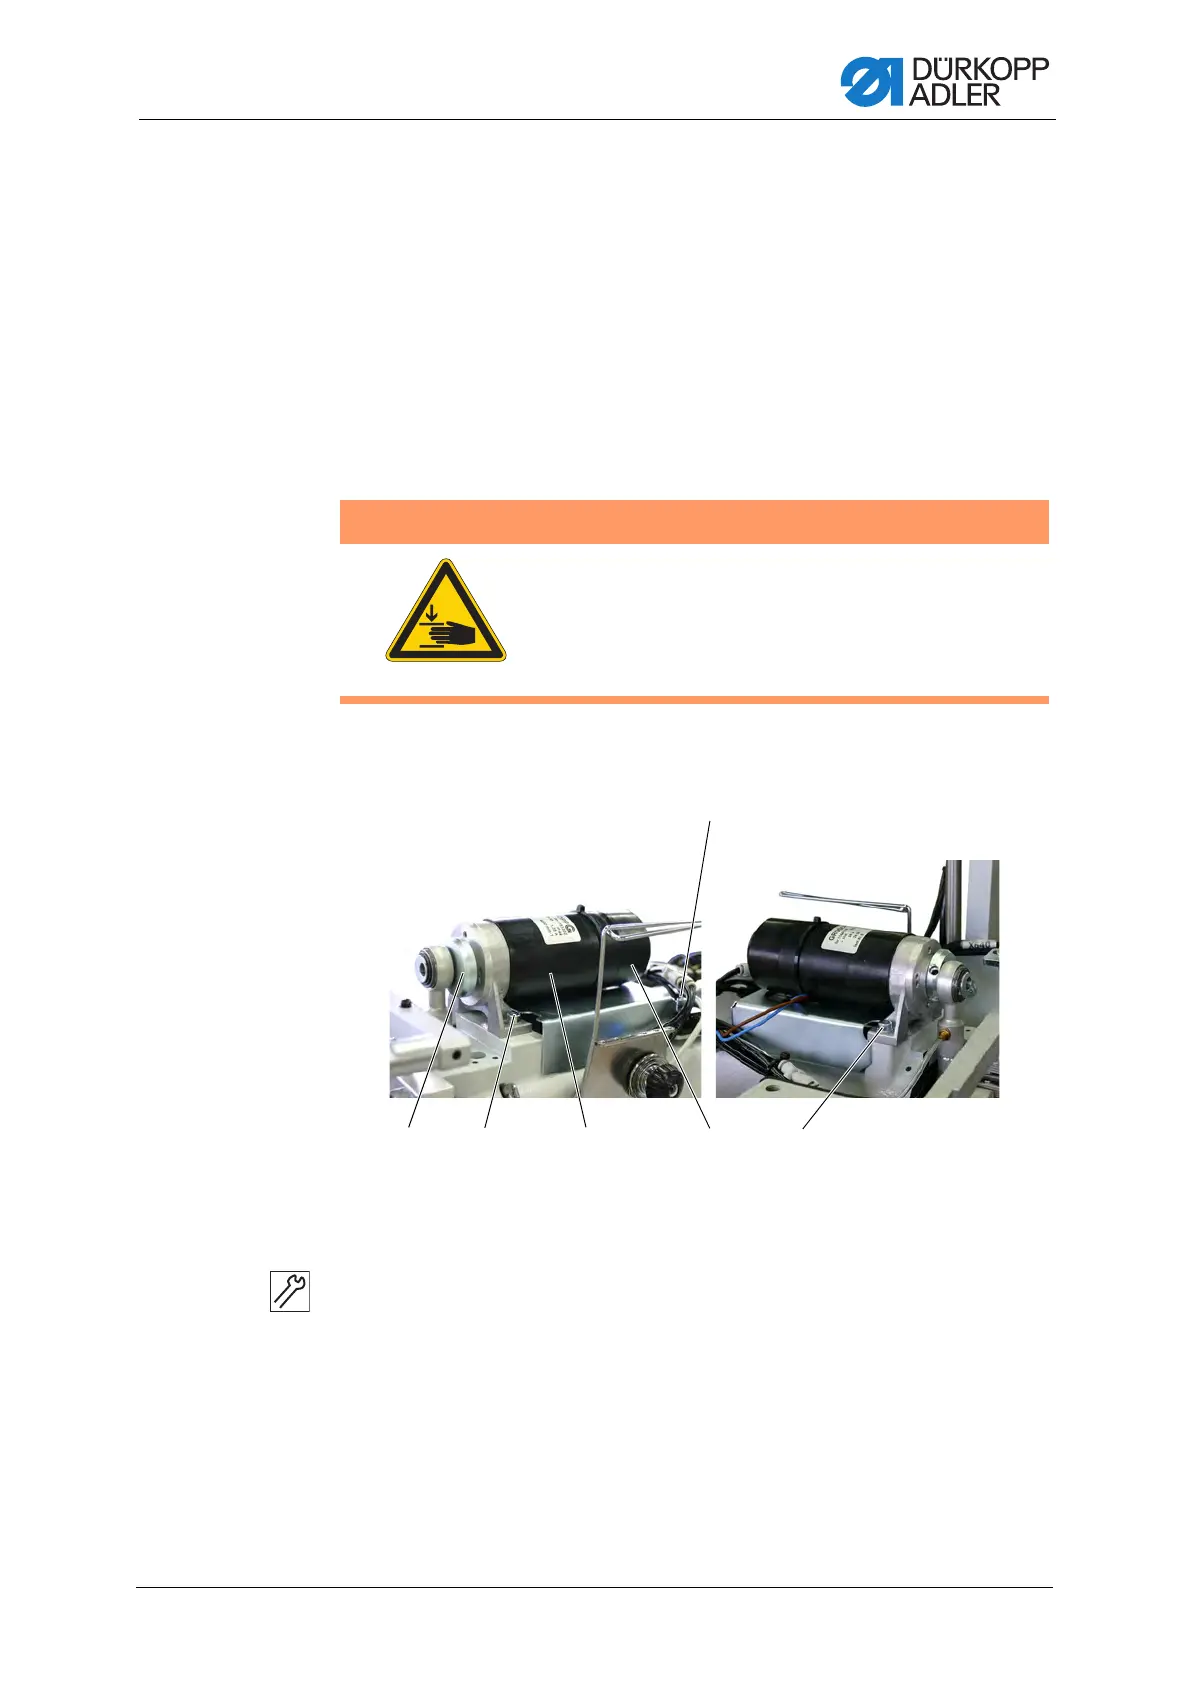
Fig. 46: Disassembling the drive motor
To remove the drive motor:
1. Loosen the electrical connection on the motor by disconnecting the
plug between cable harness and motor cable.
2. Loosen the screw (5) of the cover.
3. Pull the cover off carefully.
4. Loosen the screws on the eccentric (1).
5. Loosen the motor fastening screws (2).
6. Pull the drive motor (3) out of the eccentric (1) towards the rear.
WARNING
Risk of injury from moving parts!
Crushing possible.
Only remove the drive motor when the sewing unit
is switched off.
(1) - Eccentric
(2) - Motor fastening screws
(3) - Drive motor
(4) - Cap
(5) - Screw
 Loading...


