EasyManuals Logo

Eaton 9PX 5000i RT3U Netpack User Manual

Eaton 9PX 5000i RT3U Netpack
125 pages
To Next Page IconTo Next Page
To Previous Page IconTo Previous Page
Page #92 background imageLoading...
Page #92 background image
Página 17
614-09354-01_ES
ESPAÑOL
4. Inserte el cable de Normal AC source a través del pasacables.
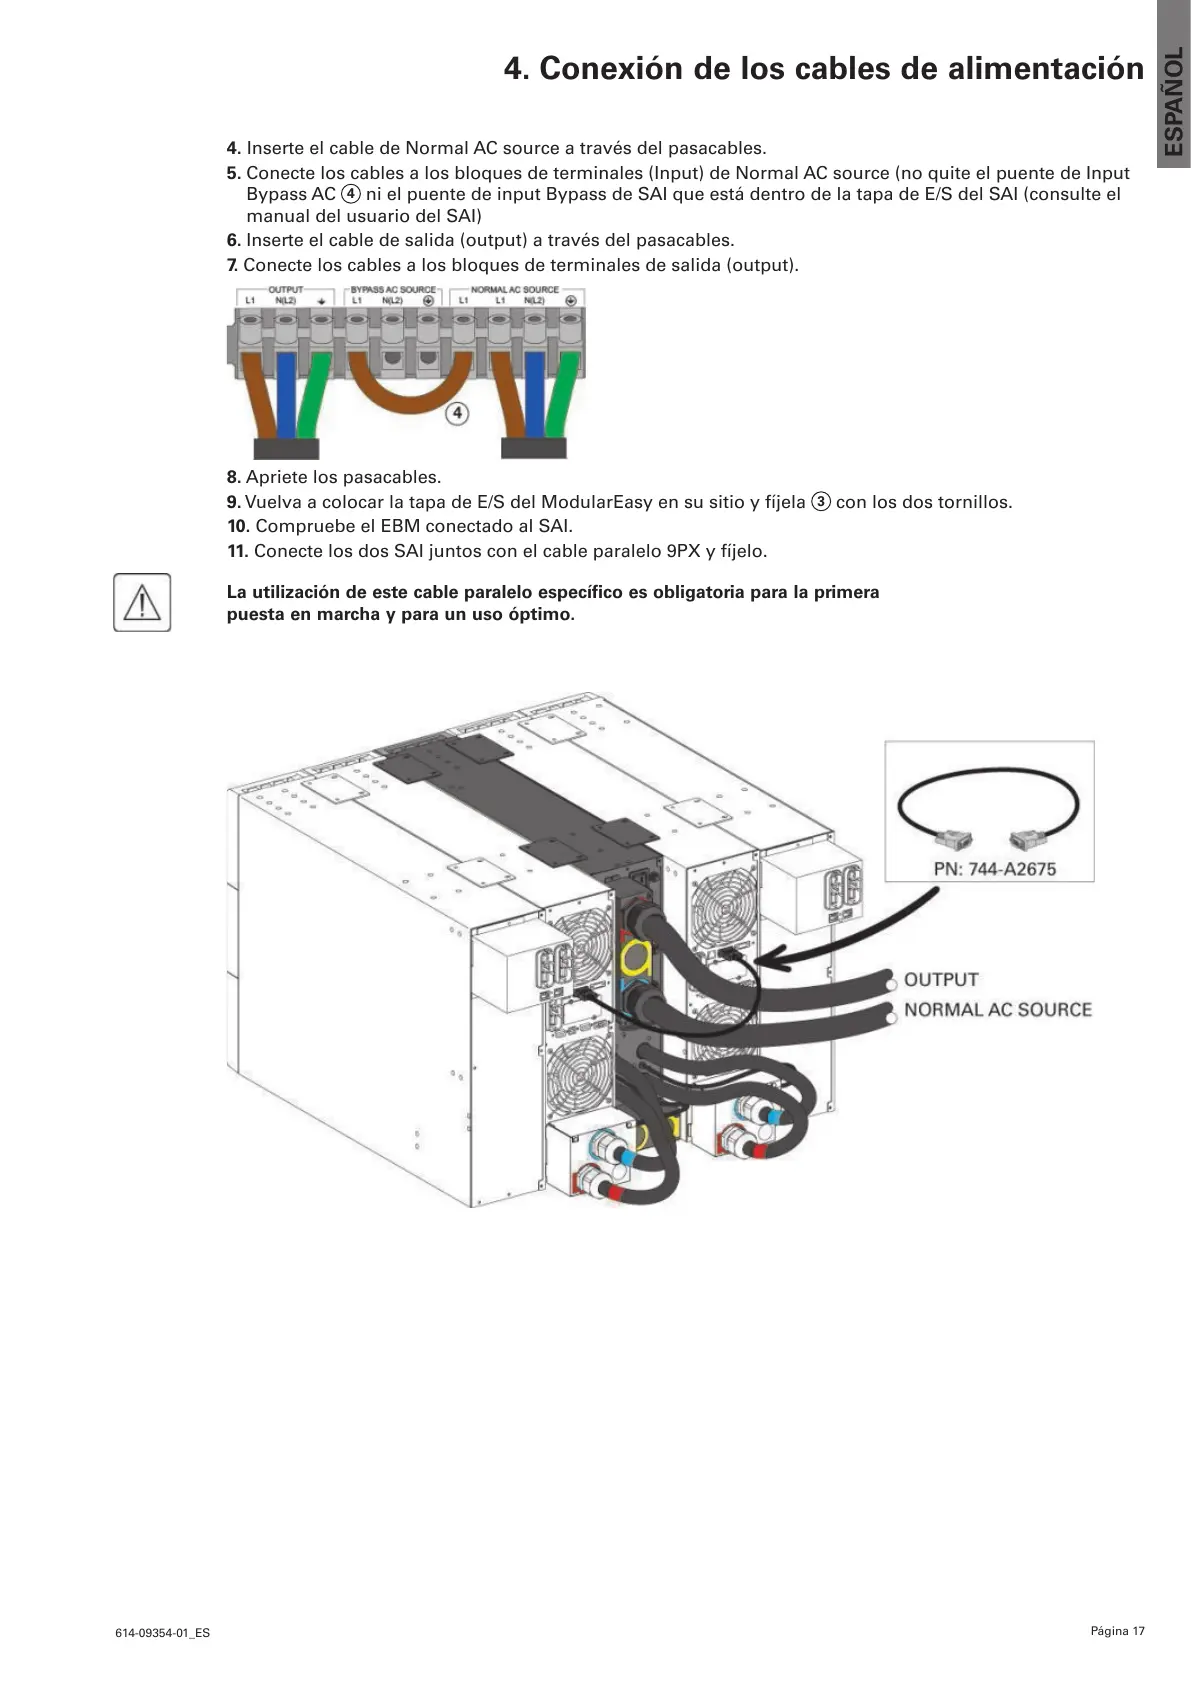
5. Conecte los cables a los bloques de terminales (Input) de Normal AC source (no quite el puente de Input
Bypass AC
4
ni el puente de input Bypass de SAI que está dentro de la tapa de E/S del SAI (consulte el
manual del usuario del SAI)
6. Inserte el cable de salida (output) a través del pasacables.
7. Conecte los cables a los bloques de terminales de salida (output).
8. Apriete los pasacables.
9. Vuelva a colocar la tapa de E/S del ModularEasy en su sitio y fíjela
3
con los dos tornillos.
10. Compruebe el EBM conectado al SAI.
11. Conecte los dos SAI juntos con el cable paralelo 9PX y fíjelo.
La utilización de este cable paralelo específico es obligatoria para la primera
puesta en marcha y para un uso óptimo.
4. Conexión de los cables de alimentación

Table of Contents

Questions and Answers:

Question and Answer IconNeed help?

Do you have a question about the Eaton 9PX 5000i RT3U Netpack and is the answer not in the manual?

Eaton 9PX 5000i RT3U Netpack Specifications

General IconGeneral
Power Rating5000 VA / 4500 W
Rack Height3U
Output Frequency50/60 Hz
Output Power Factor0.9
TopologyDouble conversion online
Input Frequency40-70 Hz
Runtime at Half Load11 minutes
DisplayLCD
Form FactorRack/Tower
Output Voltage200/208/220/230/240V
Output ConnectionsIEC C13, IEC C19
Network ManagementYes, via Network Card
Battery TypeSealed Lead Acid
EfficiencyUp to 94%
CommunicationUSB, Serial, Relay
BatteriesInternal
Input Voltage Range176-276 VAC without derating (100-300 VAC with derating)

Related product manuals