62 |
62 User Manual
Troubleshooting
“D” key which will call up the DIAGNOSTICS menu directly.
Use the up/down cursor keys to locate the Clear Nozzle option. Press [enter] and type in the number
of Clear Nozzle sequences you wish to run. DO NOT press the [enter] key to start the nozzle clear
sequence yet - the following procedure
must be carried out first:
NOTE: A minimum of three Clear Nozzle sequences is recommended in an attempt to clear a
nozzle blockage. This can be performed as a continuous routine by entering “3” in the
Clear Nozzle option and pressing [enter]. While wearing disposable gloves:
1. Remove the printhead cover.
2. Wash the printhead as described in “Cleaning the Printhead” ensuring the nozzle area
is clean.
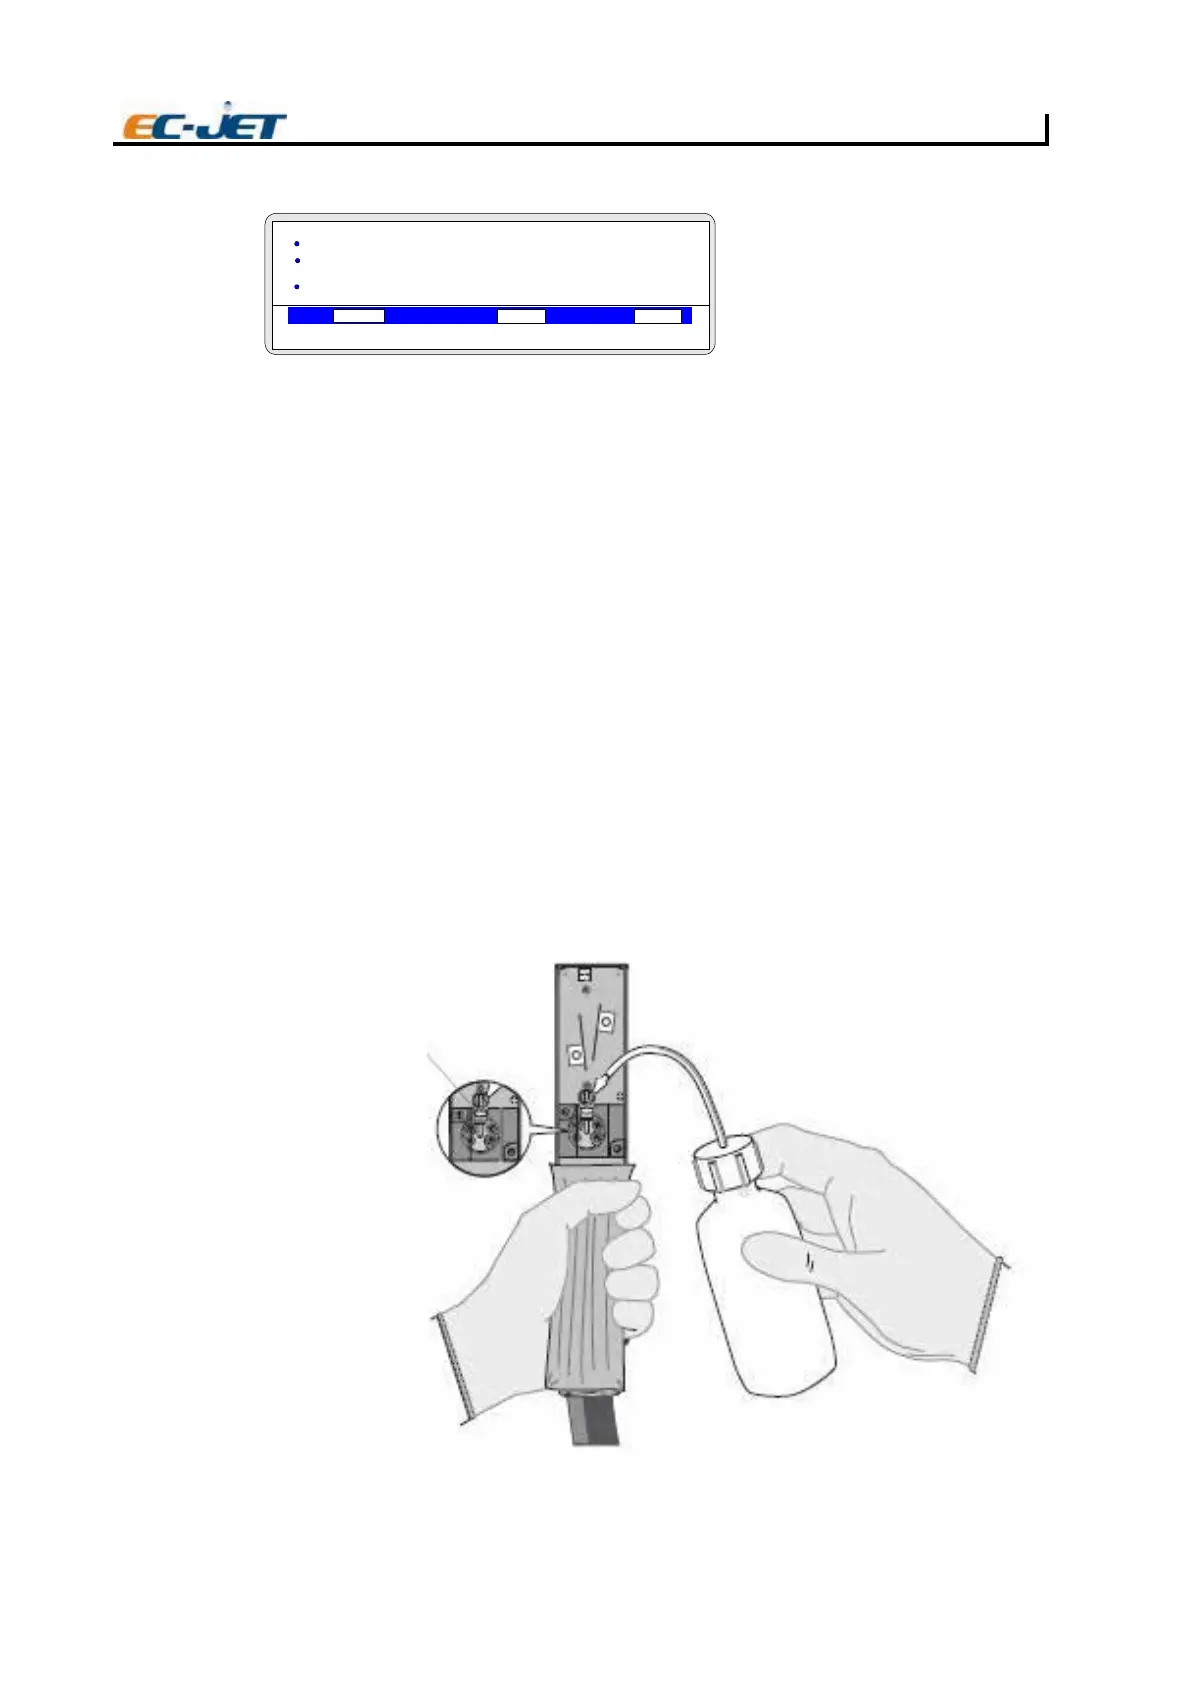
3. Invert the printhead, with some absorbent material wrapped around it where it connects
to the conduit, and hold it in a vertical position.
4. Activate the Clear Nozzle routine by pressing the [enter] key.
5. The status line will indicate that the printer is clearing the nozzle.
6. Apply small amounts of solvent to the inverted nozzle face as illustrated below. It should
be observed that when a small drip of solvent is applied to the nozzle face, it will be drawn
in through the nozzle orifice and back into
the assembly.
7. Apply drops of solvent repeatedly until no more solvent is drawn in.
8. The routine of three Clear Nozzle sequences should be carried out a maximum of 10
times, with an attempt to start the jet at the end of each routine. If the nozzle is still blocked
after the 10 routines have been completed, the printhead should be replaced.
CAUTION: Be certain to use the correct solvent that corresponds to the ink type being used in the
printer.
DIAGNOSTICS
VOD PRESSURE PHASE
00000
000
> Stop Print
> Test Print
> Clean Nozzle
> Nozzle Flush
EJ101
Take care to build Up a
good coating of solvent
on the nozzle as shown
here
EJ102
2006-03-24 14:01:38
Jet off