Maintenance and Repair
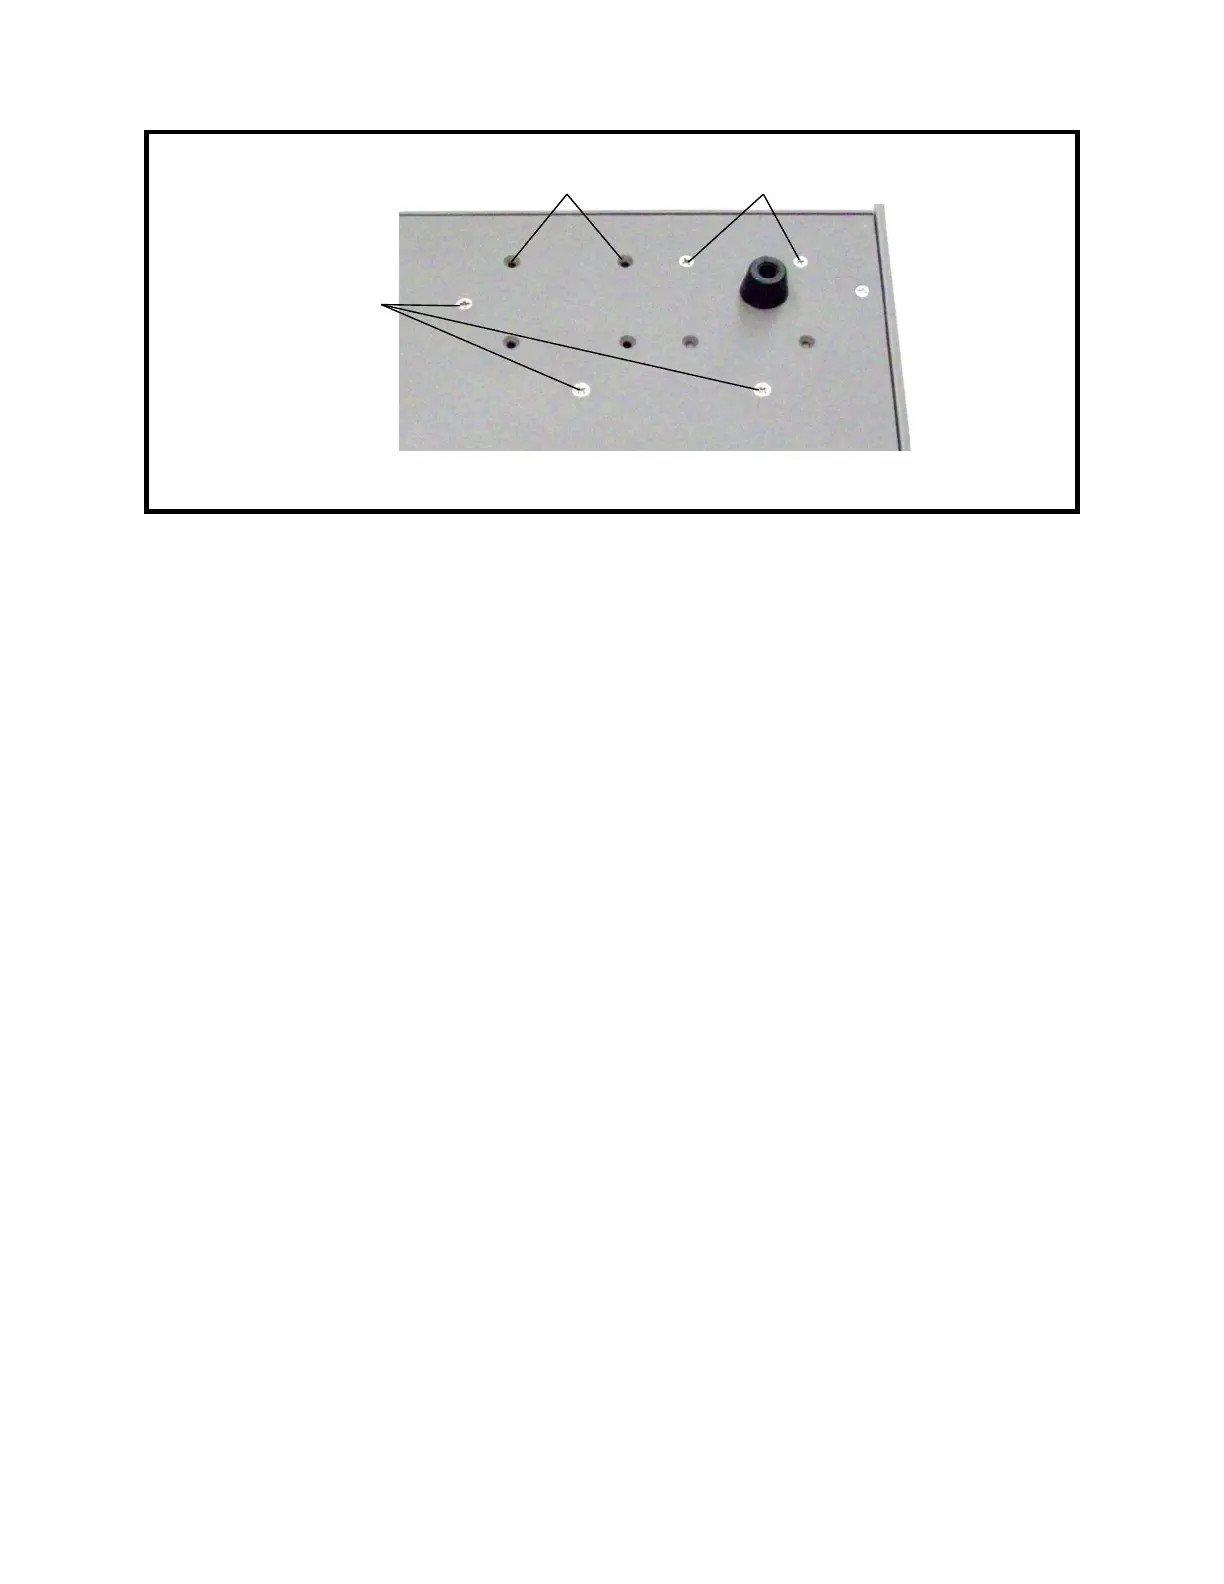
Figure 9-4: Underside of Left Rear Corner
5. While supporting the charging supply and its mounting bracket, use a #2 Phillips
screwdriver from the underside of the Model 1140A to remove the three flat head
screws that hold the charging supply mounting bracket to the bottom plate. See
Figure 9-4.
6. Remove the charging supply and mounting bracket together.
7. Using a #1 Phillips screwdriver, remove the two screws that hold the charging supply
to the mounting bracket.
8. Remove the charging supply.
6 Charging Supply Installation
1. Use a #1 Phillips screwdriver to install the two screws that hold the charging supply
to the mounting bracket. Tighten the screws to 3.2 in-lb torque.
2. Place the Model 1140A on its left side.
3. Place the charging supply and mounting bracket so that the holes are aligned with the
holes in the bottom of the unit.
4. Using a #2 Phillips screwdriver, install the three flat head screws that hold the
charging supply mounting bracket. These screws are installed from the underside of
the unit. Tighten to 10 in-lb torque. See Figure 9-4.
5. Connect the wires to the charging supply barrier strip according to the labels on the
charging supply and Table 9-1. See Figure 9-3. Tighten the screws using a #1 Phillips
screwdriver.
6. Place the ac voltage guard over the charging supply barrier strip and install its screw
using a #1 Phillips screwdriver. Tighten to 5 in-lb torque.
7. Follow Procedure 2 for Top Cover Installation.
9-5
↓ Front
Three screws for
charging supply
mounting bracket
Two screws for remote
interface bracket 1
Two screws for remote
interface bracket 2