4-9
2. Flip the unit over and put the other part of the cage on the top of the unit.
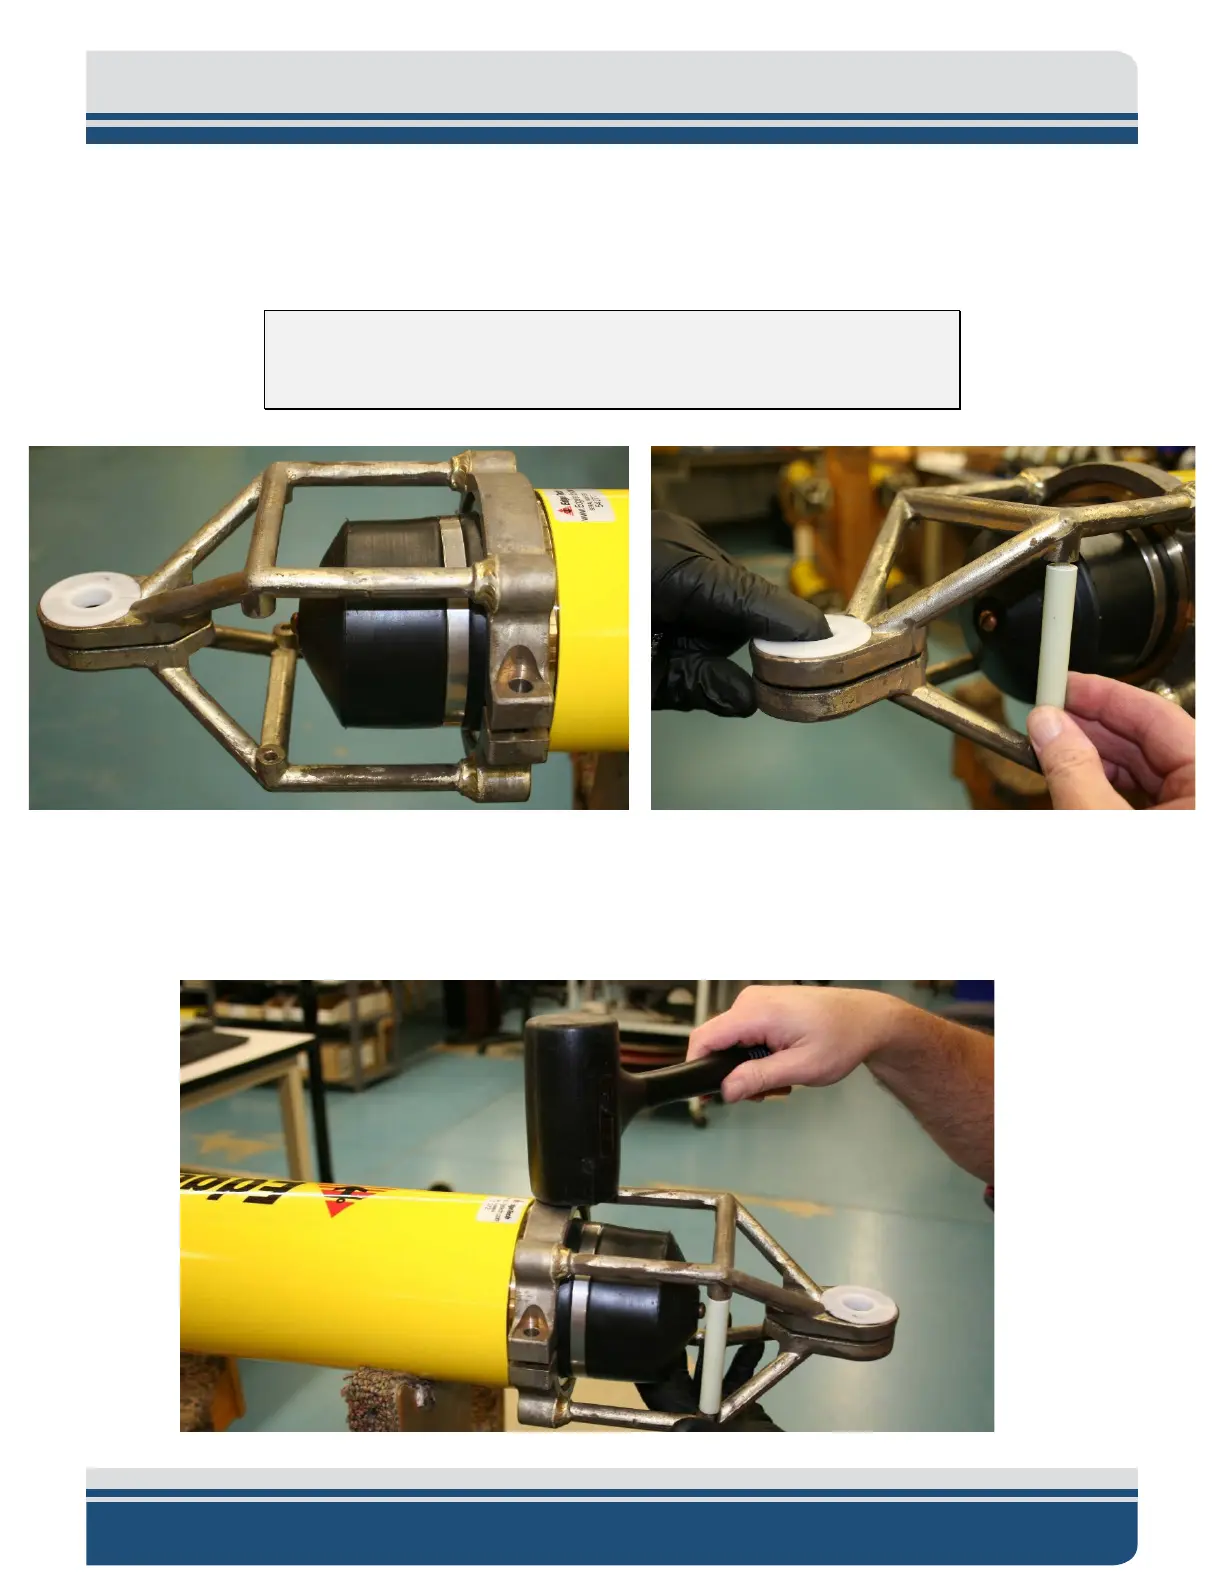
a. Before tapping the other part of the cage with the mallet, align each of the two 1/2-inch
diameter spreader rods into the spaces one at a time, as shown in F
IGURE 4-14.
Note: If inserting the spreader Rods is difficult, remove one part of the
Lifting Support and try again without pushing it down.
Figure 4-14: Applying the Second Part of the Lifting Support, Including the ½” Spreader Rods
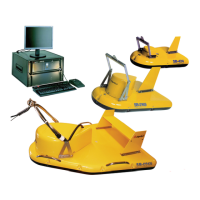
b. Gently use a mallet to tap the cage together and try to keep the gaps between the
clamps on both sides even, as shown in F
IGURE 4-15.