5-7
8242XS Assembly
The instructions below detail the Clevis End Cap Assembly.
Clevis End Cap Assembly
1. Prepare the sealing surfaces for assembly by cleaning with a lint-free towel or swab, moistened if
needed with alcohol. Inspect for scratches or nicks which will impair the O-ring efficiency. Apply
a Very light coat of O-ring lubricant (EdgeTech recommends the use of Parker Super O-lube) to
the piston O-ring surface to aid sliding insertion of the piston seal. Inspect the O-Rings for damage
or manufacturing flaws such as tears, dimples or inclusions in the rubber. Lightly coat the O-Rings
with O-ring lubricant. Protect O-Rings when stretching them over large diameters (i.e., cover
diameter. with plastic sleeve). See F
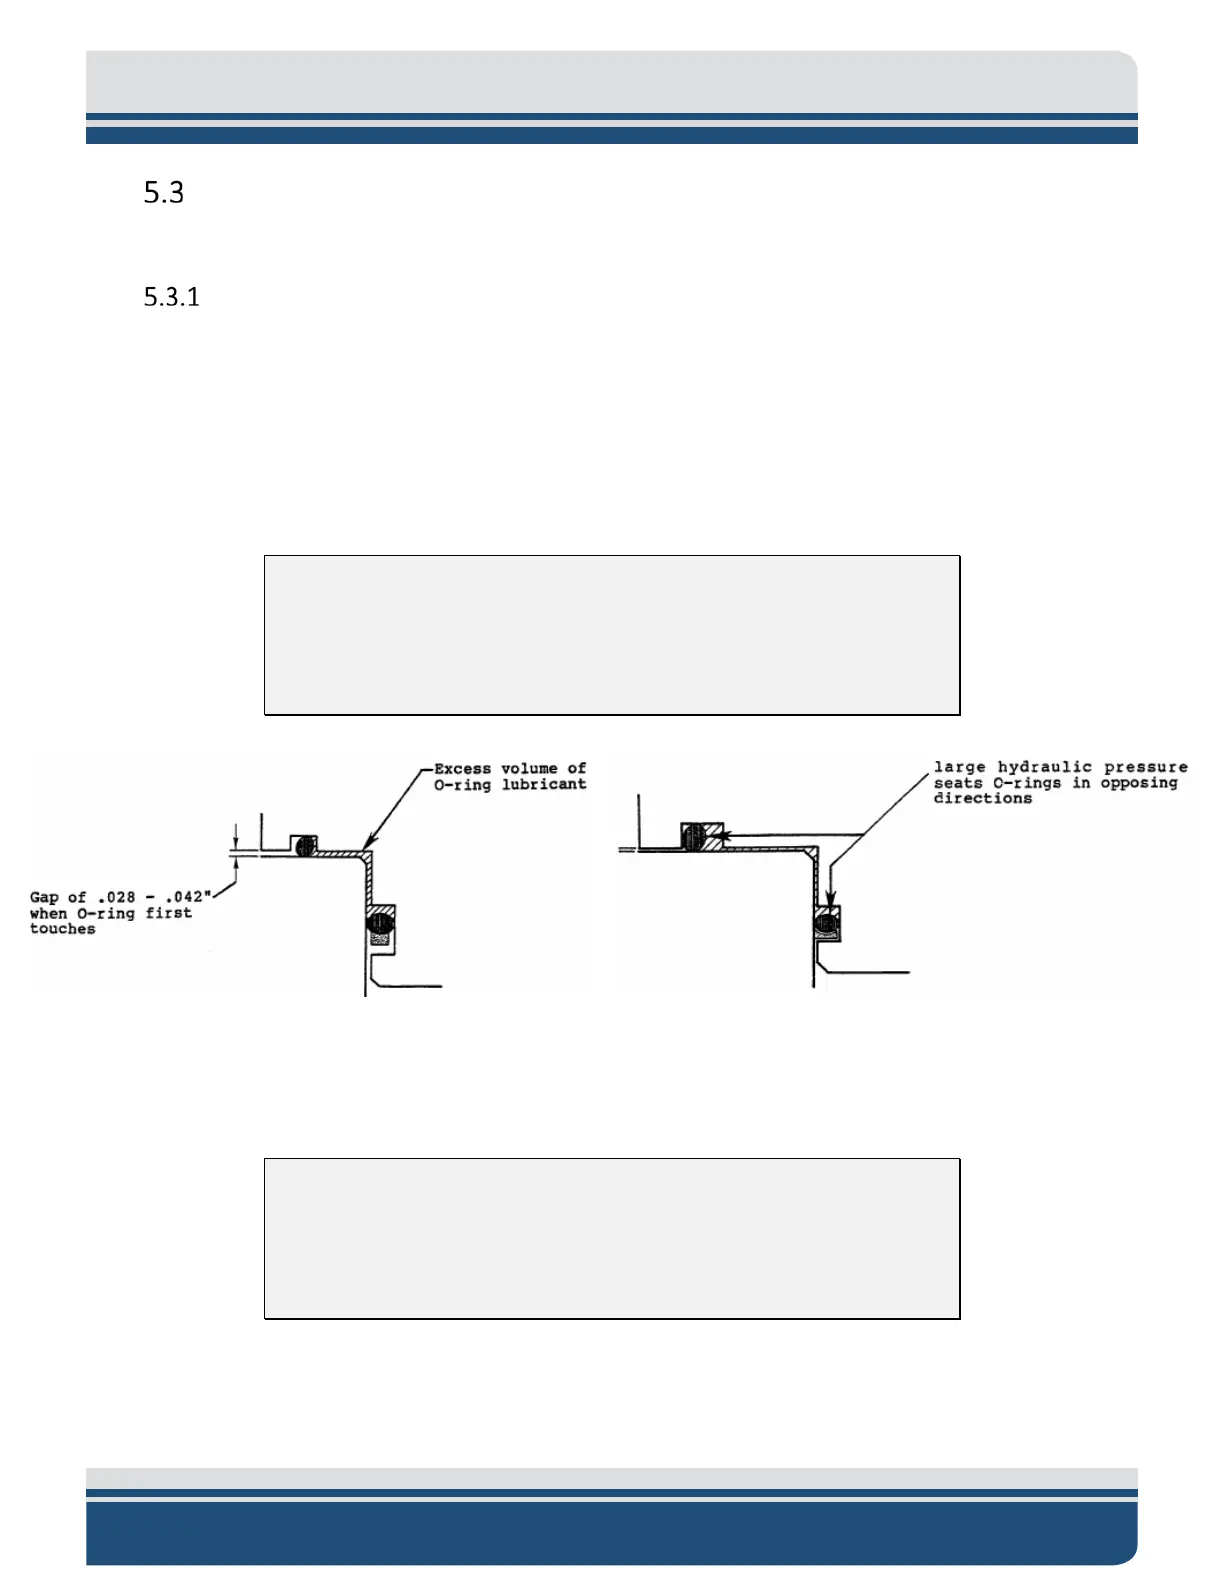
IGURE 5-7, FIGURE 5-9, and FIGURE 4-12.
CAUTION!
Only a light coating of lubricant is required. Excess lubricant between
seals may cause excessive hydraulic pressure between O-Rings, resulting
in improper seating.
Figure 5-7: O-Rings in Clevis End Cap
2. Slip the electronics into the housing. After the electronics is in the housing and before the
transducer end cap is inserted, connect the transducer cable and then the battery.
CAUTION!
Do not pinch or damage wires when inserting assembly into the housing.
There are large diameter plates in the electronics assembly which will not
allow clearance for cables or connectors.
3. Carefully press the piston seal into the housing. The backup O-ring is properly aligned if it enters
the housing before the O-ring while the curved side of the backup ring faces the O-ring.