EFKA FP220A5911
31
Set functions of seam 03:
!
Press the E key " Seam number 03 is displayed.
! Press the 3 key " The righthand arrow above the 3 key indicates that the light barrier operates covered "
uncovered. The light barrier compensating stitches can be varied as previously shown.
! Press the 4 key " The righthand arrow above the 4 key indicates that the double end backtack is On. The end
backtack stitches must be input individually.
!
Press the 5 key " Both arrows above the 5 key indicate that thread trimmer and thread wiper are On.
!
Press the 6 key " The lefthand arrow above the 6 key indicates that the sewing foot is automatically lifted in the
seam.
! Press the 7 key " The lefthand arrow above the 7 key indicates that the needle is in the up position.
Display of seam 03 after correct function input
! Press the P key twice " Exit programming of seams.
! Start sewing once " The programmed data are saved.
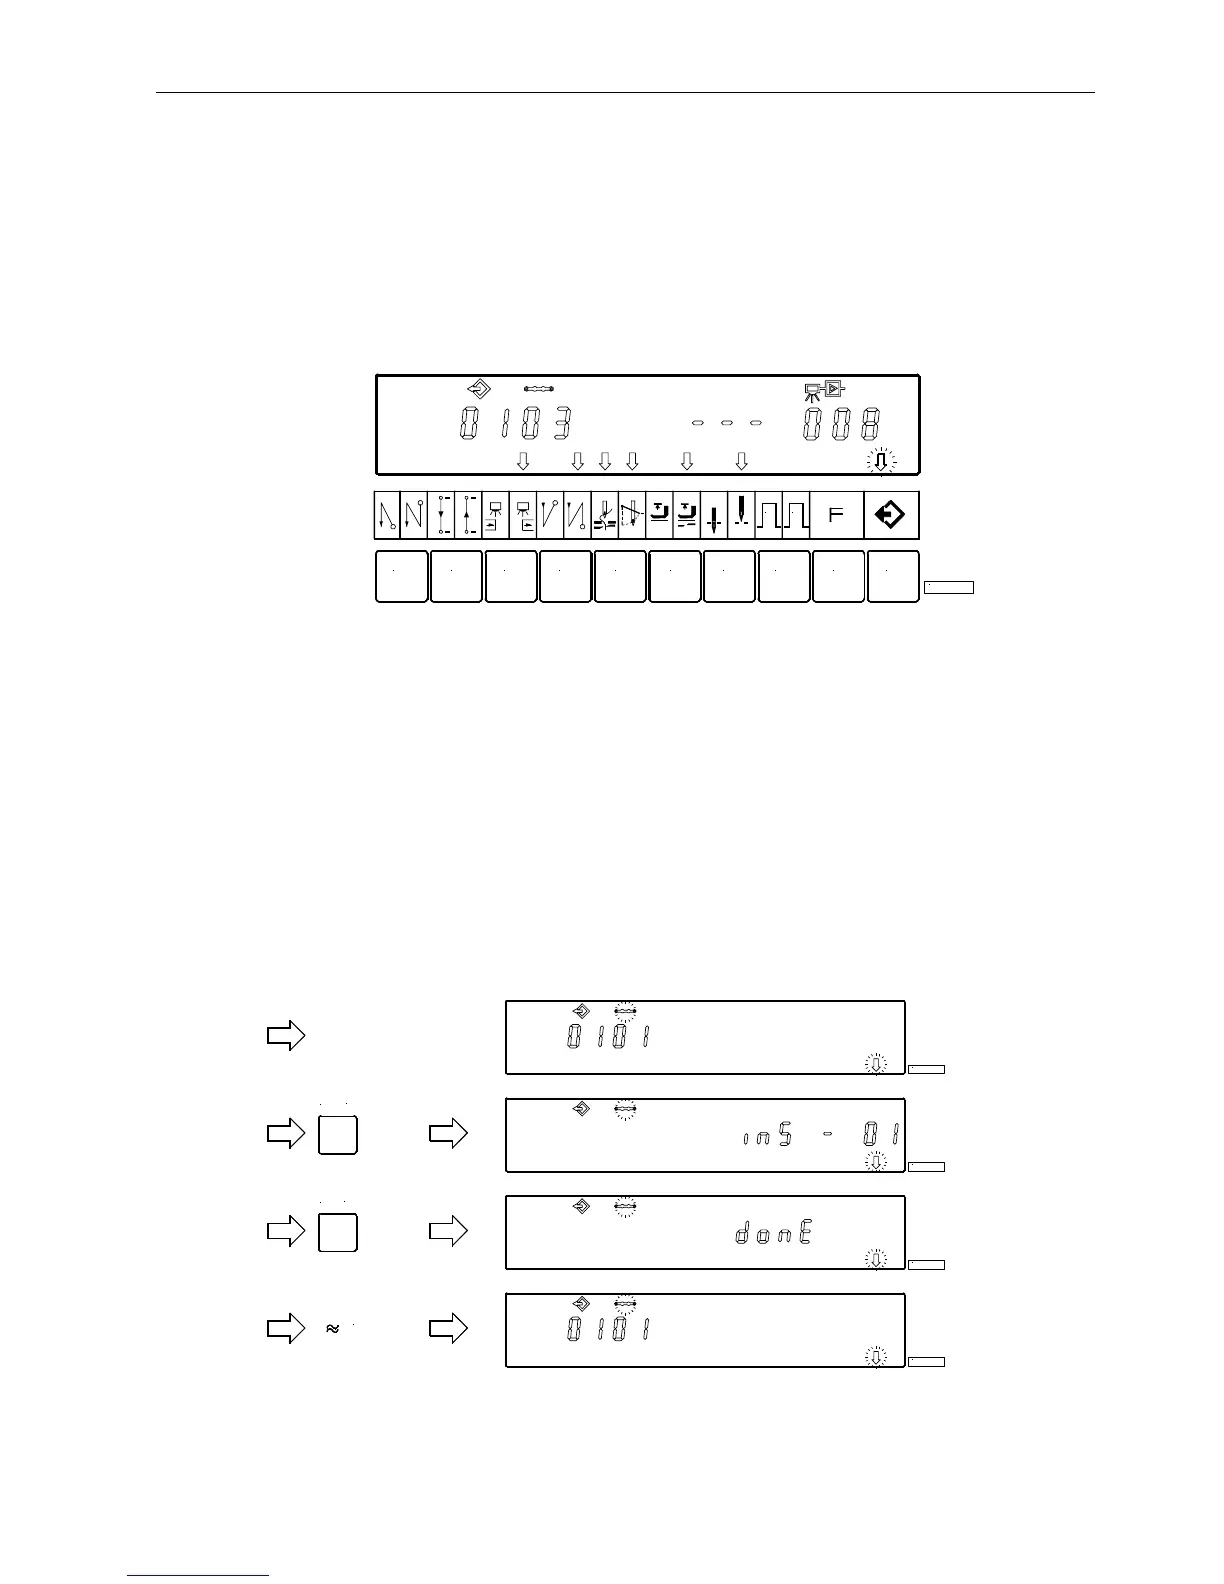
7.6.4 Inserting a Seam or Pattern
A pattern or seam can be inserted by means of the A “INSERT F1“ key, on condition that the symbol above the pattern or
seam number is blinking during programming.
! Select the pattern or seam number where the new number is to be inserted. The symbol above the pattern or seam
number must be blinking. Proceed as shown in chapters “Programming with or without Code Number Input“.
!
Press the A “INSERT F1“ key twice in brief succession. The new pattern or seam number will be inserted. All
subsequent numbers are automatically augmented by “1“. The following example shows how a seam is inserted before
the existing seam.
!
Any desired function can now be assigned to the new seam.
721 3 4 5 6
1 2
8 9
KL2389
0
KL2390
INSERT
F1
KL2391
INSERT
F1
KL2392
3 sec.
KL2393