25
Code Info For Vertical Axis For Horizontal Axis
Axis Type
OSC. POS.
Max POS.
1500/1800/2100/2400/2700/3000 1000
Min POS.
0 0
HOM. Delay
50 ms 0
HOM. Freq.
10 Hz 10 Hz
Max Freq.
75 Hz 50 Hz
Max V (Velocity)
36.0 m/min. 8.0 m/min.
Min V
6.0 m/min. 4.0 m/min.
Recommended V
20.0 m/min. 5.0 m/min.
Max a (acceleration)
2.5 m/s² 2.5 m/s²
Min a
0,5 m/s² 0,5 m/s²
Recommended a
1.5 m/s² 1.5 m/s²
HOM. T. Out
30 30
MOT. T. Lim
120 120
ENC. 1P. mm
Default Default
1Hz/V
Default Default
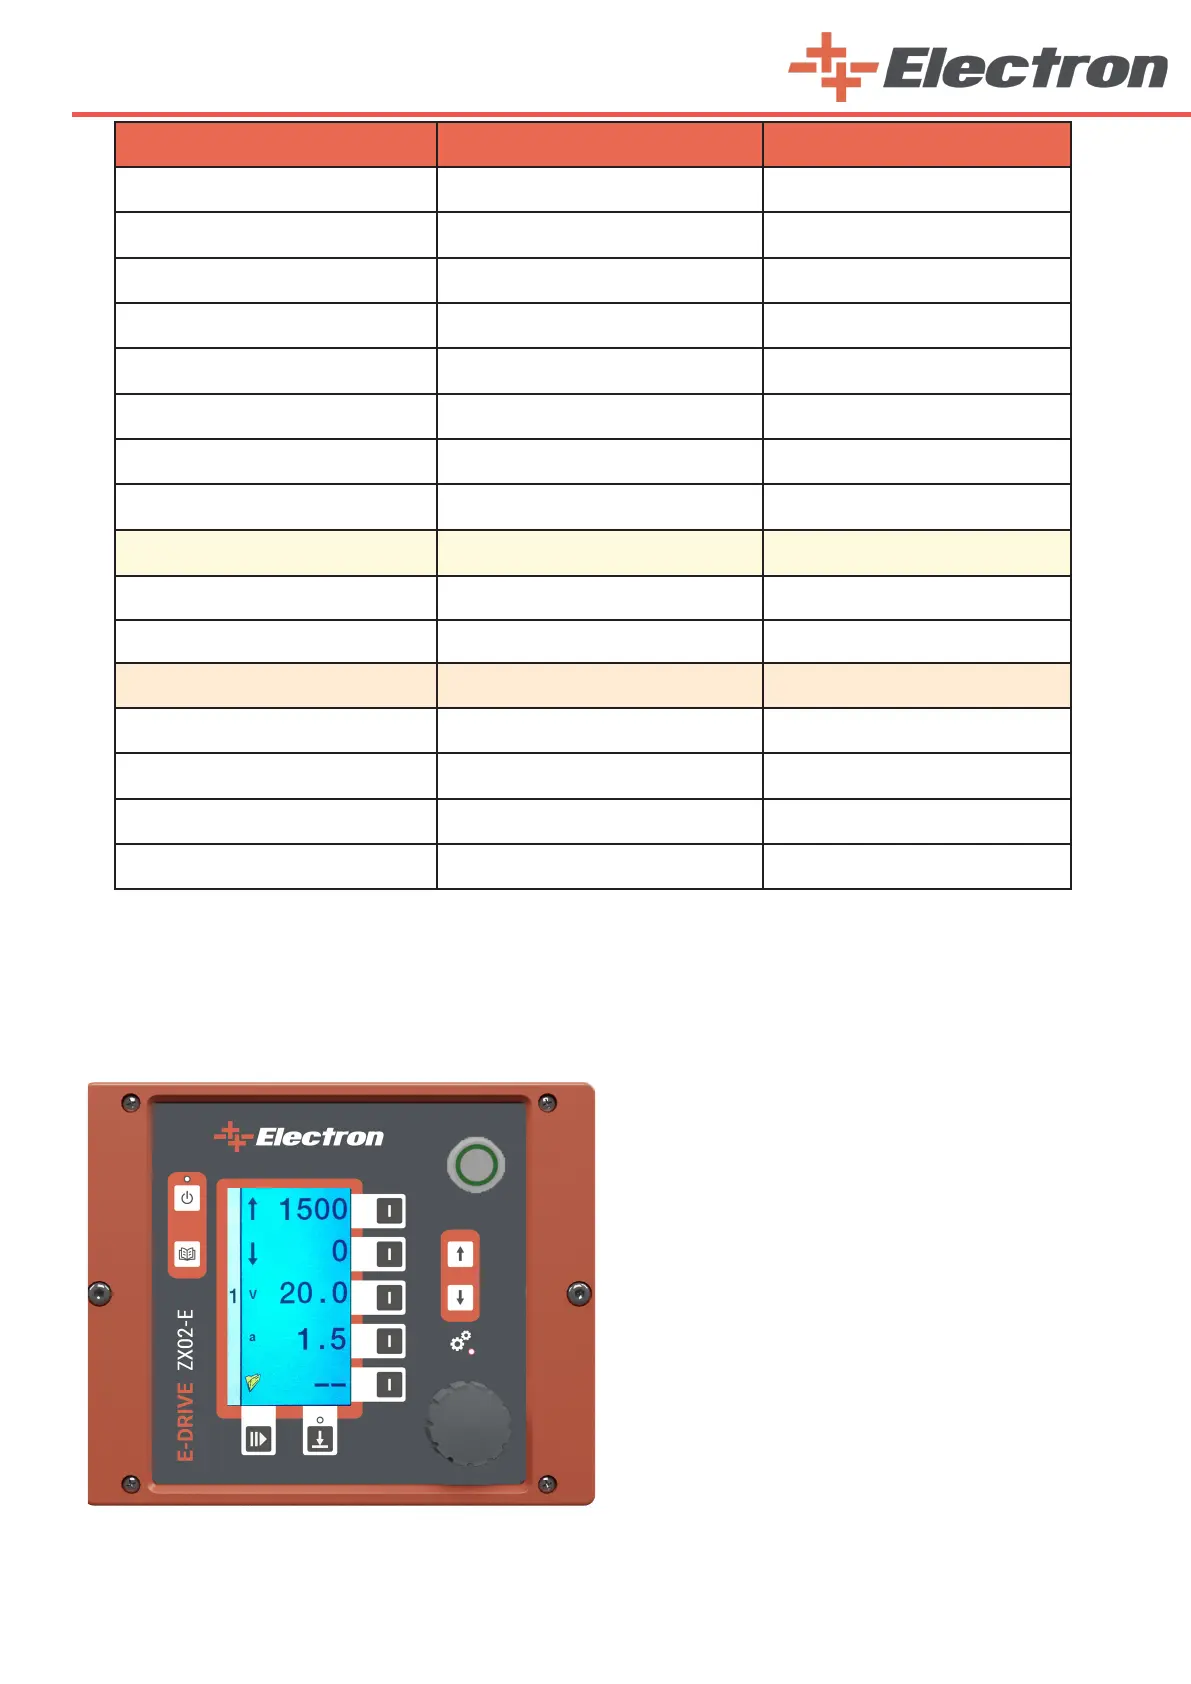
7.4. Main Menu Page
After making the main settings and axis settings, press the ‘Axes Active / Passive Button’ (B14) to switch
to the ‘‘Main Menu’’ page. Here you need to edit the reciprocator’s operating settings, that is, create a recipe.
You can select the setting of each line with the
buttons (B5,B6,B7,B8,B9) on the right sides and change
their values with the ‘Rotary Adjustment Knob’ (B10).
1st Line: It is the upper working height adjustment of your
reciprocator stroke. The maximum can be up to the value
you set on the setup page.
2nd Line: It is the bottom working height adjustment of
your reciprocator stroke. The minimum value is zero. This
value is referenced as the location of the mechanical stop
bumper.
3th Line: It is velocity adjustment.
4th Line: It is acceleration adjustment.
5th Line: It shows the prescription.
Note: Prescribing will be explained in the next section.
Press the ‘Menu Button’ (B13) to adjust the other
axes settings.