33
9.7.1 Replacing the counterweight plates on the vertical axis
9.7. Counterweight Plates
WARNING:
The following workings should only be carried out by trained personnel!
WARNING:
Never loosen more than one roller at the same time! Adjust only one roller after another!
WARNING:
The counterweight quantities are given approximately. These
given values may also vary depending on the gun mounting
arrangement. (horizontal, vertical, double, etc.)
As you attach counterweight to the reciprocator, you should
add more counterweight by examining it visually, if you think
it is unbalanced.
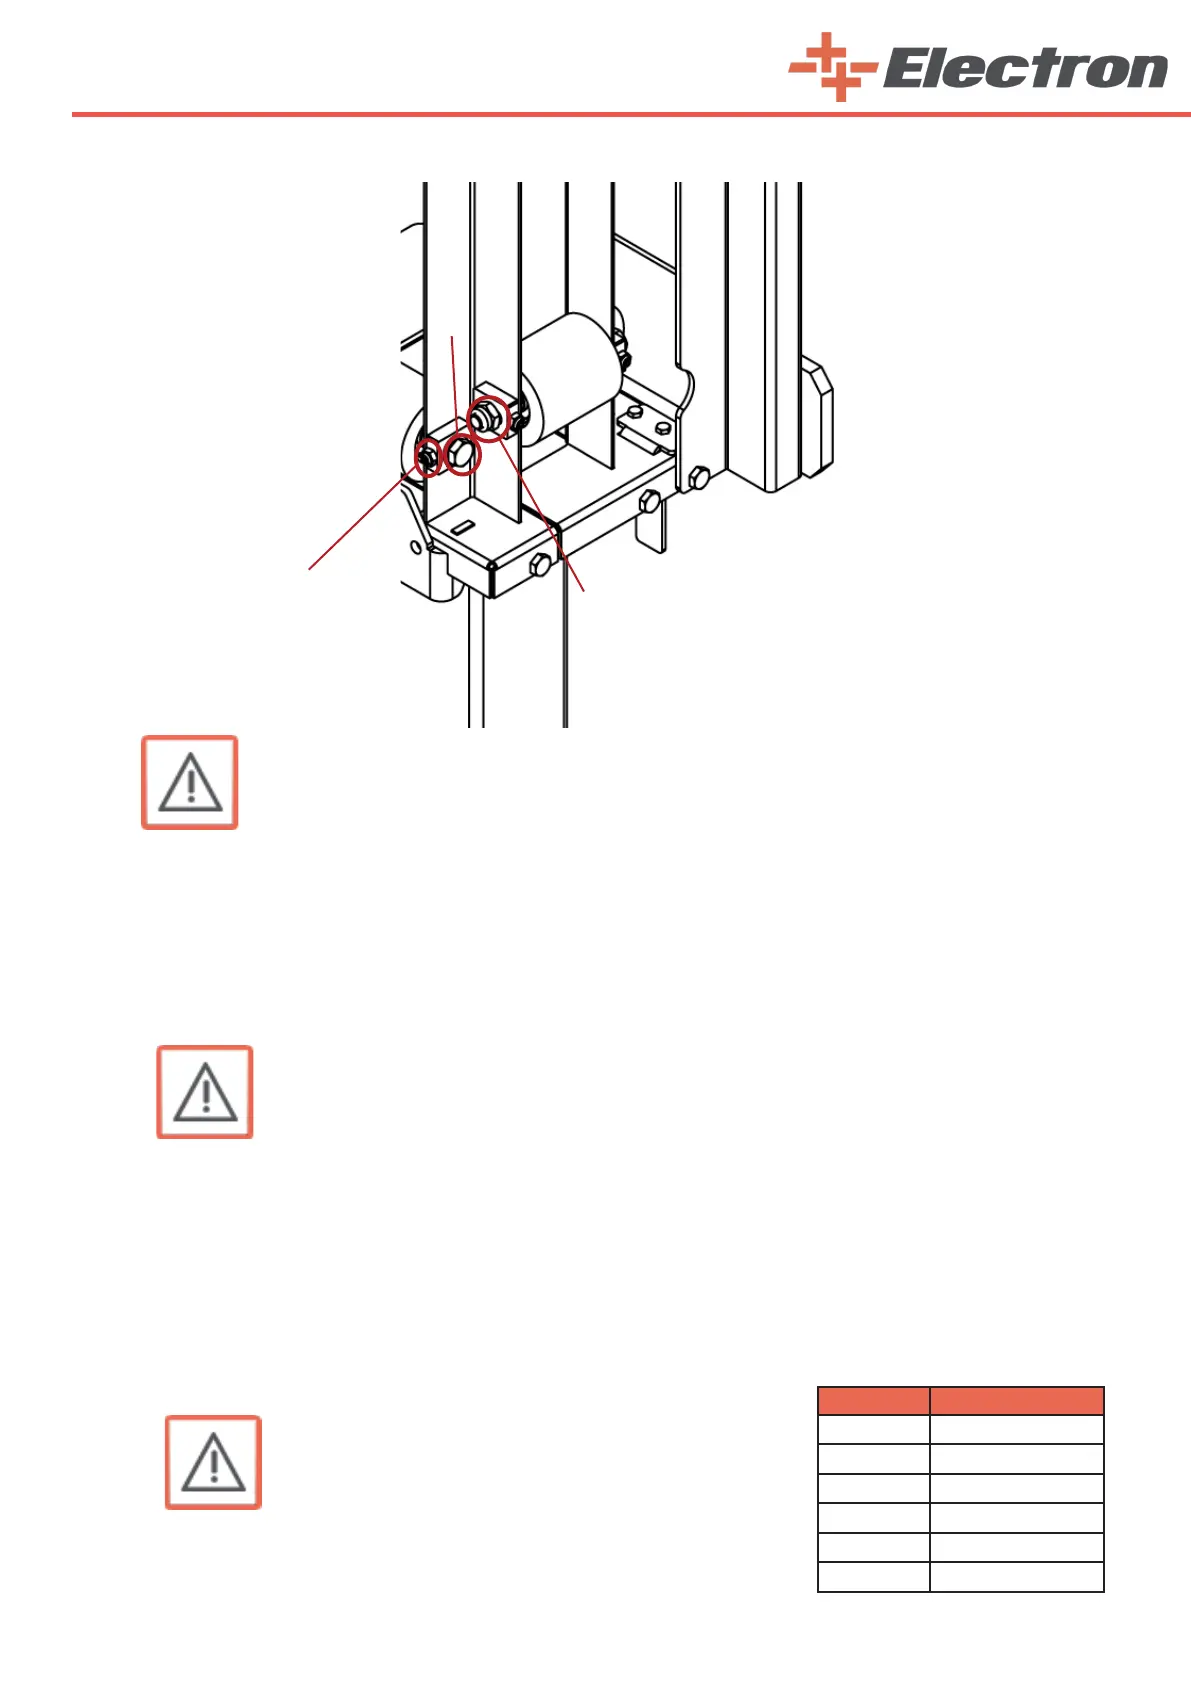
7. Adjust the roller pressure with the grub screw (3) , in such a way that the roller can just be turned by
hand
8. Tighten the roller axle bolt (1) and the nut(2)
9. Tighten the grub screw (3) and secure it
10. Fit the panels again and fasten them firmly
The Z carriage should run evenly and quietly again!
Procedure:
1. Let the Z carriage (7) move down onto the lower stop
2. Switch o the electric power
3. Remove the boarding (right side panel)
4. According to the number of guns specied in the table, insert the counterweights to the threaded
rods through the holes drilled for 4 M8 threaded rods as shown in the picture.
5. After inserting the counterweights, insert the spring washers into the threaded rods. (4 qty)
6. Insert the M8 nuts and tighten. (4 qty)
Gun Qty Counterweight Qty
2 4 x 1.87 kg
4 8 x 1.87 kg
6 10 x 1.87 kg
8 16 x 1.87 kg
10 20 x 1.87 kg
12 22 x 1.87 kg
3
2
1