INNOVATION AND FLEXIBILITY
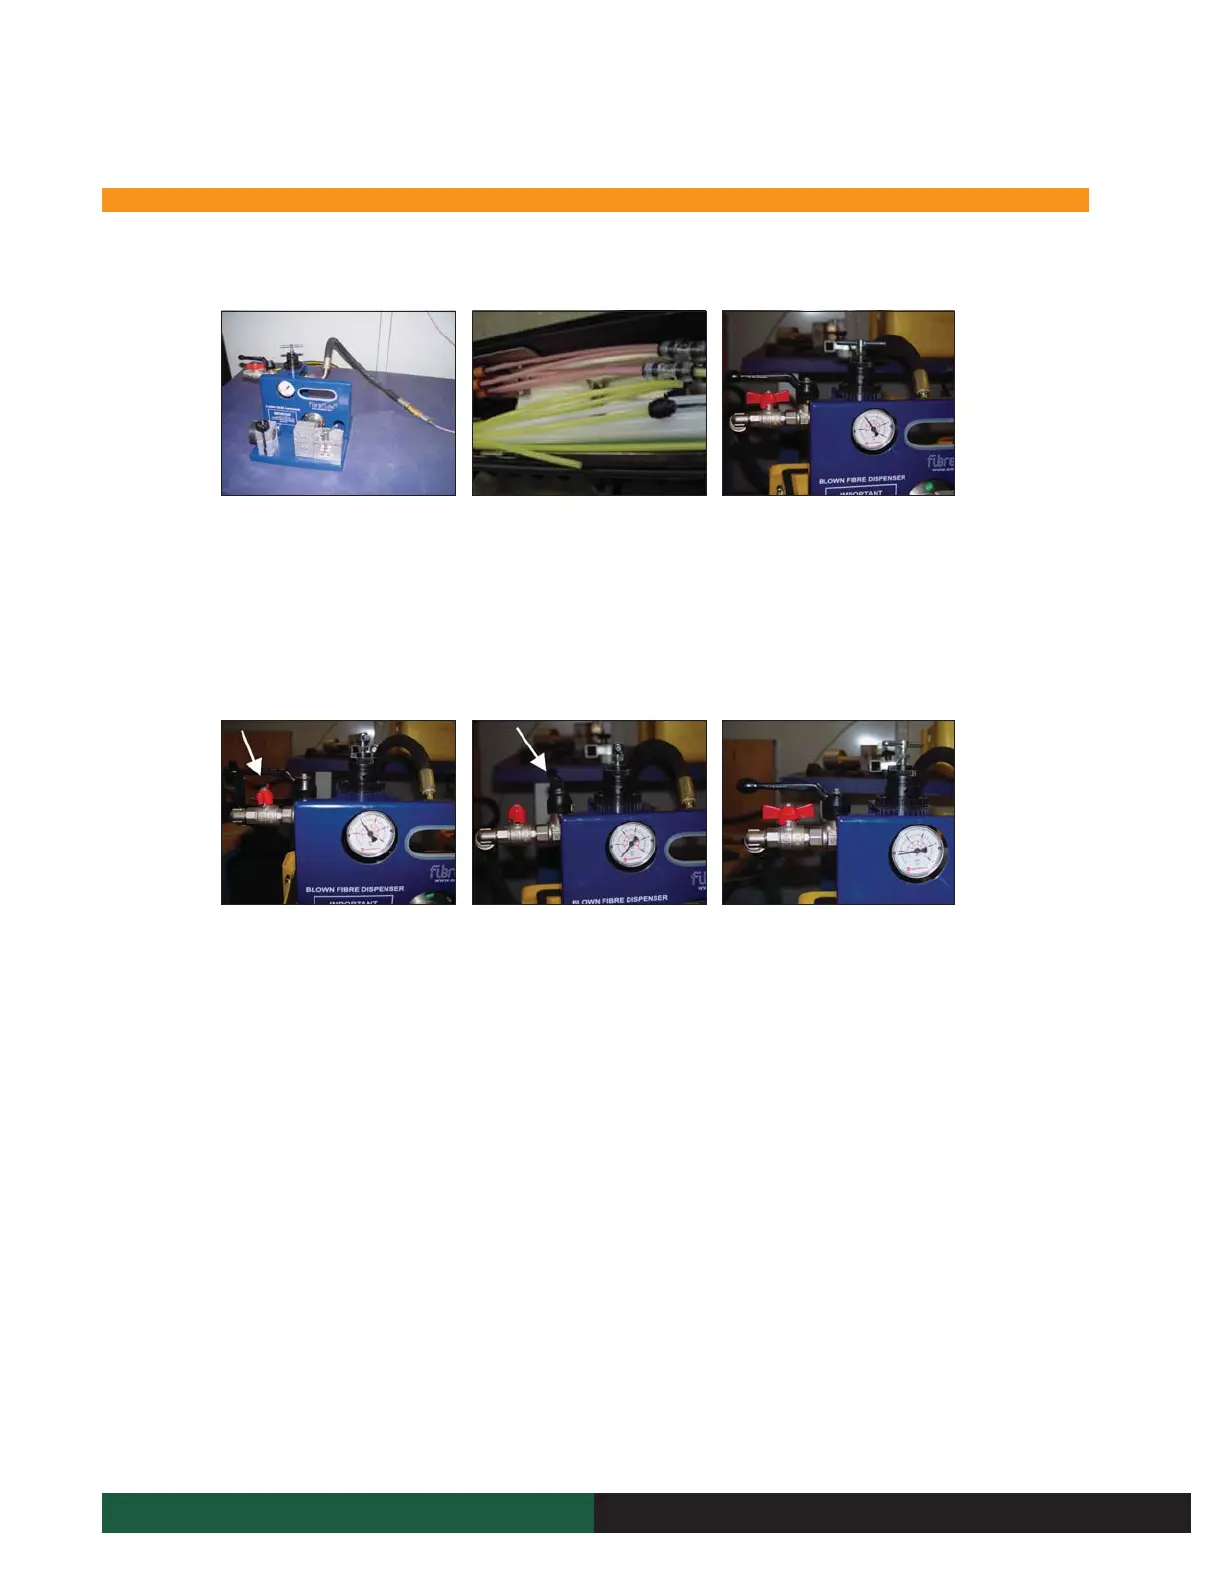
9.11.2 Pressure Testing
1. Connect microduct number 1 to
the Air Hose on the Dispenser
(code 7855).
2. onnect an end cap to the
corresponding microduct at the
other end of the route.
3. Connect the air compressor
to Dispenser 16B and turn on
the air compressor. Open the
inlet valve on the Dispenser
and adjust the pressure to 7bar.
Allow some time for the air
pressure to stabilise.
6. Isolate the air supply to the primary
m/d using the ‘Red’ air ‘ON/OFF’
lever on the Dispenser 16B.
7. Check the Air Pressure gauge on
the Dispenser 16B to see if there
is any pressure drop over
2 minutes. (There may be an
initial, slight pressure drop, but
the pressure should stabilise).
8. If there are any leaks, refer to
the Pressure Testing fault finding
flow chart
9. Dump the pressurised air from
the m/d side by turning the black
lever to the dump position.
Now take off the end cap from
the far end.
10. Switch off the compressor and
turn the red and black lever to the
open position. This will dump air
from the compressor side.
NOTE: If the end cap is not removed after step 9, the air from the compressor side must be dumped through the
regulator. This is done by turning the T bar counter clockwise and relieving the air pressure to atmosphere.
9 Fibre blowing
“This document is intended as a guide only. Whilst the information it contains is believed to be correct, Emtelle can take no responsibility for actions taken based on the information contained in this document. Emtelle reserves the
right to make changes to this document without notice. All sales of product are subject to Emtelle’s terms and conditions of sale only, which can be found on Emtelle’s website.”
84
INNOVATION AND FLEXIBILITY
 Loading...