INNOVATION AND FLEXIBILITY
THE
INSTALLATION AND MAINTENANCE TRAINING MANUAL
6.3 Closure Assembly: General Instructions
The following advice is given in a general style to demonstrate the aspects of closure assembly that are important, whatever the closure style. There are
many closures for use with the Emtelle blown fibre systems, and individual instructions are available for each. Remember: The m/d inside each closure
must be fit for the FU blowing operation that will follow. They should be clean, undamaged, not subject to crush or kink, have smooth bends, and not leak.
1. Location
Indoor, outdoor, buried, exposed to water, chemicals, disturbance. Use the correct closure.
2. Closure Rating
Check the rating (eg the IP rating), the strength (impact?) and expected performance, lifetime etc.
Closures expected to be covered by water may or may not be required to be watertight, whatever the spec of
the closure is. Ensuring a closure is watertight means doing the procedure correctly.
Indoor closures may be subject to temperature or environmental limitations. Check the compliance.
3. Capacity
Closures have a limit as to how many cables they will accommodate, and what size. Do not attempt to exceed
these limits with any closure.
4. Ports
Cables for entry, exit, and branch-off would normally fall within certain diameter limits. Check all cables
comply. When opening up multi-tube assemblies, note the m/d numbers, which will branch to where. Log all
connections correctly. Returning to a buried closure should be minimised.
5. Connections
Make m/d connections properly: make clean 90° cuts, use the m/d rounding tool, and the collet locking tool. Cap
off any unused m/ds to keep water out.
6. Anchoring
Some closures have provision to anchor cables or m/d, to minimise tension on core elements. Check your
project brief: is anchoring to be used? Picture 1: anchoring a 1DB
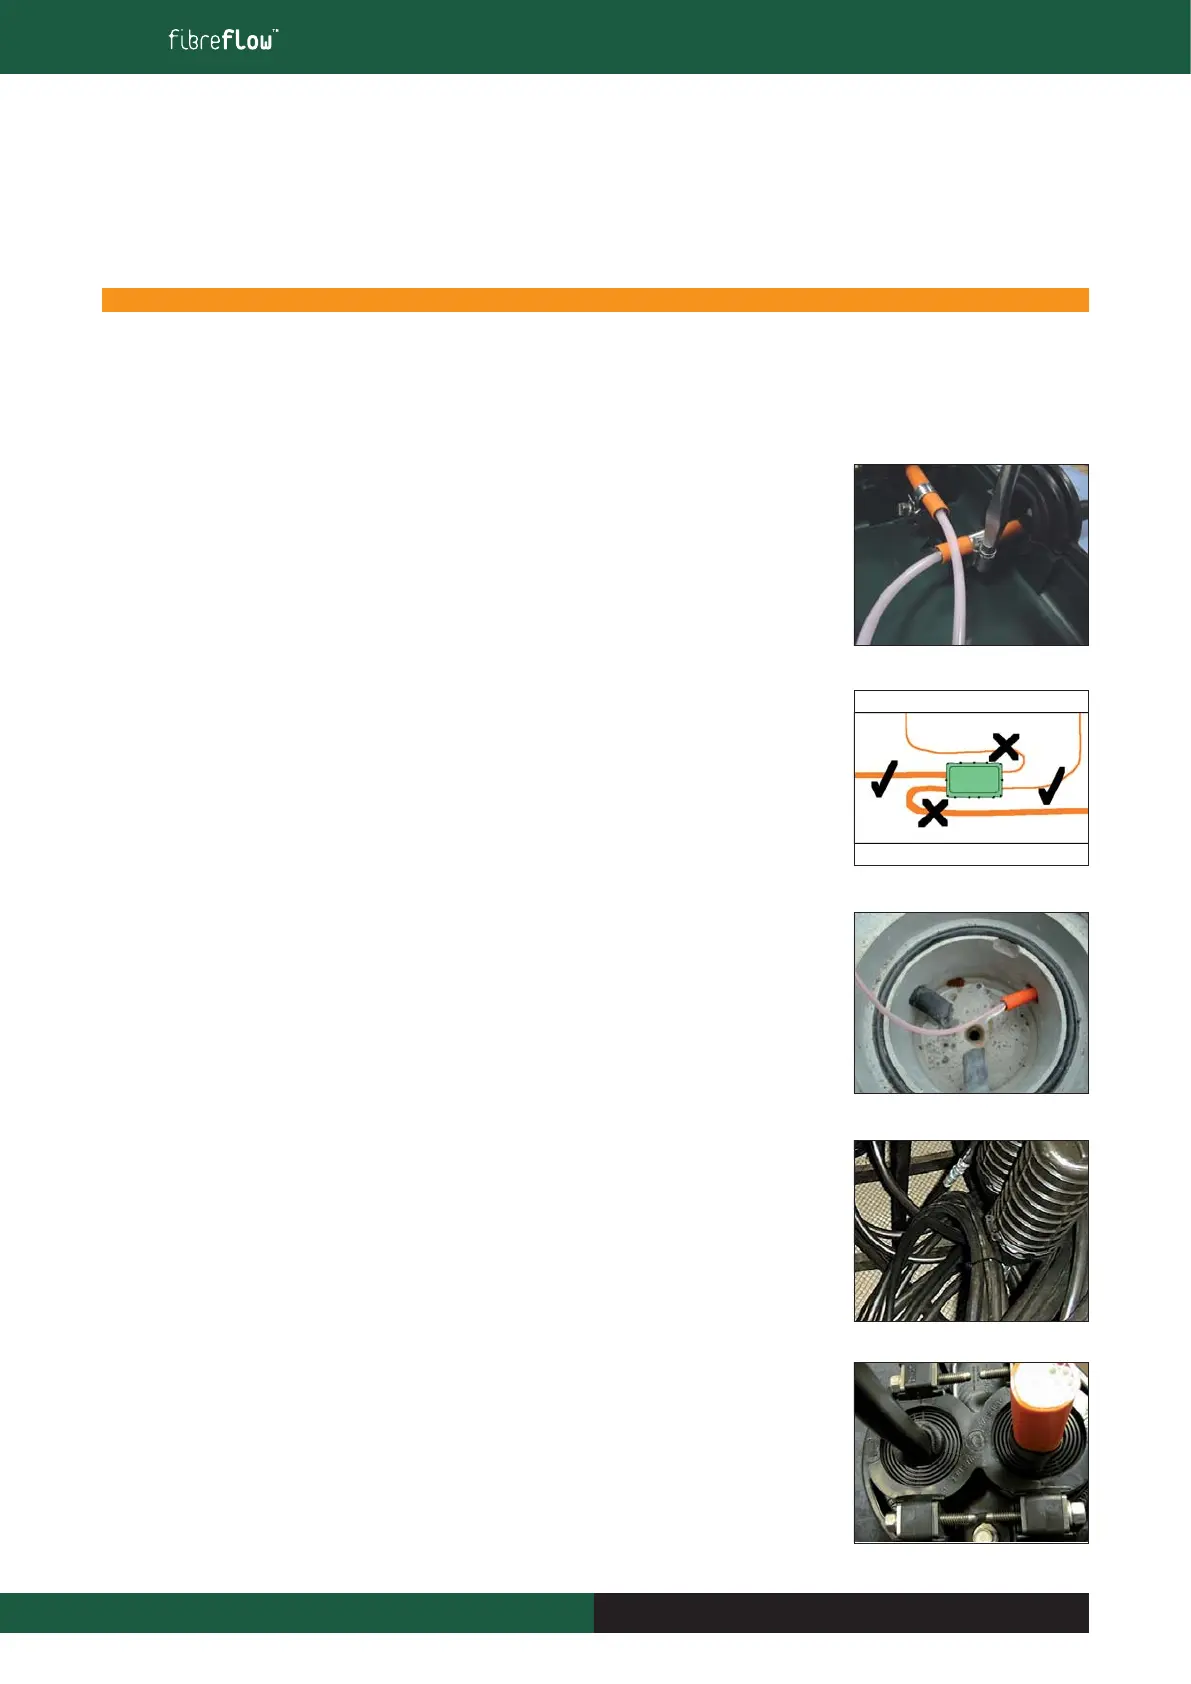
7. Bends
■ Avoid tight bends entering/leaving closures. Picture 2.
■ Avoid tight bends inside closures. Help FU flow smoothly.
■ Make all bends as gentle as possible. Picture 3.
■ Sometimes the ‘spare’ bundle length connected to a closure is laid looped in the manhole. The bundle can
be pulled out straight during blowing then looped back in afterwards. Picture 4.
8. Sealing
If the closure is intended to satisfy a particular sealing requirement, or IP rating, check that each entry is built as
per closure instructions, and that the lid is secured with the correct procedure. Once the closure is buried, you may
need to declare if it is watertight due to your correct assembly procedures. Picture 5: sealing with tapes
9. Closing
When closing the lid, or equivalent, do not force or distort any parts. This may cause the closure to leak, or
suffer stress crack, or worse.
10. Re-opening
If the closure needs to be re-opened at some future date, do not place it, secure it or block it such that access is
difficult for the next installer.
6 Closures And Their Selection
“This document is intended as a guide only. Whilst the information it contains is believed to be correct, Emtelle can take no responsibility for actions taken based on the information contained in this document. Emtelle reserves the
right to make changes to this document without notice. All sales of product are subject to Emtelle’s terms and conditions of sale only, which can be found on Emtelle’s website.”
49
INNOVATION AND FLEXIBILITY
 Loading...