12
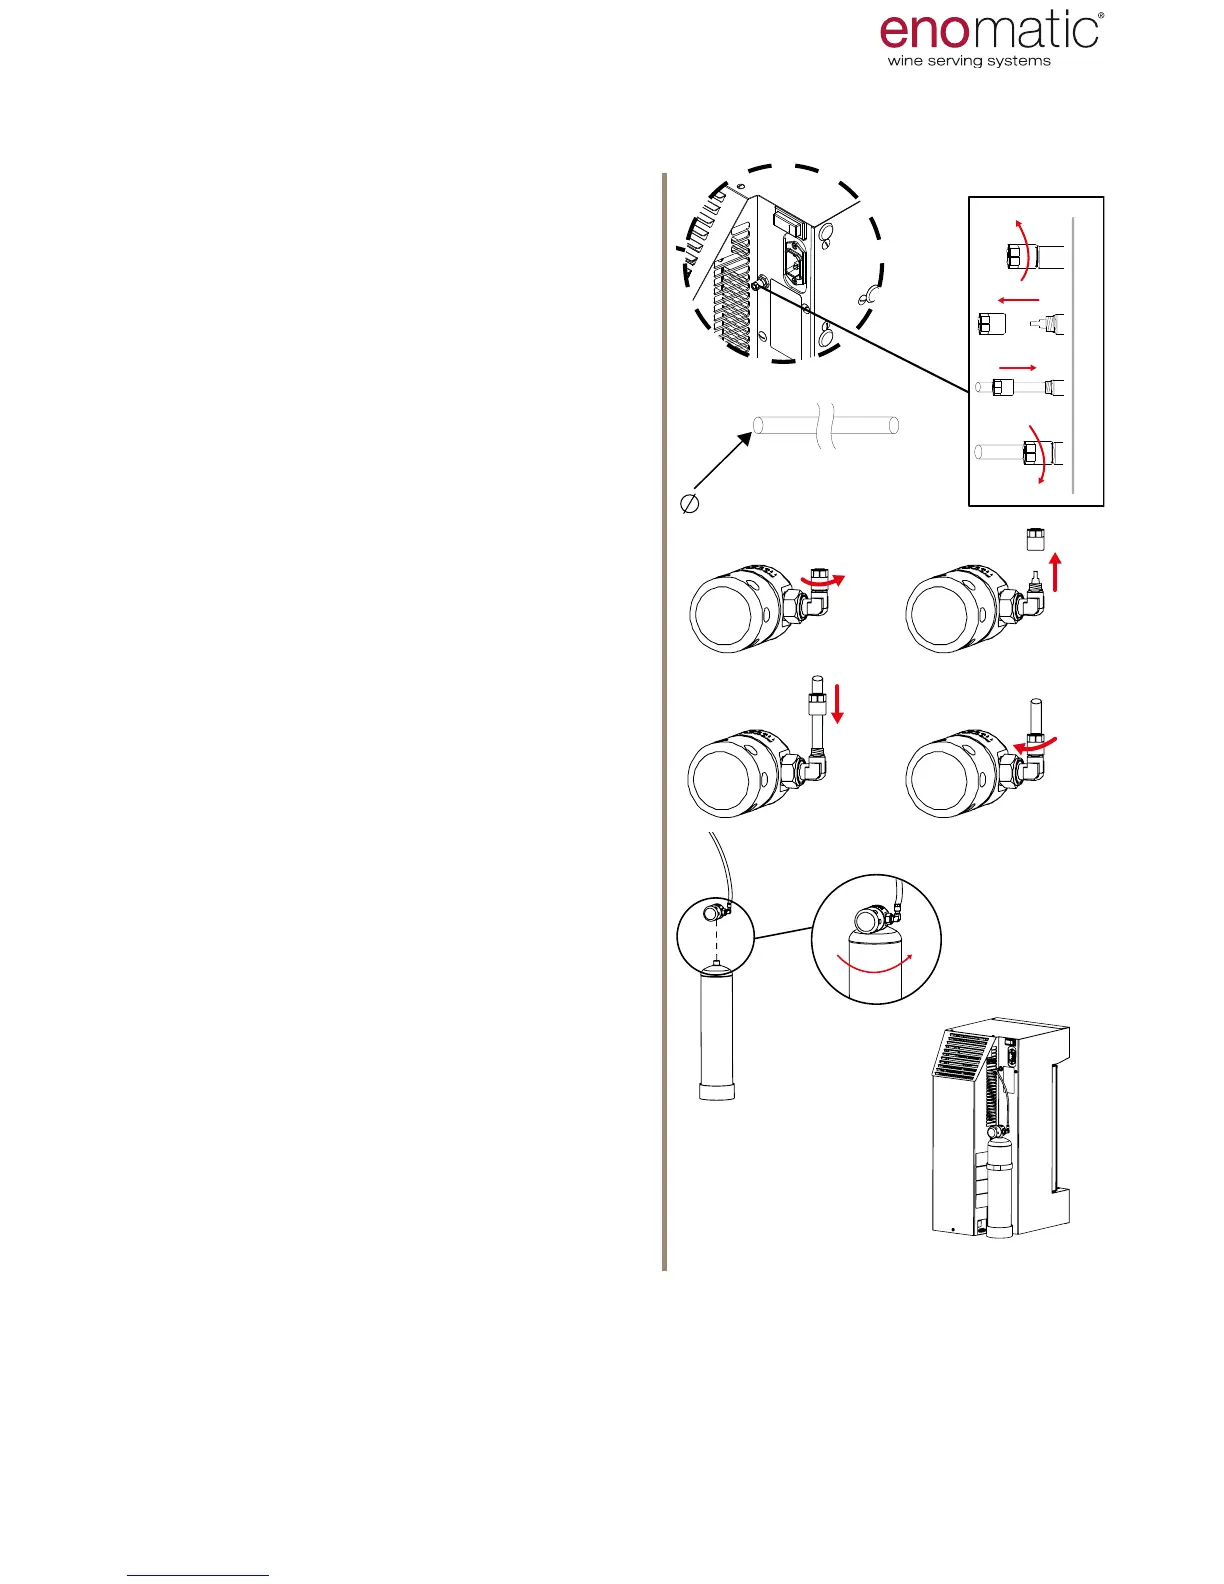
1. Unscrew with your ngers the safety nut
from the tting of inert gas connection (
H
).
2. Remove the safety nut from the tting.
3. Take one end of the gas connection pipe,
insert it within the safety nut and connect
the pipe by pushing it with force as far as
possible on the inert gas connection tting
(H), being careful not to tilt the Dispenser.
4. Tighten the nut to secure the pipe by
squeezing it as much as possible with your
ngers.
5. Take the pressure regulator to the dispos-
able cylinder (gure to the side)
6. Unscrew with your ngers the safety nut
from the cylinder pressure regulator con-
nection tting
.
7. Remove the safety nut.
8. Insert within the safety nut the other end
of the pipe and connect it with force to the
tting, pushing it to the end.
9. Tighten the nut to lock the pipe, squeezing
it as much as possible with your ngers.
10. Place the bottle on the working sur-
face, remove the plastic protective cap
and screw it quickly down to the bottom
of the pressure regulator (rotate the cyl-
inder while holding the regulator still
to prevent the gas connection pipe
from twisting). A small leak during the
screwing stage is in any case envisaged
therefore at this phase accelerate tight-
ening.
11. Open the pressure regulator valve to
minimum 4 Bar and maximum 6 Bar.
12. Place the bottle in the appropriate rear
space of the Dispenser, supporting the
base on the surface and fasten it with the
specic locking strap (E) or place it close
to the Dispenser.
6
8 9
7
INSTALLATION
Should it be necessary to disconnect the Dispenser from the gas supply, never
directly extract the pipe from the machine without rst having closed the valve
on the pressure regulator. Close the regulator valve. Only unscrew the cylinder
from the pressure reducer if it is tted with a safety needle valve.
DISPOSABLE PERFORATION CYLINDERS MUST NEVER BE
REMOVED BEFORE THEY ARE COMPLETELY EMPTY
Carefully read all of the safety guidelines of the cylinder (container under pres-
sure) before manipulating it.