eno one 2/r - user manual
REV.05
16
15. ELECTRICAL CONNECTION
Before connecting the Dispenser to the electrical mains, always check the compat-
ibility of the voltage comparing it with the data indicated on the identication plate
(F).
For safely reasons, it is absolutely essential that the Dispenser is
connected to an electrical network equipped with an effective earthing sys-
tem, performed in accordance with the legal technical regulations.
Ensure the Dispenser does not experience power surges due to interference
from other equipment connected to the same electrical network that could
alter the normal functioning of its electronics.
Before connecting the plug to the electrical mains, check that the main switch
(L) is in the "0" = OFF position.
Insert the power supply cable into the socket (I)) of the Dispenser.
Insert the plug of the supplied cable into the wall socket.
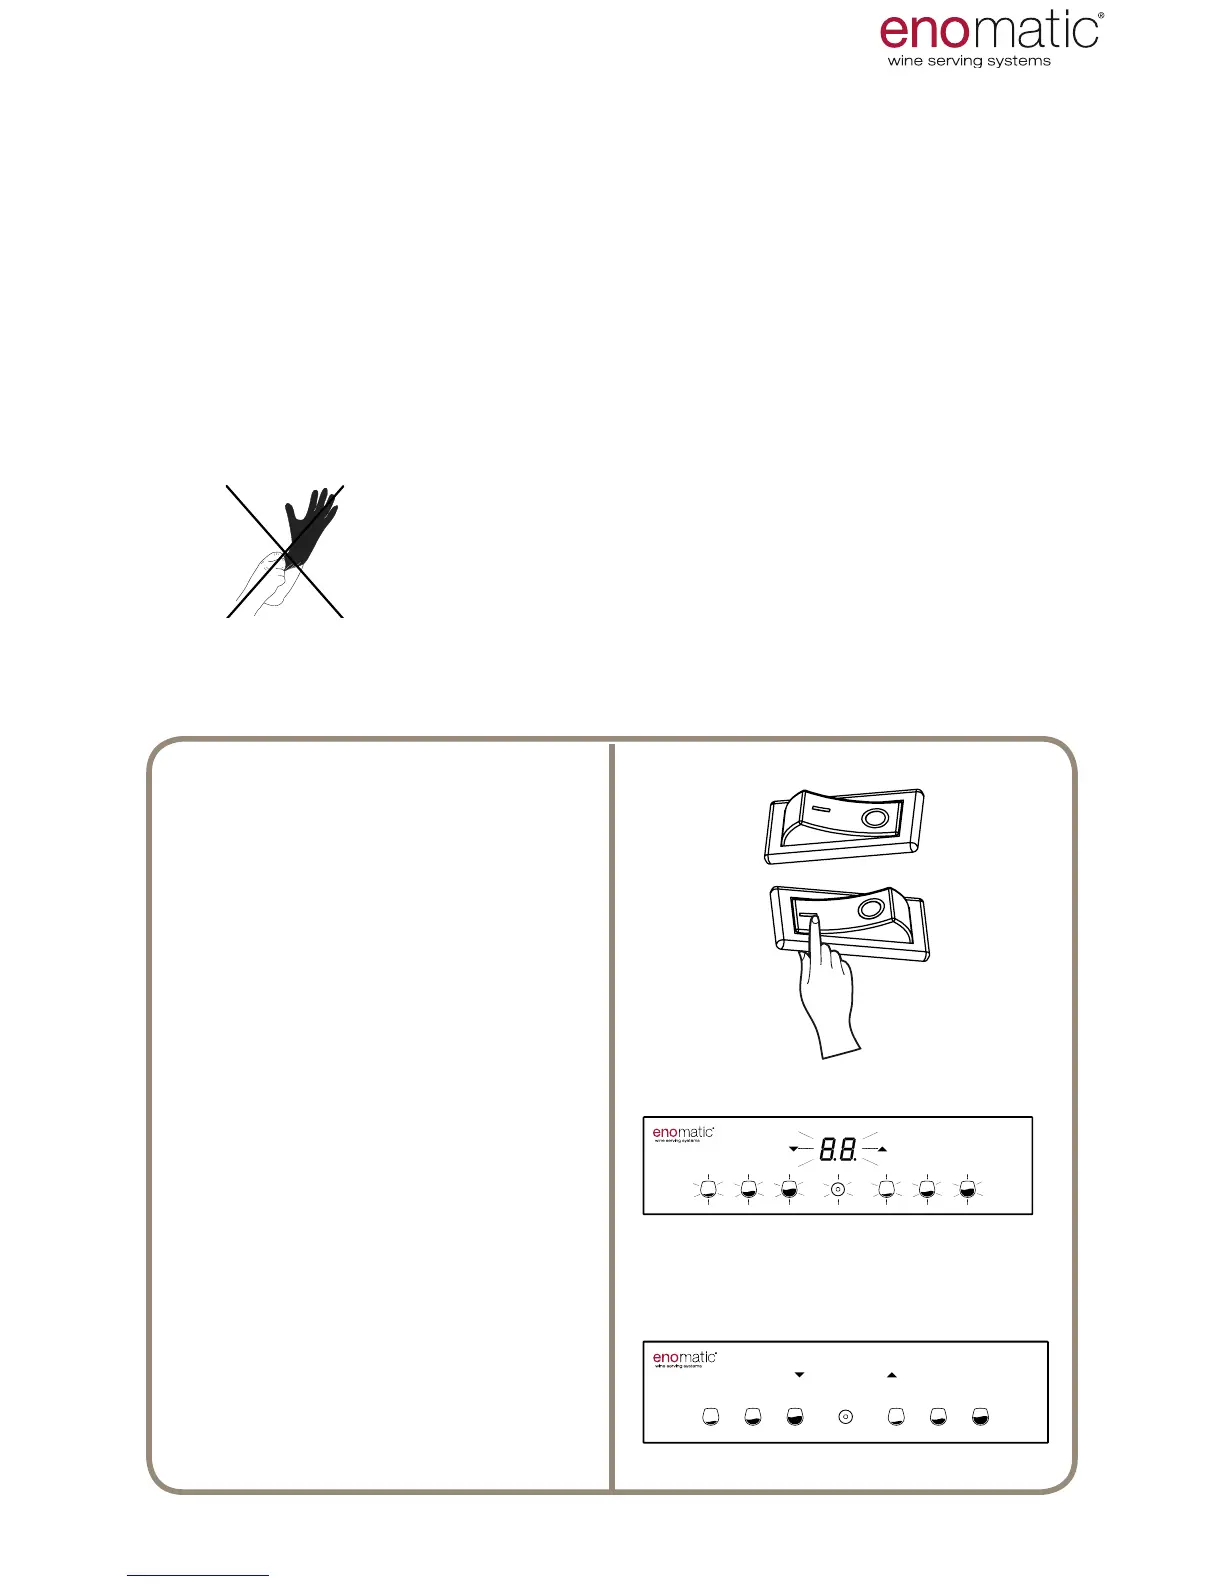
INSTALLATION
From now on, it is possible to continue without
using gloves.
Place the main switch
(L) in position
"I" = ON
The Dispenser starts and performs
a functional check, indicated by
the simultaneous ashing of all the
buttons (V) and of the display (W).
The LED (R) comes on.
After a few seconds, the Dispens-
er passes to the operating status
illuminating only the active
Dispensing (V) buttons with acti-
vation of the thermoelectric mod-
ule function for refrigeration of the
bottle compartment (P).