eno one 2/r - user manual
REV.05
6
3. INTRODUCTION
The Enomatic® tasting systems are able to store bottles of wine, controlling the
temperature (refrigerated models only) and preserving, by means of a food-use inert
gas, their content, to then serve it in the desired quantities directly into the glass.
This gas protects the wine from alterations due to oxygenation preserving the char-
acteristics for up to 4 weeks after opening of the bottle.
This
Dispenser
was designed to store and provide the following types of still wine:
dry, sweet, light and sweet. Do not use with sparkling wine.
See para. 49 with the table for the frequency of cleaning the dispensing unit de-
pending on the sugar content of the wine.
Before installing and using your
Enomatic Dispenser, please carefully read the instructions contained in this
manual: these provide important information regarding safety during installa-
tion, use and maintenance.
The manufacturer is not responsible in any way for damage caused by misuse, irra-
tional or irresponsible use of the system or from misinterpretation of the instructions
on safety and installation.
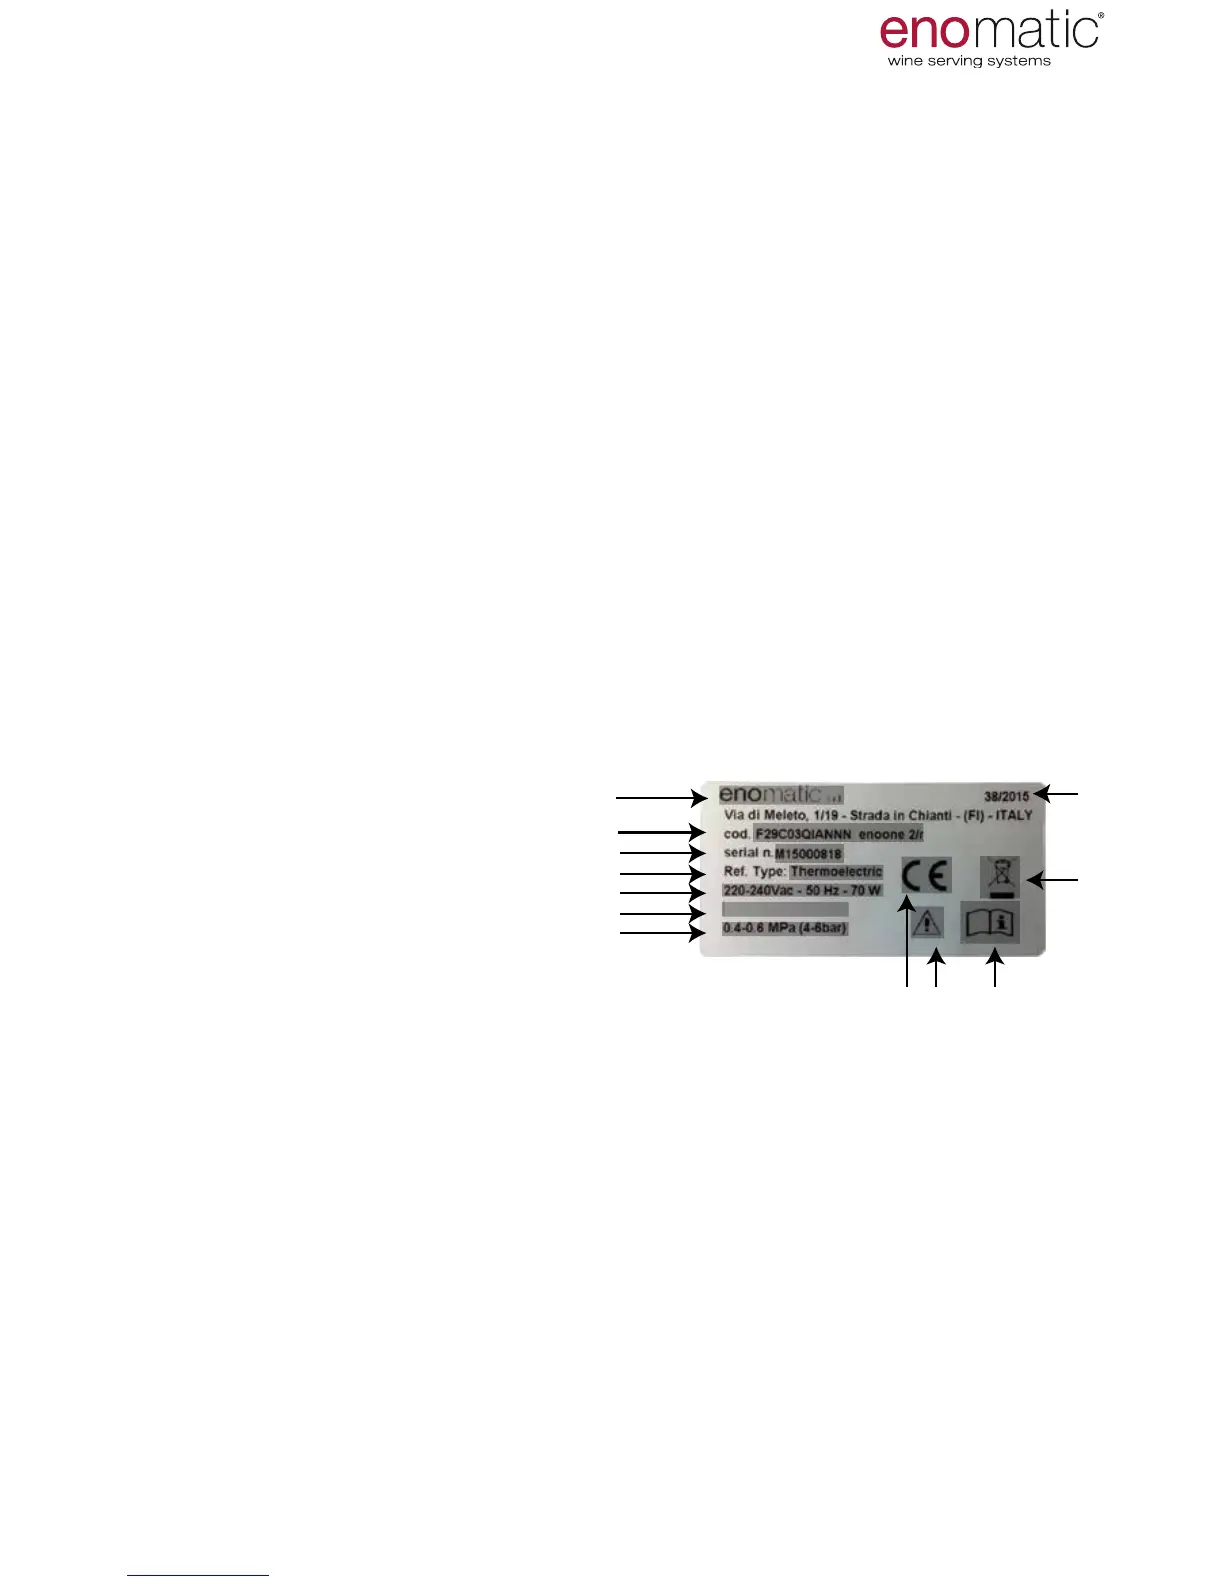
4. IDENTIFICATION OF MODEL
AND MANUFACTURER
The identication plate shown is applied directly onto the
Dispenser
(one on the rear and
one inside the
Dispenser
under the drip
tray).
It contains the identication references
and all the technical data for safe oper-
ation.
1) Manufacturer identication
2) Machine code and model
3) Serial number
4) Type of cooling system
5) Voltage (V) frequency (Hz), absorption (A) or power (W)
6) Fuse characteristics, only if required
7) Operating pneumatic pressure
8) Marking of conformity
9) Danger in case of misuse
10) "read the user manual" warning
11) Disposal indication (Directive 2002/96/CE)
12 Week/Year of production
DO NOT DAMAGE OR REMOVE THE IDENTIFICATION PLATE