eno one 2/r - user manual
REV.05
19
For the initial and correct insertion of the bottles and for subsequent replacements
of the bottles, follow the steps described below. In particular the centring and stabi-
lisation activities must be performed well to quickly replace bottles, as described in
the bottle replacement/extraction paragraph (para. 21)
It is recommended that the temperature of the bottles to be inserted only dif-
fer by a maximum of 4°C (7.2°F) from the value set for the bottle compartment
(para. 23).
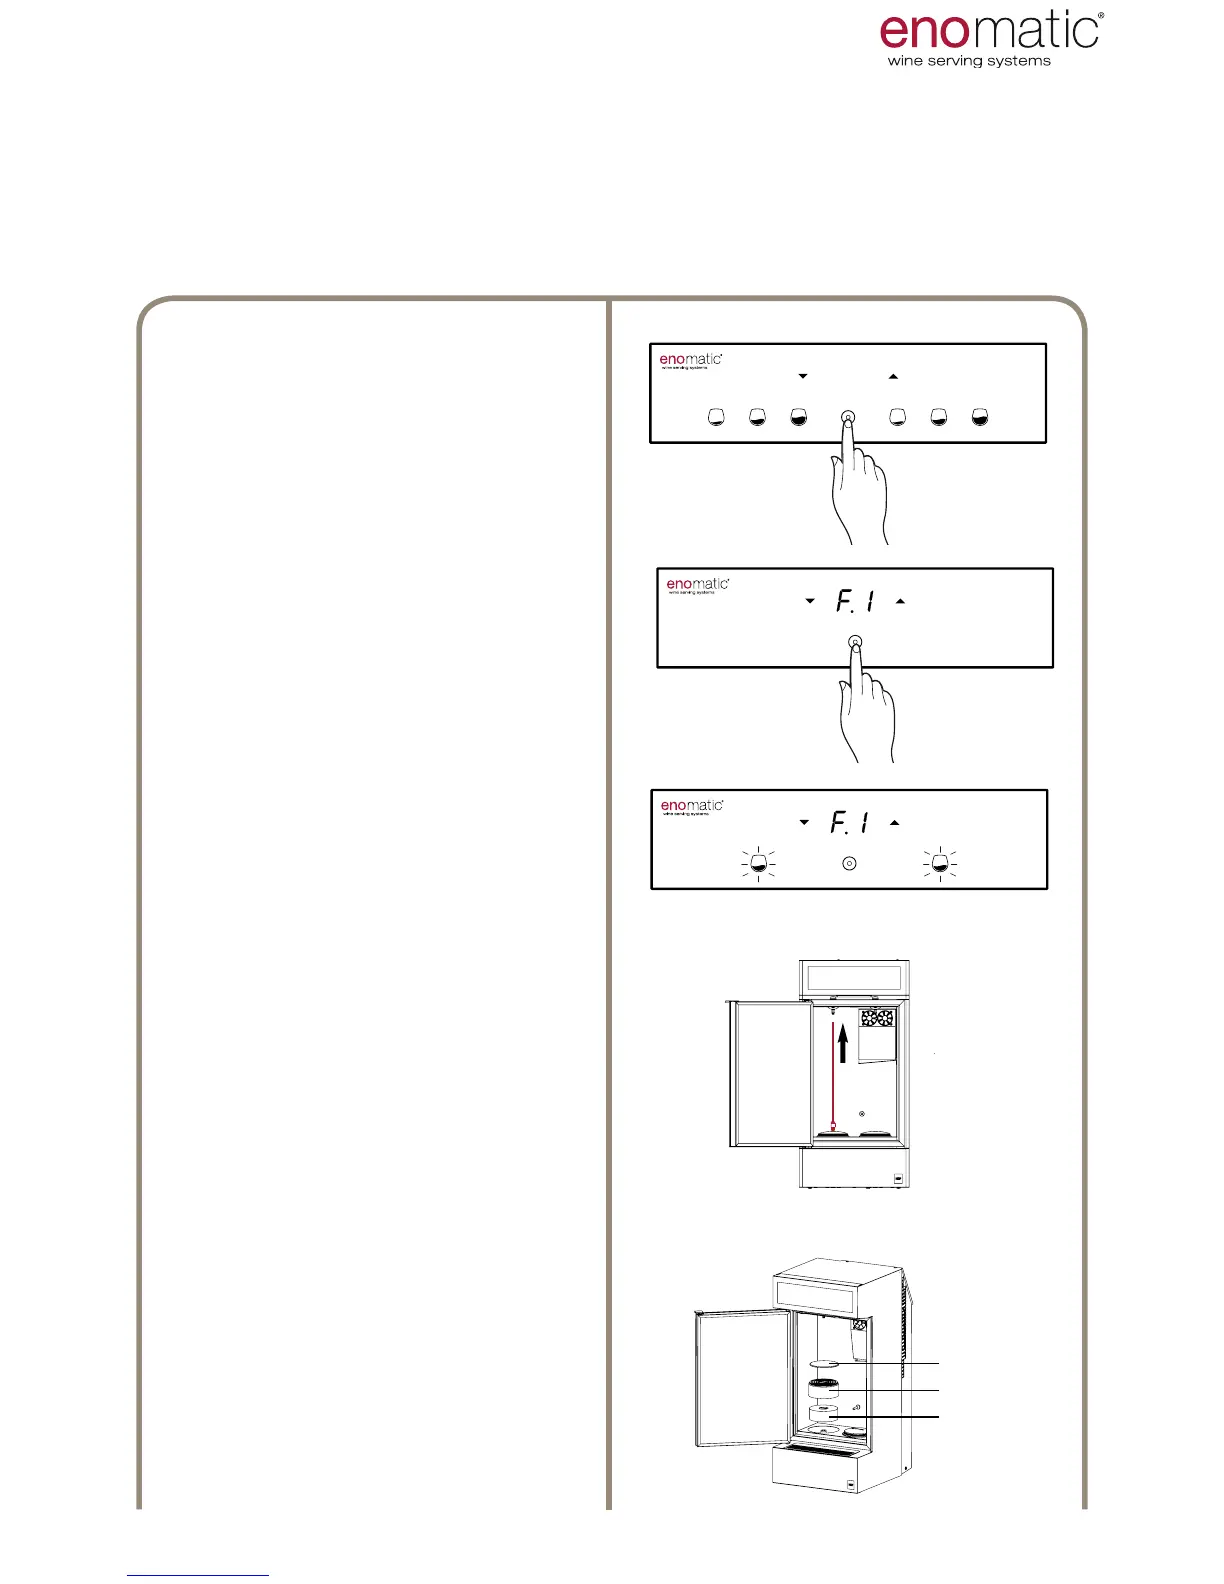
3’’
From the operating state
Press
the multifunction button (Z) for 3
seconds and release it as soon as
the letters "F1" are displayed.
Press the multifunction button (Z) to
access the function chosen.
The Dispenser is on hold for loading
of the bottles after which the medium
dose button (V2) of each dispensing
unit will ash. During this function
refrigeration is switched off to limit
energy consumption.
The Dispenser remains in this po-
sition for 10 minutes, after which it
automatically returns to the operating
state.
Open the door (B) and insert the suc-
tion pipe on the relevant
nozzle of the plug tap (N),
pushing rmly until it is fully inserted.
Repeat the same operation for the
other position.
Check for the presence of a
spacer (T2) and of a cylinder (T3).
Place on the cylinder
a curved coaster (T4) supplied
with the Dispenser (para.10 ). Repeat
the same operation for the other po-
sition.
When inserting bottles with a at
bottom remove the curved coaster.
USE AND OPERATION