Rack Mounting the Switch
SecureStack B2 Installation Guide 3-9
Attaching Brackets and Installing in Rack
Proceedasfollowstoinstalltheswitchintoa19‐inchrack:
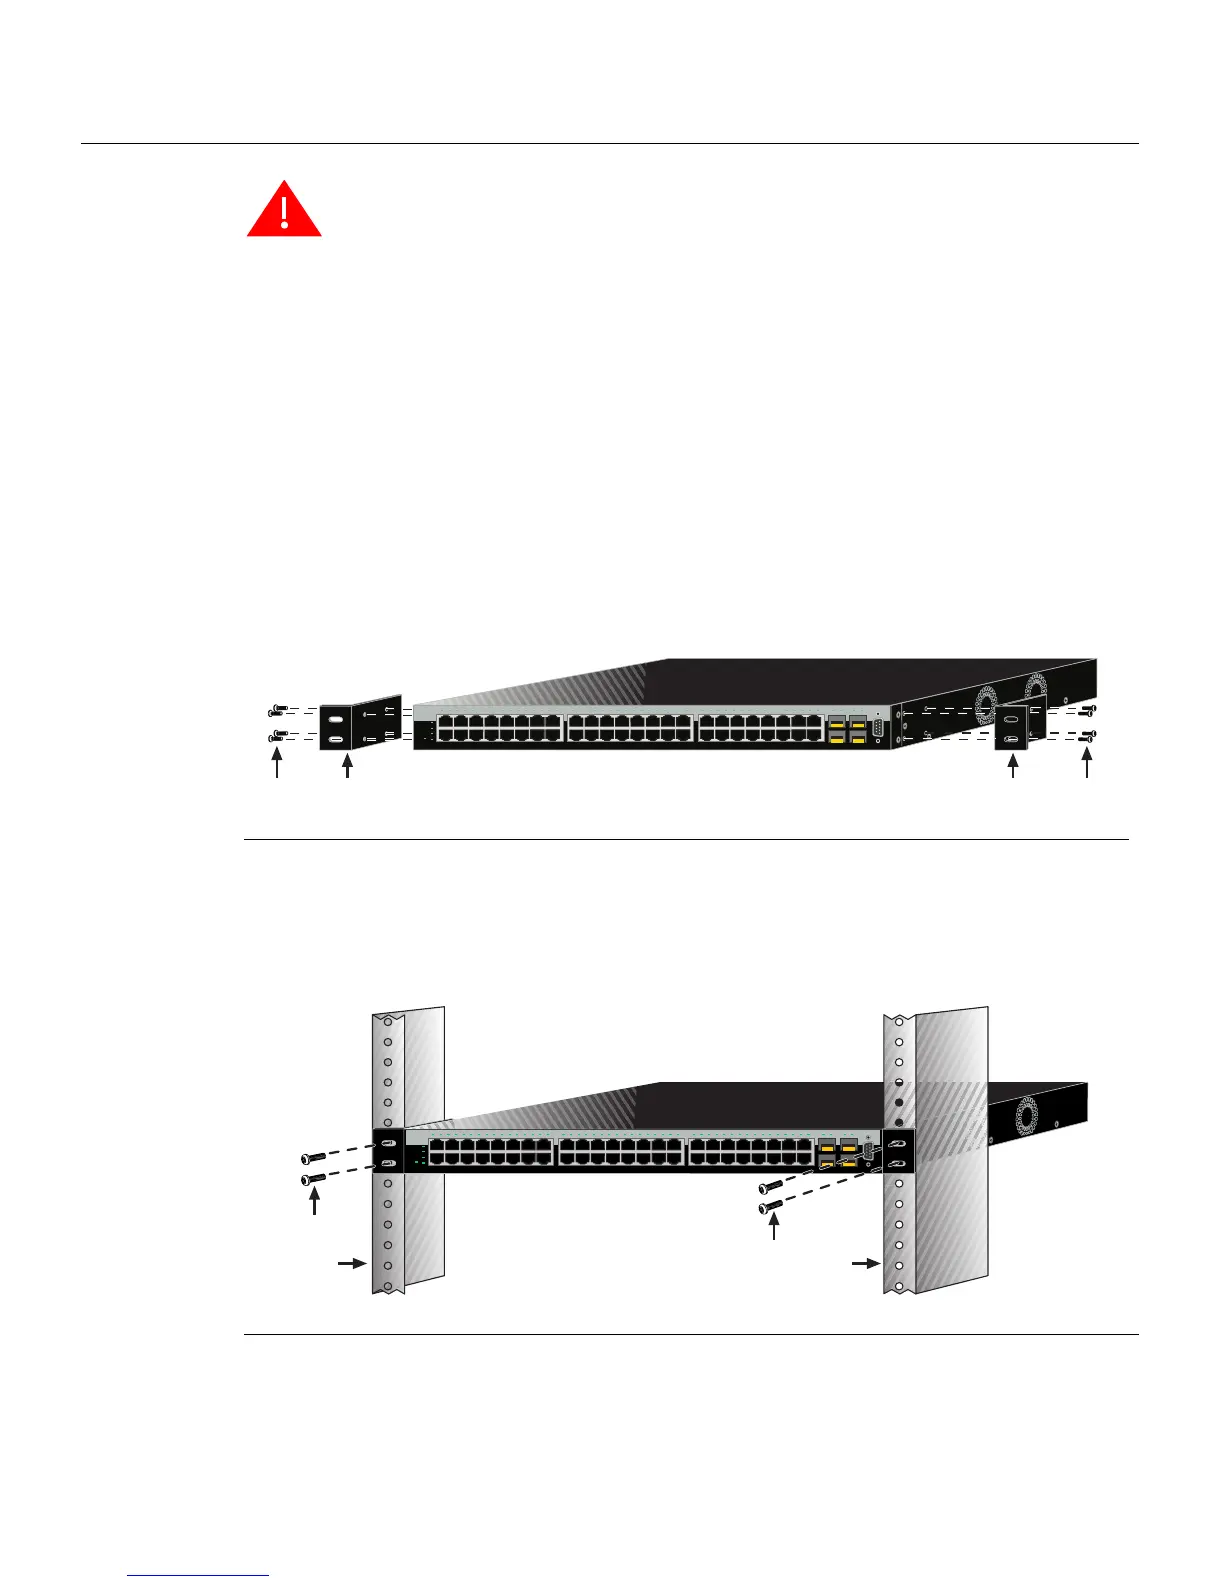
1. Attachtherackmountbracketstotheswitch,asshowninFigure 3‐7,usingtheeight
M3 x 6mmflatheadscrewsshipped withtheswitch.
Figure 3-7 Attaching the Rackmount Brackets
2. Withthemountingbracketsattached,positiontheswitchbetweentheverticalframe
membersofthe
19‐inchrackasshowninFigure 3‐8.Thenfastentheswitchsecurely
totheframeusingfourmountingscrews(usersupplied).
Figure 3-8 Fastening the Switch to the Rack
Warning: Before installing the chassis into a rack, ensure that the rack can support the
device(s) without compromising the stability of the rack. Otherwise, personal injury and/or
equipment damage may result.
Advertencia: Antes de instalar el chassis en un rack, asegurarse que el rack puede
soportar el(los) dispositivo(s) sin comprometer la estabilidad del mismo. De otra forma
puede suceder algun tipo de daño personal o del equipo.
Warnhinweis: Schützen Sie sich vor Verletzungen und Geräteschaden, überzeugen Sie
sich vor der Installation des Chassis in das Rack, von dessen Stabilität.
1 Rackmount brackets 2 M3 x 6 mm flathead screws
1 Rails of 19-inch rack 2 Mounting screws (supplied by user)
Console
1
2
45
CPU
UP
RPS
MGR
DOWN
46
47
48
47
48
B2G124-48P
123456 78910111213141516
15
16
17
18
31
32
33
34
17 18 19 20 21 22 23 24 25 26 27 28 29 30 31 32 33 34 35 36 37 38 39 40 41 42 43 44 45 46 47 48 45 46 47 48
Á
À
Á
À
Console
1
2
45
CPU
UP
RPS
MGR
DOWN
46
47
48
47
48
B2G124-48P
123456 78910111213141516
15
16
17
18
31
32
33
34
17 18 19 20 21 22 23 24 25 26 27 28 29 30 31 32 33 34 35 36 37 38 39 40 41 42 43 44 45 46 47 48 45 46 47 48
À
Á
Á
À