Rack Mounting the Switch
3-10 Hardware Installation
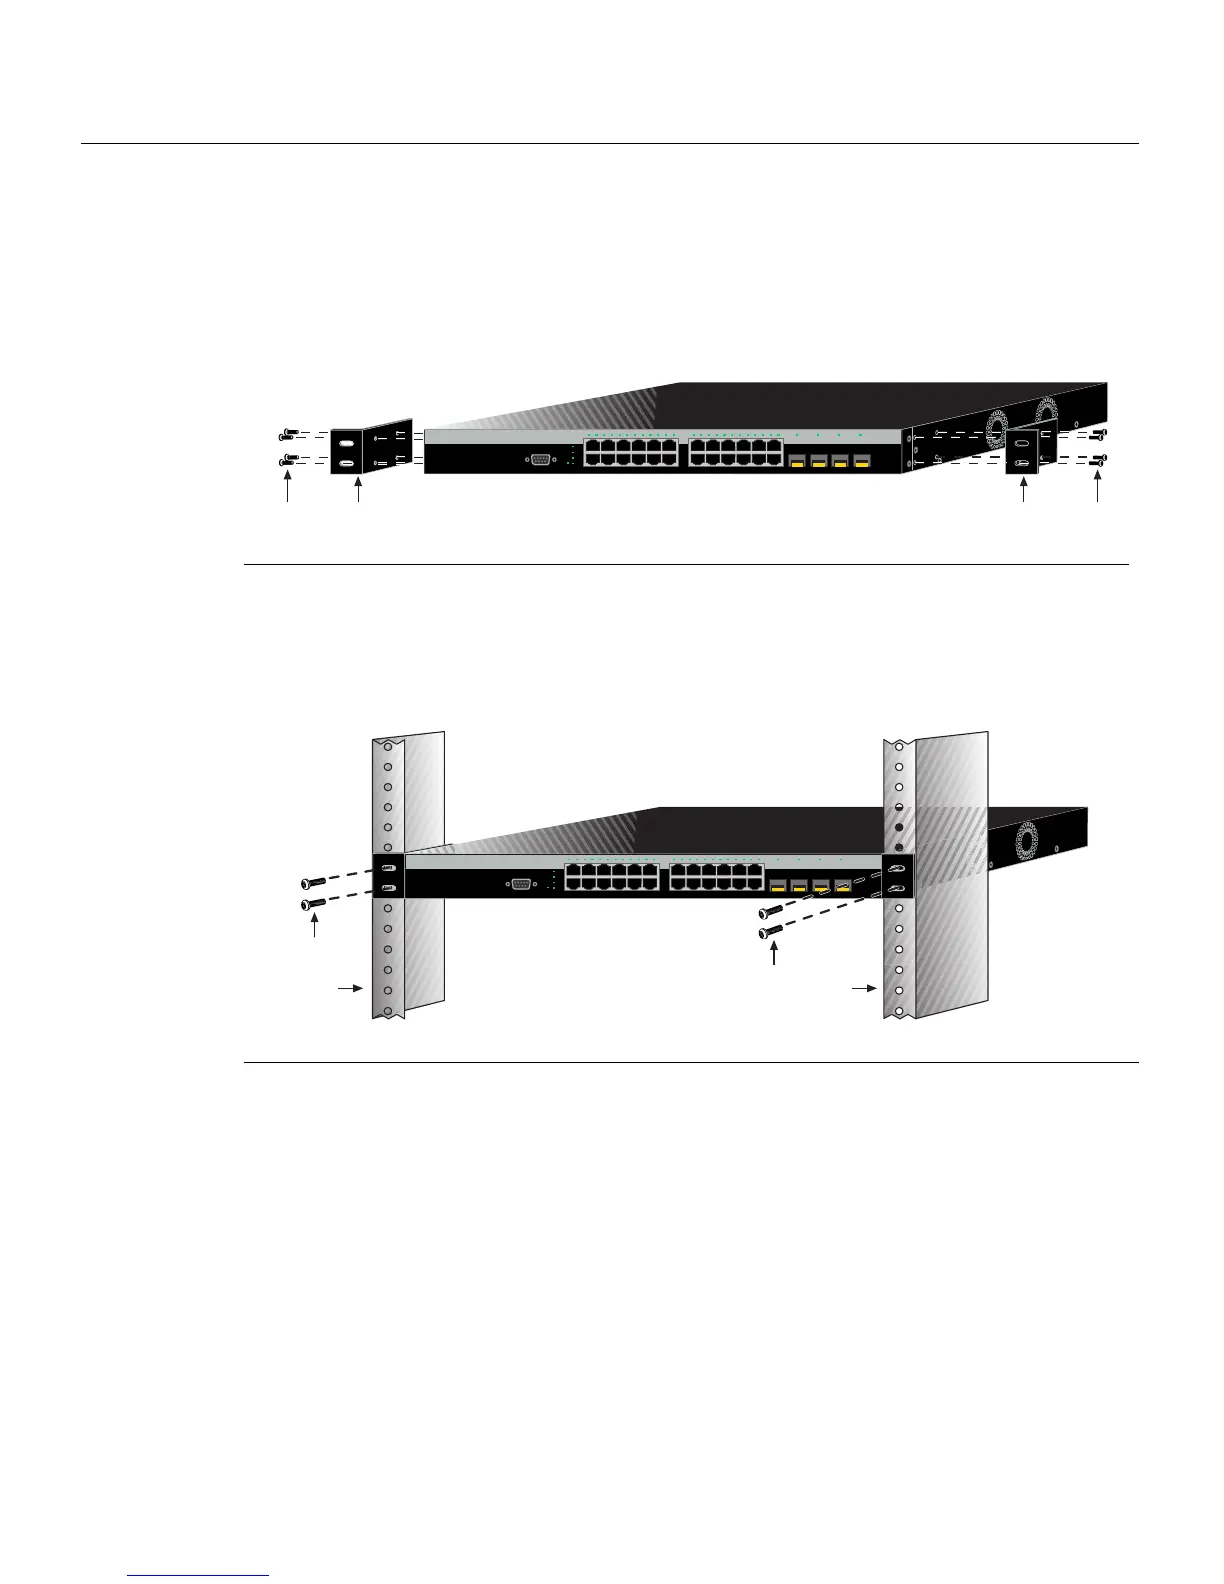
Attaching Brackets and Installing in Rack
Proceedasfollowstoinstalltheswitchintoa19‐inchrack:
1. Attachtherackmountbracketstotheswitch,asshowninFigure 3‐5,usingtheeight
M3 x 6mmflatheadscrewsshippedwiththeswitch.
Figure 3-5 Attaching the Rackmount Brackets
2. Withthemountingbracketsattached,positiontheswitchbetweentheverticalframe
membersofthe
19‐inchrackasshowninFigure 3‐6.Thenfastentheswitchsecurely
totheframeusingfourmountingscrews(usersupplied).
Figure 3-6 Fastening the Switch to the Rack
3. Ifyouareinstallingthisswitchinastackedconfiguration,repeatthisprocedurefor
eachswitchuntilallswitcheshavebeeninstalledinthestack,thenproceedto
“ConnectingHigh‐SpeedStackingCables”onpage 3‐11.Otherwise,proceedto
“ConnectingACandRPSPower”onpage 3‐15.
1 Rackmount brackets 2 M3 x 6 mm flathead screws
1 Rails of 19-inch rack 2 Mounting screws (supplied by user)
C2G124-24
Á
À
Á
À
Console
1
2
23
24
21 22 23 24
CPU
UP
RPS
MGR
DOWN
1 2 3 4 5 6 7 8 9 10 11 12 13 14 15 16 17 18 19 20 21 22 23 24
11
12
13
14
21 22 23 24
C2G124-24
Á
À
Á
À
Console
1
2
23
24
21 22 23 24
CPU
UP
RPS
MGR
DOWN
123456789101112 131415161718192021222324
11
12
13
14
21 22 23 24
C2G124-24