Connecting to the Network
SecureStack C2 Installation Guide 3-23
3. VerifythatalinkexistsbycheckingthattheLink/ActivityLEDisON(solidgreenor
blinkinggreen).IftheLink/ActivityLEDisOFF,performthefollowingstepsuntilitis
on:
a. VerifythatthecablingbeingusedisCategory 5orbetterwithanimpedance
between85and111 ohmswitha
maximumlengthof100meters(328feet).
b. Verifythatthedeviceattheotherendofthetwistedpairsegmentisonand
properlyconnectedtothesegment.
c. VerifythattheRJ45connectorsonthetwistedpairsegmenthavetheproper
pinoutsandcheckthecableforcontinuity.Typically ,acrossover
cableisused
betweenhubdevices.Astraight‐throughcableisusedtoconnectbetween
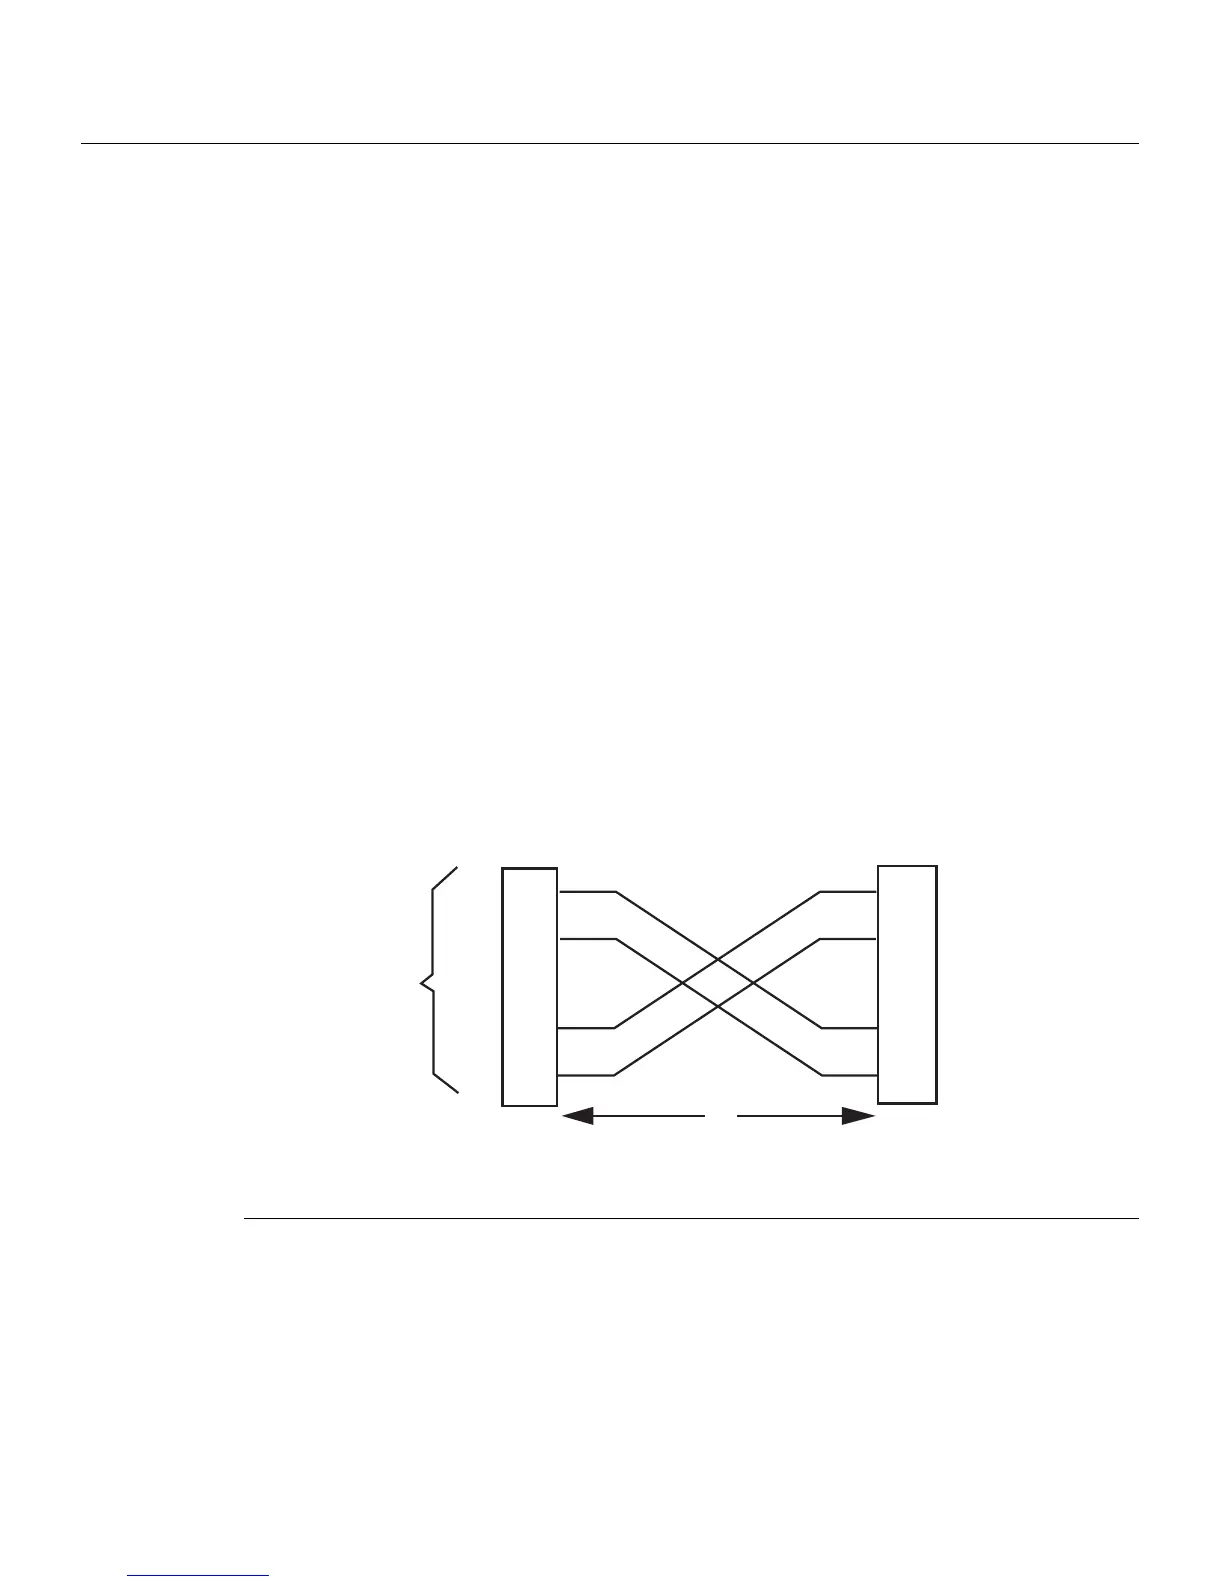
switchesorhubdevicesandanenduser(computer).RefertoFigure 3‐14and
Figure 3‐15forfour‐wireRJ45connections.RefertoFigure 3‐16and Figure 3‐17
foreight‐wireRJ45connections.
d. Ensurethatthe
twistedpairconnectionmeetsthedBlossandcablespecifications
outlinedintheCablingGuide.Referto“RelatedDocuments”onpage xvifor
informationonobtainingthisdocument.
4. Ifalinkisnotestablished,contactEnterasys Networks.Referto“GettingHelp”on
page 1 ‐7fordetails.
Repeatallstepsaboveuntilall
connectionshavebeenmade.
Figure 3-14 Four-Wire Crossover Cable RJ45 Pinouts for 10/100BASE-TX
1 RJ45 switch port 3 RJ45-to-RJ45 crossover cable
2 Other device port 4 RX+/RX- and TX+/TX-connections
These connections must share a common color pair.
TX+
TX
RX+
RX 2
1
3
6
TX+
TX
2
1
3
6
RX+
RX
ÀÁ
Â
Ã



 To Next Page