Epson Artisan 800/Epson Stylus Photo PX800FW/TX800FW/Epson Artisan 700/Epson Stylus Photo PX700W/TX700W Revision C
ADJUSTMENT Adjustment without Using Adjustment Program 238
Confidential
4. To reduce measurement errors, lift and lower each part of the jigs lightly, then
press each part easily.
5. Check all the dial gauges, and adjust the parallelism adjustment bushings within
the standard values in the order of closest to the dial gauge indicating the biggest
value.
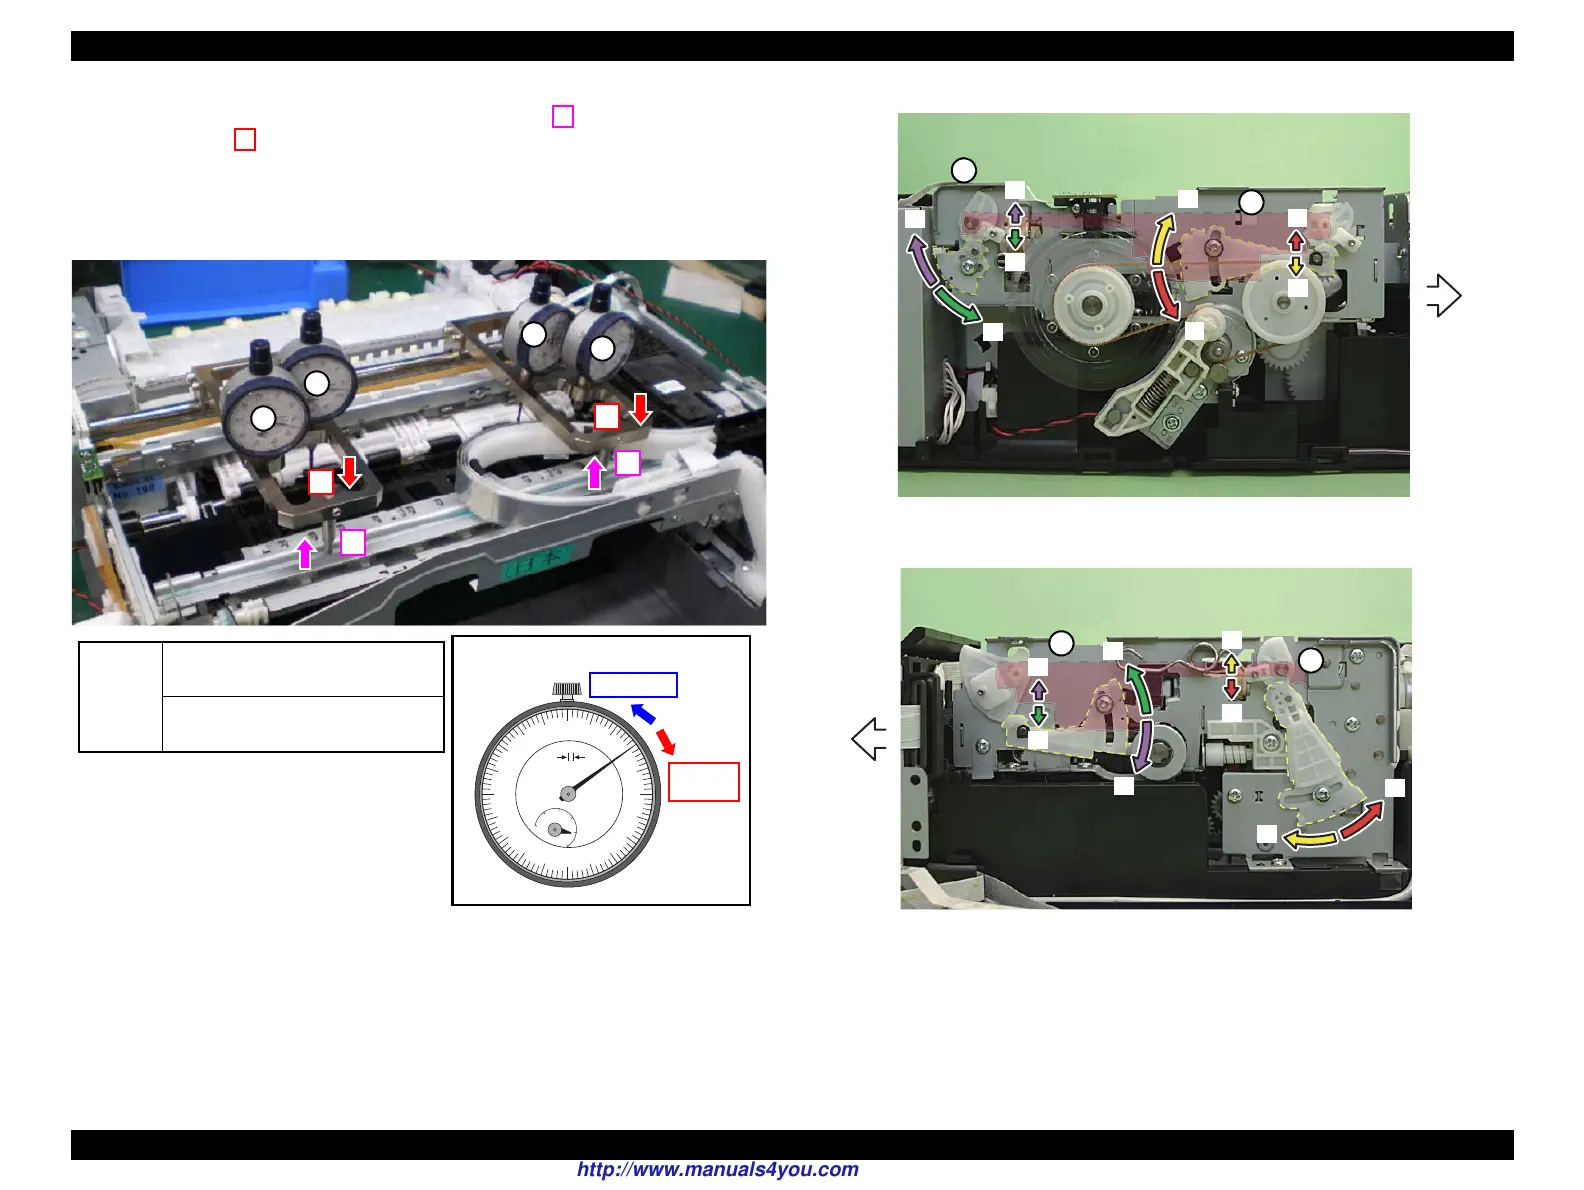
Figure 5-38. PG adjustment
Figure 5-39. Operating the parallelism adjustment bushing (Left side)
Figure 5-40. Operating the parallelism adjustment bushing (Right side)
6. Tighten the screw of each parallelism adjustment bushing to secure them. ( Fig.
5-34 )
7. Remove the parallelism adjustment jigs from the printer mechanism.
0
0
10
90
20
80
30
70
40
60
50
50
60
40
70
30
80
20
90
10
0.01mm
4
5
3
2
1
0
Relation between dial gauge's value and PG
Standard
value
Each dial gauge must be:
within -0.05mm to +0.05mm
Each gauge's value range (max. to min.)
must be within 0.05mm.
http://www.manuals4you.com

 Loading...


