EB-E01 series Disassembly and Assembly INTERNAL USE ONLY
SEIKO EPSON 165 Revision A
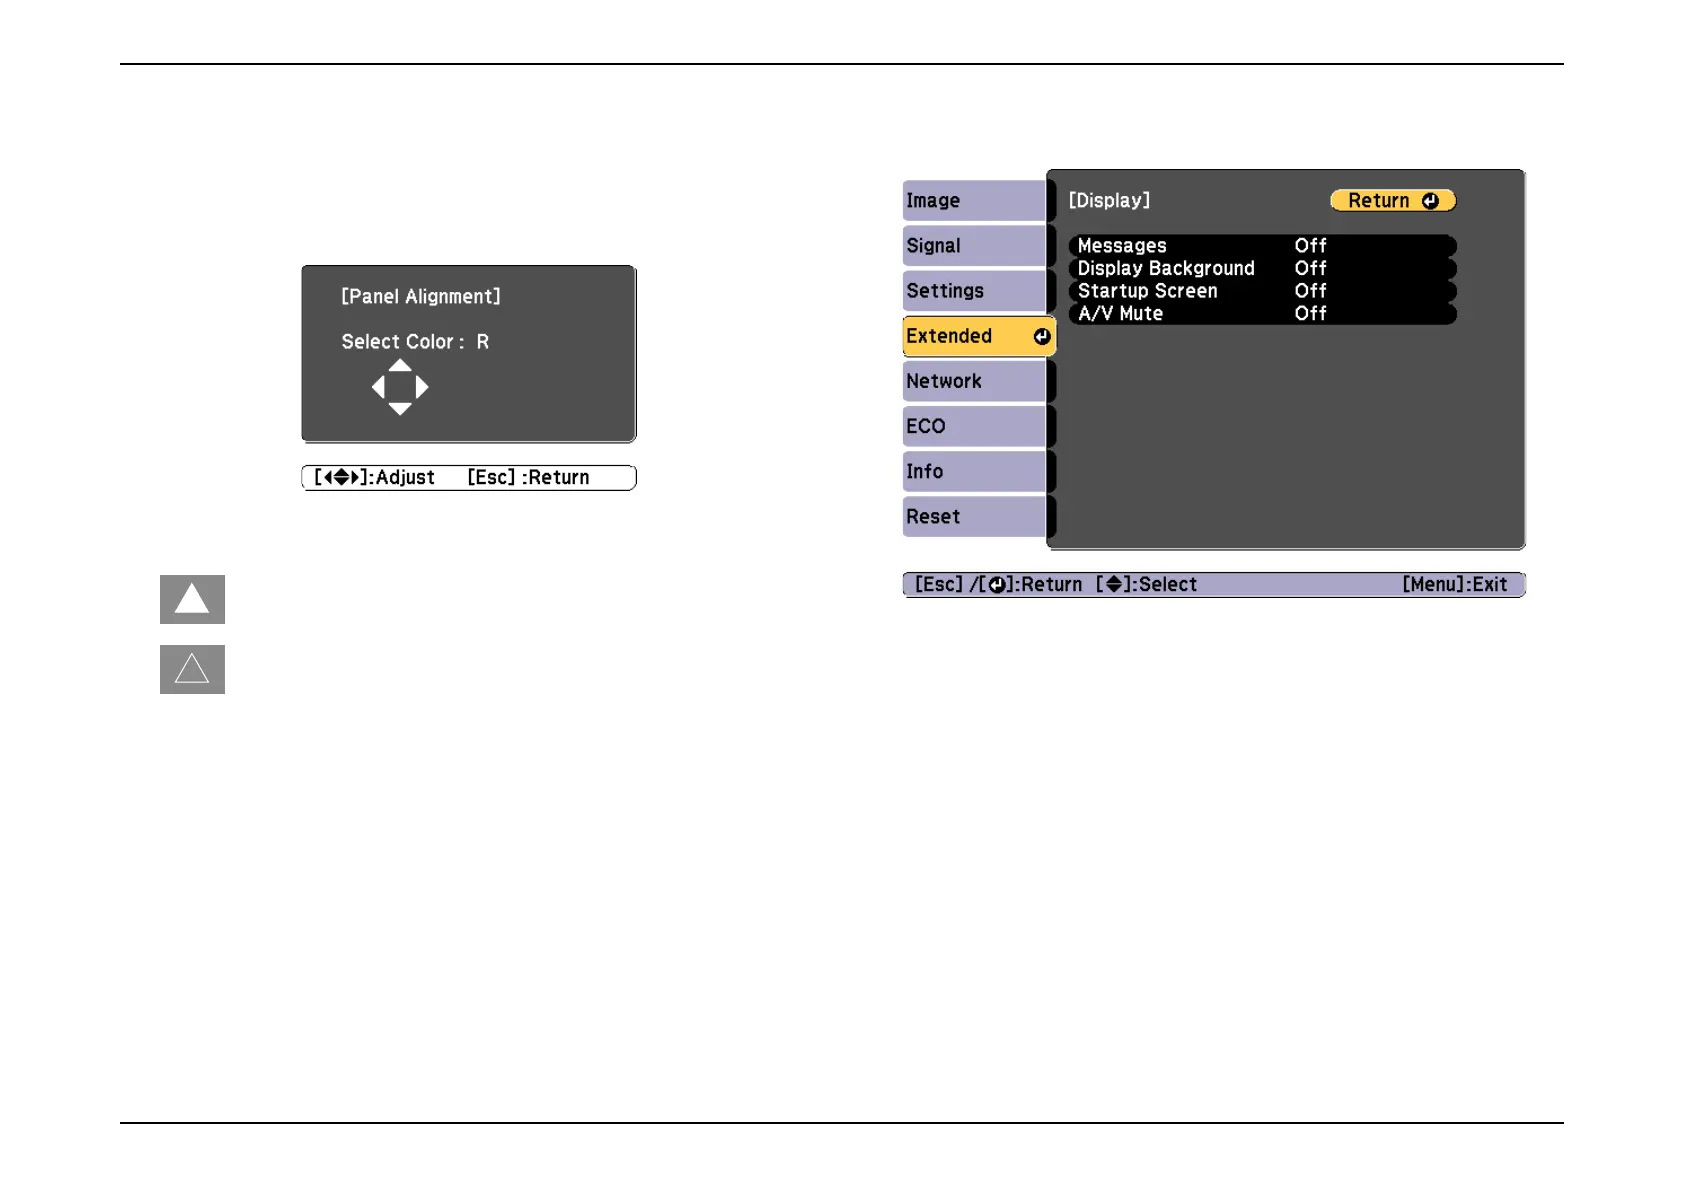
4. Select [Start Adjustment] and then press the [Enter] button.
5. Adjust using the [Up], [Down], [Left], and [Right] buttons, and press the
[Esc] button when the adjustment is complete.
(Adjustment Guide is displayed at the bottom right of the screen during
adjustment)
The color of the △ symbols in the four direction have the following
meanings.
:The state of being in the initial position (position when this
function is started)
:The state when the point of adjustment has moved to the end of
the range, and no further movement is possible in that direction.
6. Press the [Menu] button to complete the LCD Alignment.
7. According to 3.8.3 LCD alignment activation method (p162), switch
between 1 and 0 for Bit 5 of DIP-SW 6.
8. Close the software DIP-SW by pressing the [Menu] button.
9. Restart the projector to reflect the changes in settings.
10. After restarting the projector, press the [Menu] button.
11. Select [Enlargement Settings] and then press the [Enter] button.
12. Select [Display Settings] and then press the [Enter] button.
13. Check that [LCD Alignment] is not displayed on the Display Settings
screen.