24 Scanning Basics
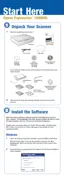
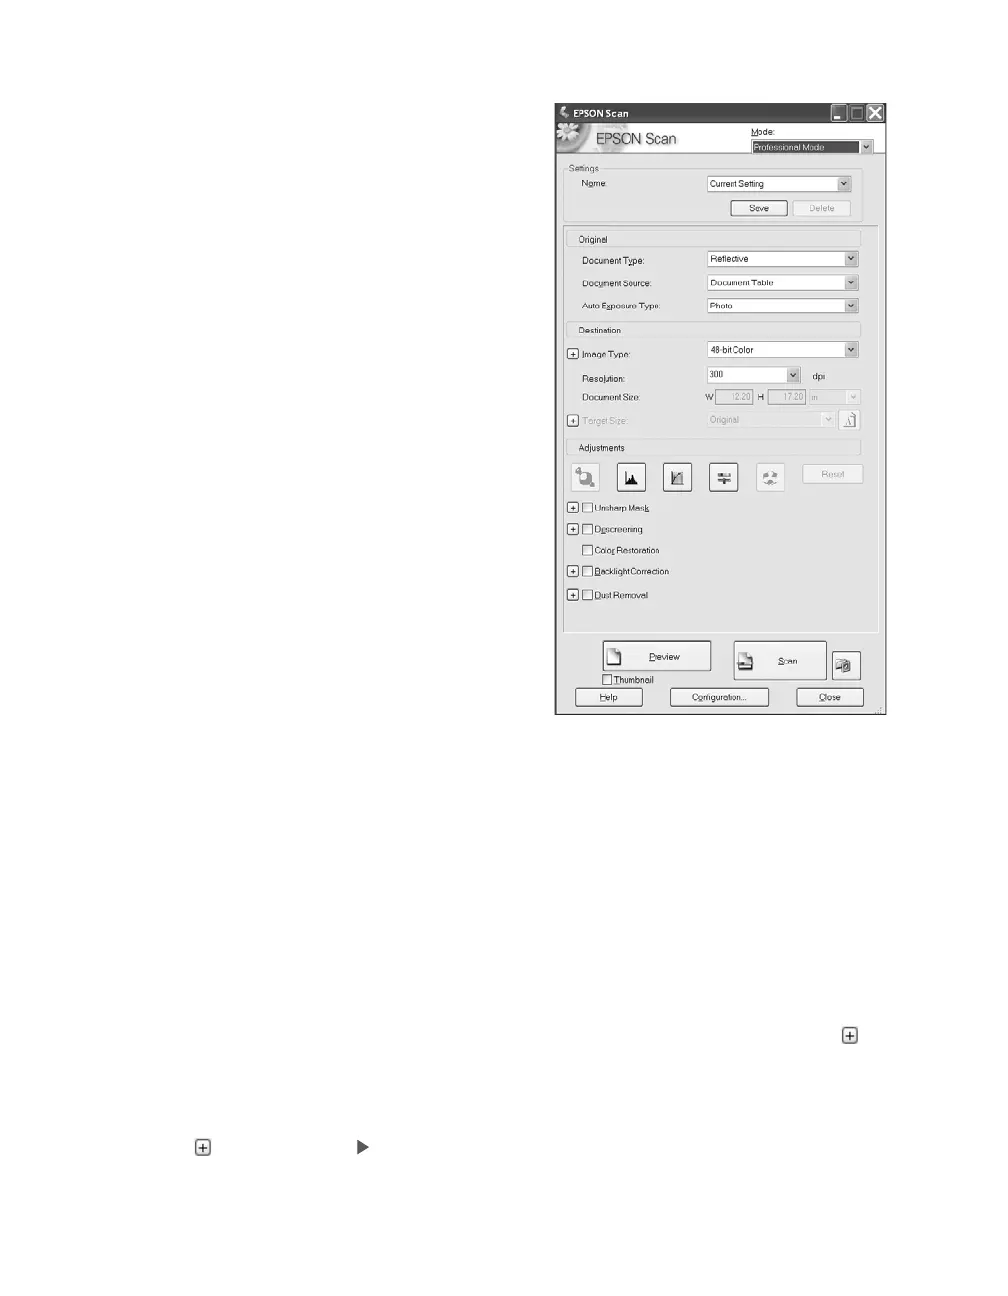
You see the EPSON Scan dialog box:
3. Select Professional Mode from the
Mode list at the top of the screen.
Note: You may have to scroll down to see
some of the settings referred to in the
following steps.
4. Under the Original settings, choose the
Auto Exposure Type: Photo to optimize
exposure for photos, or Document to
optimize exposure for printed material.
5. Under the Destination settings, choose a
color depth from the Image Type menu:
■ 48-bit Color for the highest quality
color scans
Note: If you choose this option, make
sure your application supports 48-bit
image files (Photoshop Elements does
not support 48-bit color). This option
significantly increases your file size.
■
24-bit Color for high quality color
scans
■ Color Smoothing to reduce color variations in an image without lessening
its sharpness
■ 16-bit Grayscale for the highest quality scans of black-and-white photos or
images
Note: Make sure your application supports 16-bit grayscale.
■
8-bit Grayscale for high quality scans of black-and-white photos or images
■ Halftone if you want to create pre-press scans of grayscale images; click to
select an appropriate screening pattern for your print vendor
■ Black & White for text or line art
Click (Windows) or (Macintosh) to see more options, then choose Best or
Draft for the Scanning Quality.