EasyManuals Logo
Home>Epson>Robotics>SCARA ROBOT

Epson SCARA ROBOT User Manual

Epson SCARA ROBOT
216 pages
To Next Page IconTo Next Page
To Previous Page IconTo Previous Page
Page #141 background imageLoading...
Page #141 background image
Maintenance 5. Arm #1
G6 Rev.21 129
Joint #1
reduction gear
unit
Removal
(1)
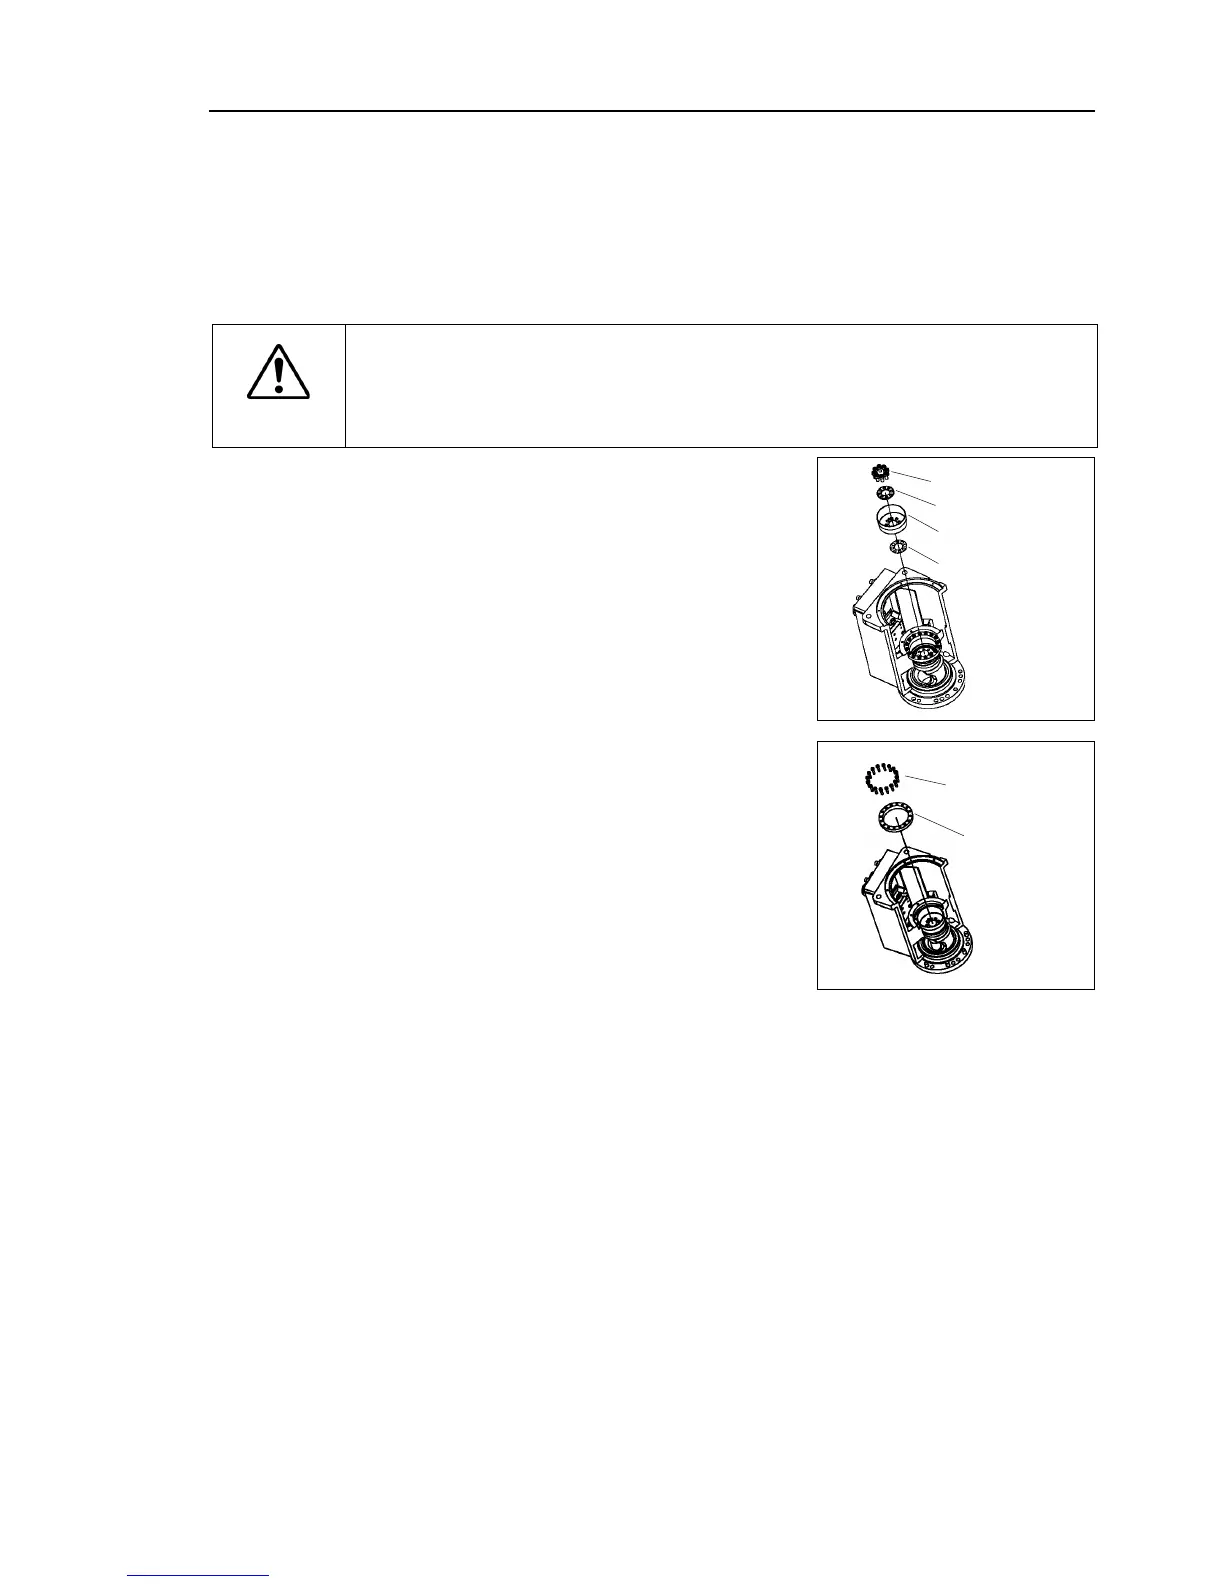
Execute the removal steps from (1) to (5) in
Maintenance: 5.1
Replacing Joint #1
Motor
and remove the waveform generator.
(2)
Remove the arm cap on the base side.
For details, refer to Maintenance: 3.3 Arm #1 Cover.
(3)
T
urn the Manipulator laterally.
CAUTION
When
turning the Manipulator laterally, there must be two or more people to work
on it so that at least one of them can support the arm while others are removing
the bolts.
Removing the bolts without supporting the arm may result in the arm
falling, bodily injury, and/or malfunction of the robot syst
em.
(4)
Use the
extracting M4 screws
and remove the
flexspline and the grip
ring.
Be sure to keep the spacer.
Flexspline
8-M6×15
Spacer
Grip ring
(5)
Remove the circular spline from the base.
Circular
spline
16-M4×20

Table of Contents

Questions and Answers:

Question and Answer IconNeed help?

Do you have a question about the Epson SCARA ROBOT and is the answer not in the manual?

Epson SCARA ROBOT Specifications

General IconGeneral
BrandEpson
ModelSCARA ROBOT
CategoryRobotics
LanguageEnglish

Related product manuals