N
Open the inner cover, and set the
transportation lock in the print position, as
shown in the illustration.
c
Important:
After cleaning the printer, return the
transportation lock to the printing position.
You cannot print if it is in the transportation
position.
O
Close the inner cover, return the interior of the
printer to its original position.
P
Install the rear cover.
Q
Insert the paper cassette
c
Important:
Use both hands to insert the paper cassette. If
you use only one hand, the paper cassette
may fall and be damaged because the paper
loaded in it is heavy.
Note:
See the Setup Guide for the procedure to connect
LAN/USB cables to the printer.
If you do not have a Setup Guide on hand, you can go
to https://epson.sn to select and view one for your
printer model.
You can watch the procedure on video also.
Epson Video Manuals
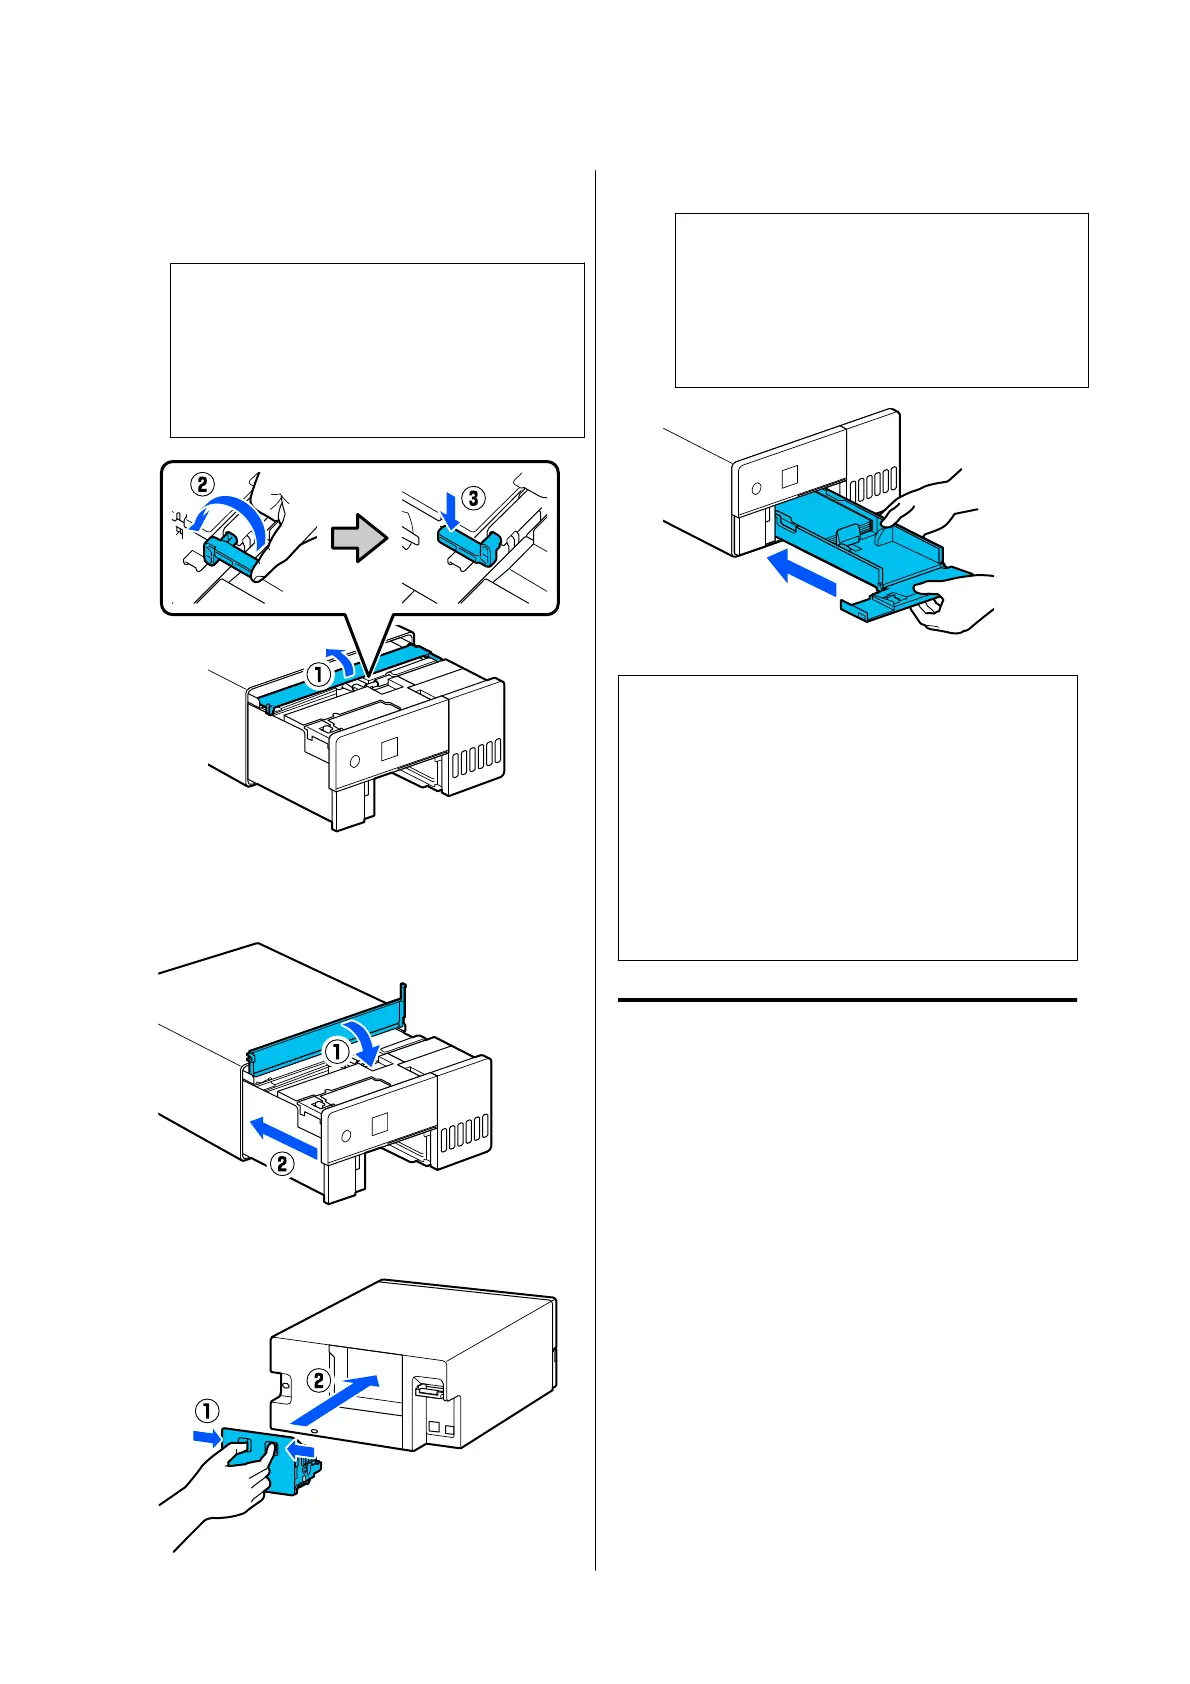
Replacing the Roller Assembly
Kit
When paper feed trouble repeatedly occurs even
though the Roller Assembly Kit has been cleaned
appropriately, replace the Roller Assembly Kit with a
new one.
Removing the Roller Assembly Kit
See the following steps 1 to 10 for how to remove the
Roller Assembly Kit.
U “How to Clean the Roller Assembly Kit” on
page 56
Installing the Roller Assembly Kit
See steps 12 to 17 below to install a new Roller
Assembly Kit.
SL-D500 Series User's Guide
Maintenance
59
 Loading...