EPSON Stylus C110/C120/D120 Revision B
DISASSEMBLY/ASSEMBLY Removing Housing 75
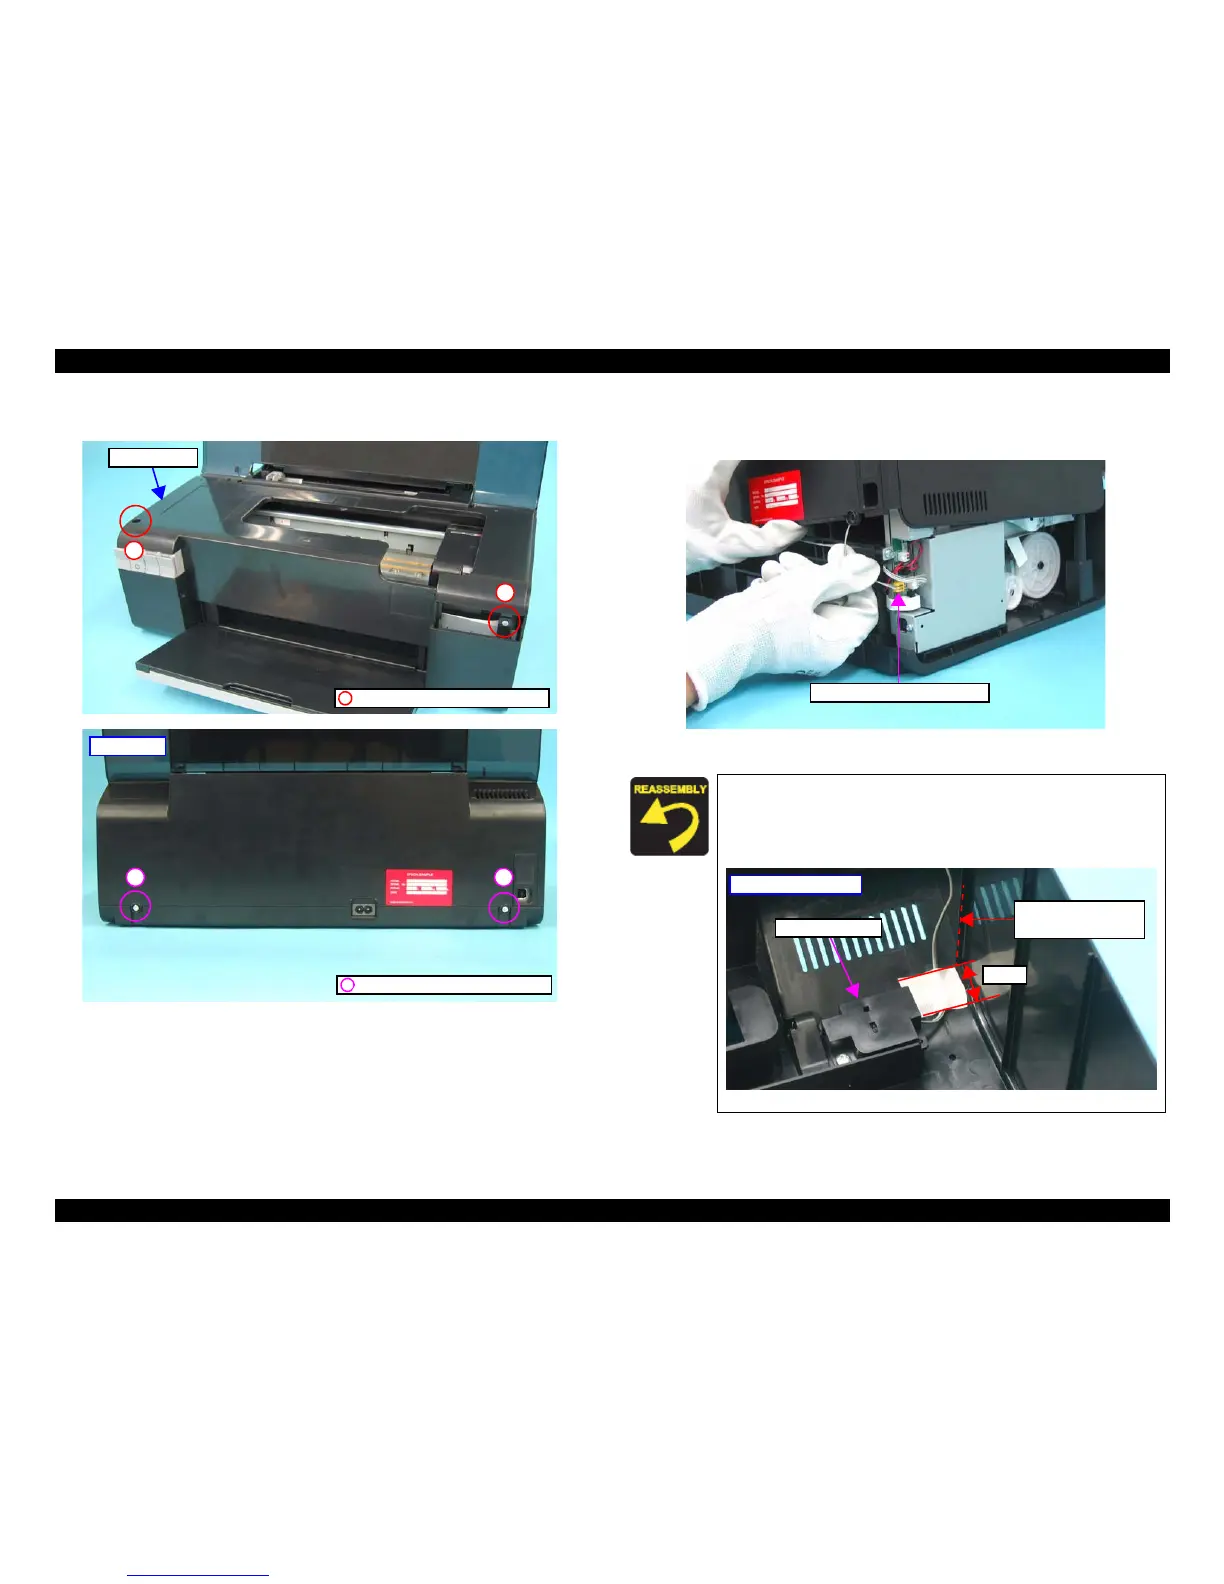
4. Remove the screws (x4) that secure the Upper Housing.
Figure 4-6. Removing Upper Housing (1)
5. Lift the Upper Housing a little to disconnect the connector (CN4) of the Cover
Open Sensor from the Main Board, then remove the Upper Housing.
Figure 4-7. Removing Upper Housing (2)
Upper Housing
C.B.P. 3x10, F/Zn-3C (6±1kgfcm)
C.B.P. 3x12, F/Zn-3C (6±1kgfcm)
4
3
12
Printer Rear
Tighten the screws in the order given in Figure 4-6.
If the acetate tape that secures the cable of the Cover Open
Sensor comes off, attach it correctly referring to the figure
below.
Figure 4-8. Acetate Tape Position
Connector of Cover Open Sensor
Cover Open Sensor
20mm
Align the tape edge
with the edge of this rib.
Back of Upper Housing