EPSON Stylus C110/C120/D120 Revision B
DISASSEMBLY/ASSEMBLY Disassembling Printer Mechanism 87
4.5.5 Front Frame/Right Frame
Part/Unit that should be removed before removing Front Frame/Right Frame
Upper Housing/Lower Housing/Main Board Unit/Left Frame/Panel Unit
Removal Procedure
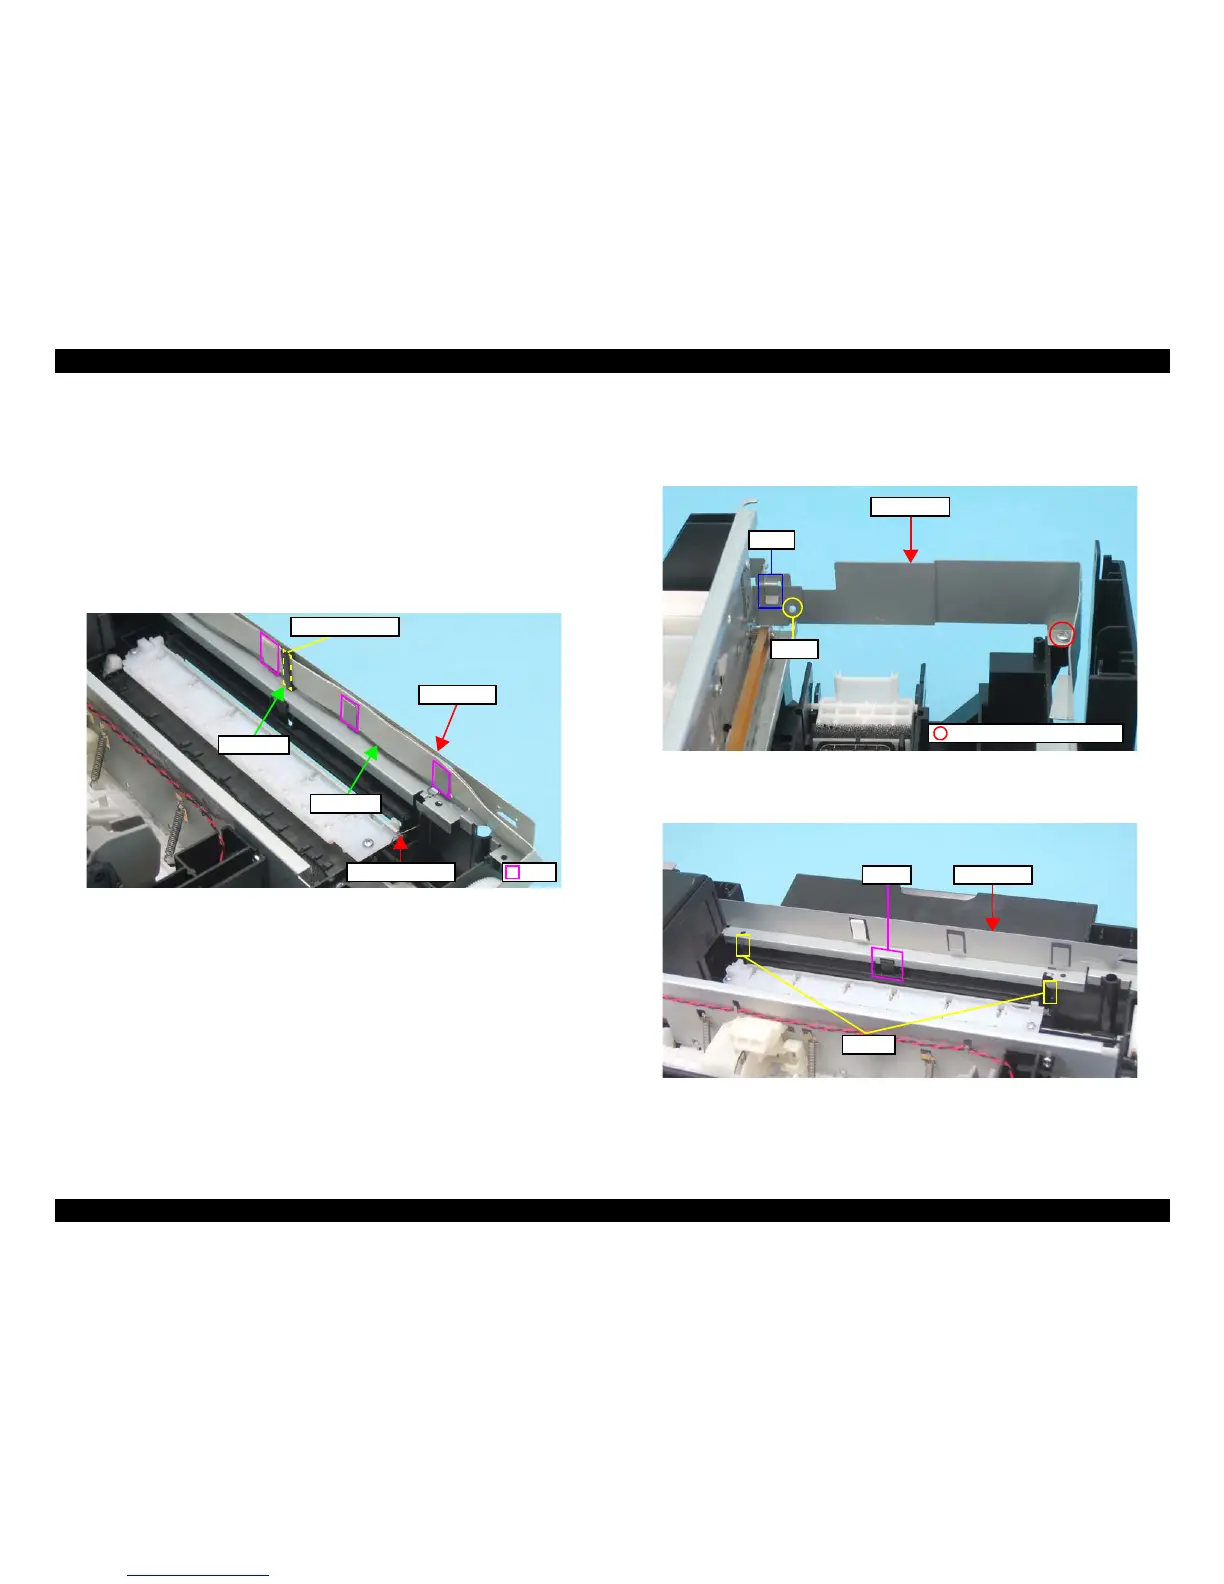
1. Remove the double-sided tape (x1) that secures the ferrite core to the Front Frame.
2. Release the Head FFC from the hooks (x3) of the Front Frame.
3. Remove the Grounding Spring from the Front Frame.
Figure 4-35. Removing Front Frame/Right Frame (1)
4. Remove the screw (x1) that secure the Front Frame and the Right Frame together.
5. Release the dowel (x1) and the hook (x1) that secure the Right Frame, and remove
it.
Figure 4-36. Removing Front Frame/Right Frame (2)
6. Release the hook (x1), and remove the Front Frame.
Figure 4-37. Removing Front Frame/Right Frame (3)