EPSON Stylus C110/C120/D120 Revision B
DISASSEMBLY/ASSEMBLY Disassembling Printer Mechanism 83
4.5.2 Printhead
Part/Unit that should be removed before removing Printer Mechanism
Upper Housing
Removal Procedure
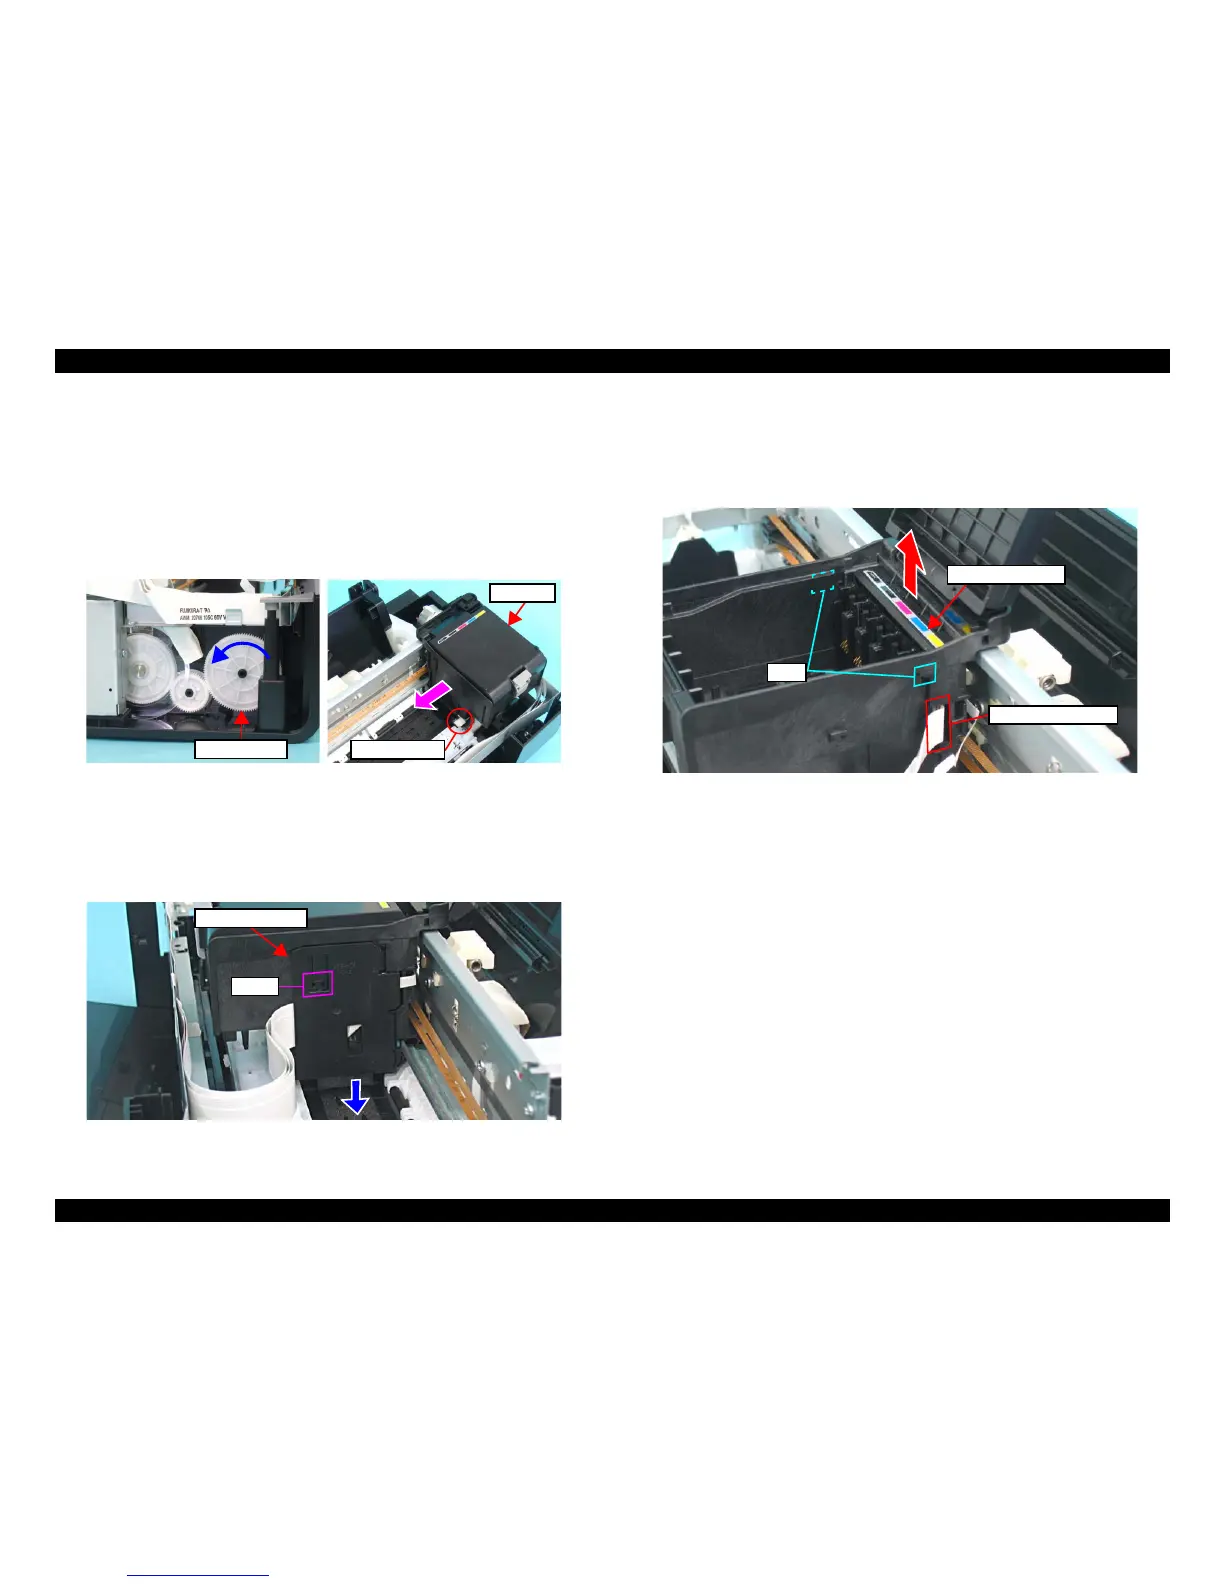
1. Turn the Spur Gear 51.5 in the direction of the arrow to release the Carriage Lock,
and then move the CR Unit to the center of the printer.
Figure 4-26. Unlocking and Moving CR Unit
2. Open the Cartridge Cover and remove all the ink cartridges from the CR Unit.
3. Release the hook (x1) of the Head Cable Cover with a flathead precision
screwdriver, and remove the Head Cable Cover while sliding it downward (in the
direction of the arrow).
Figure 4-27. Removing Printhead (1)
4. Disconnect the Head FFC (x1) that is connected to the CSIC Board.
5. Release the tabs (x2) that secure the Holder Board Assy. using a needle or a
similar tool, and remove the Holder Board Assy. upward (in the direction of the
arrow).
Figure 4-28. Removing Printhead (2)