EPSON Stylus C110/C120/D120 Revision B
DISASSEMBLY/ASSEMBLY Removing Board 79
4.4.2 Panel Unit
Part/Unit that should be removed before removing Panel Unit
Upper Housing
Removal Procedure
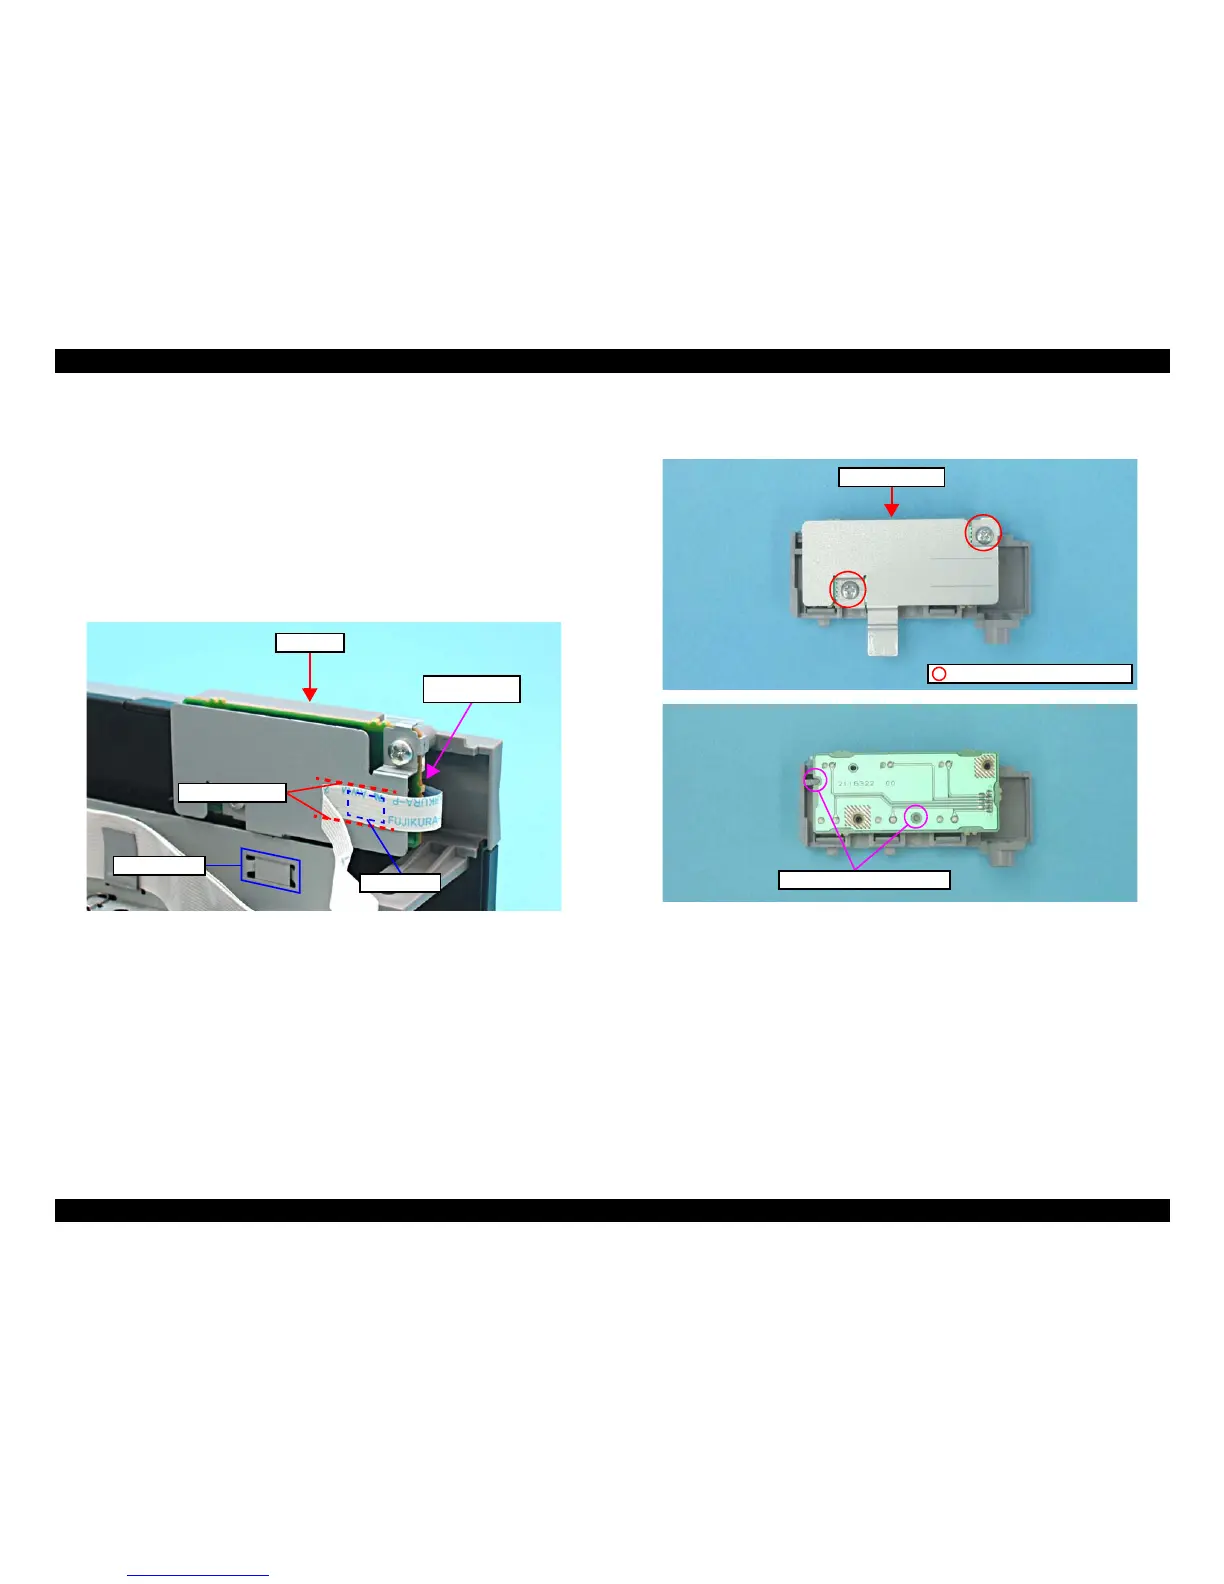
1. Peel off the Panel Unit FFC that is secured with the double-sided tape (x1) from
the Panel Unit, and disconnect the FFC (x1) from the connector of the Panel Unit.
2. Release the rib (x1) of the Panel Unit from the cutout (x1) of the Front Frame, and
remove the Panel Unit.
Figure 4-18. Removing Panel Unit
3. Remove the screws (x2) that secure the Panel Board and the Panel Shield Plate,
and remove them together.
Figure 4-19. Removing Panel Board
Panel Shield Plate
C.B.S. 3x6, F/Zn-3C (4±0.5kgfcm)
Guide Pin and Positioning Hole