EPSON Stylus CX4100/CX4200/CX4700/CX4800/DX4200/DX4800/DX4850 Revision A
DISASSEMBLY/ASSEMBLY Printer Section 132
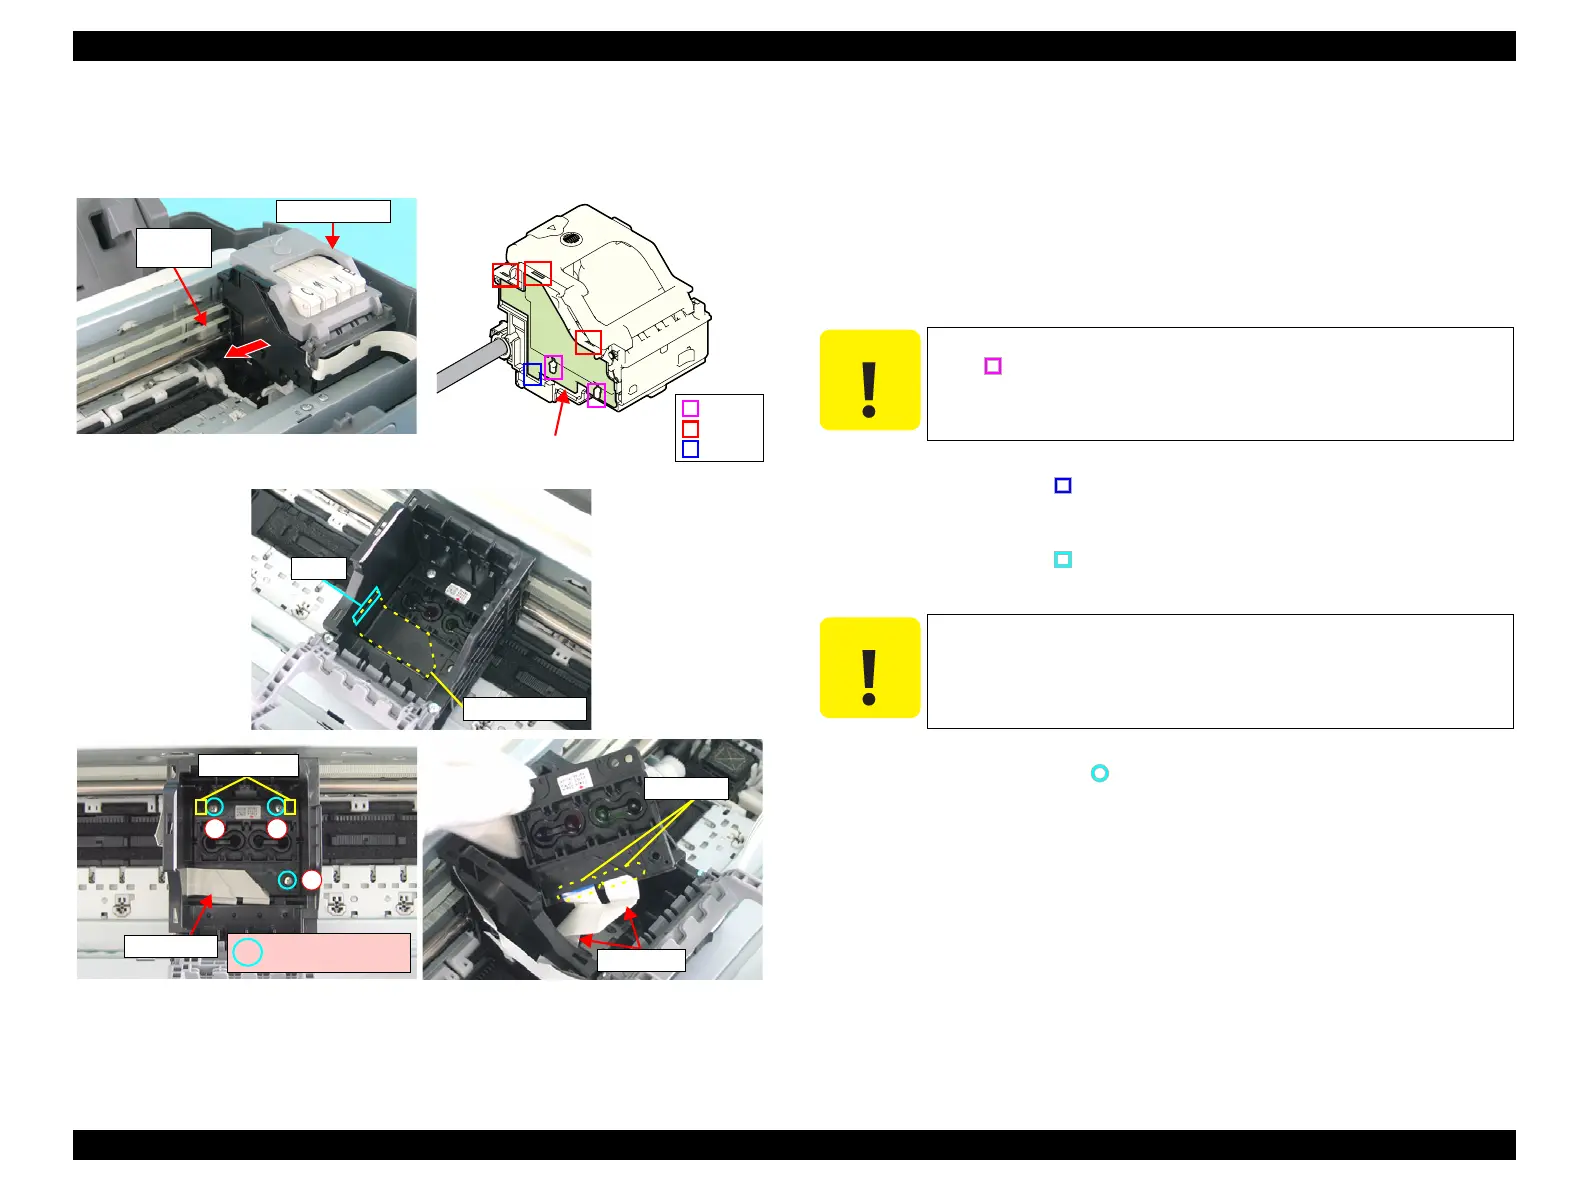
4.4.7 Printhead
External view
Figure 4-9. Removing Printhead
Part/Unit that should be removed before removing Print Head
Document Cover / Paper Support Assy. / Scanner Unit / Panel Unit /
Housing, Upper
Removal procedure
1. Release the Carriage Lock with a flathead screwdriver or a similar tool, and
move the Carriage Unit to the center of the printer.
2. Remove all the Ink Cartridges from the Carriage Unit.
3. Release the tab (x1, ) on the downside of the Head Cable Cover with a
precision screwdriver (-), slide the Cover downward, and remove the Head
Cable Cover.
4. Release the tab (x1, ) that secures the Sub FFC Guide with a precision
screwdriver (-), and remove the Sub FFC Guide.
5. Remove the screws (x3, ) that secure the Print Head, and lift up to remove
Printhead with a longnose pliers.
6. Disconnect the Head FFCs (x2) from the connectors (x2) of the Print Head,
and remove the Printhead.
Carriage Unit
Carriage
Lock
Sub FFC Guide
Tab
Tabs
Rib
Tab
Head Cable Cover
Printhead
C.B.P. 2.5x8 F/Zn
(3±1kgfcm)
Guide Pins
12
3
Head FFC
Connector
C A U T I O N
When performing the following work, be careful not to bend the
tabs (
) of the Carriage Unit.
C A U T I O N
Do not touch or damage the nozzles or the ink supply needles of the
Printhead.
 Loading...


