EPSON Stylus CX4100/CX4200/CX4700/CX4800/DX4200/DX4800/DX4850 Revision A
DISASSEMBLY/ASSEMBLY Printer Section 147
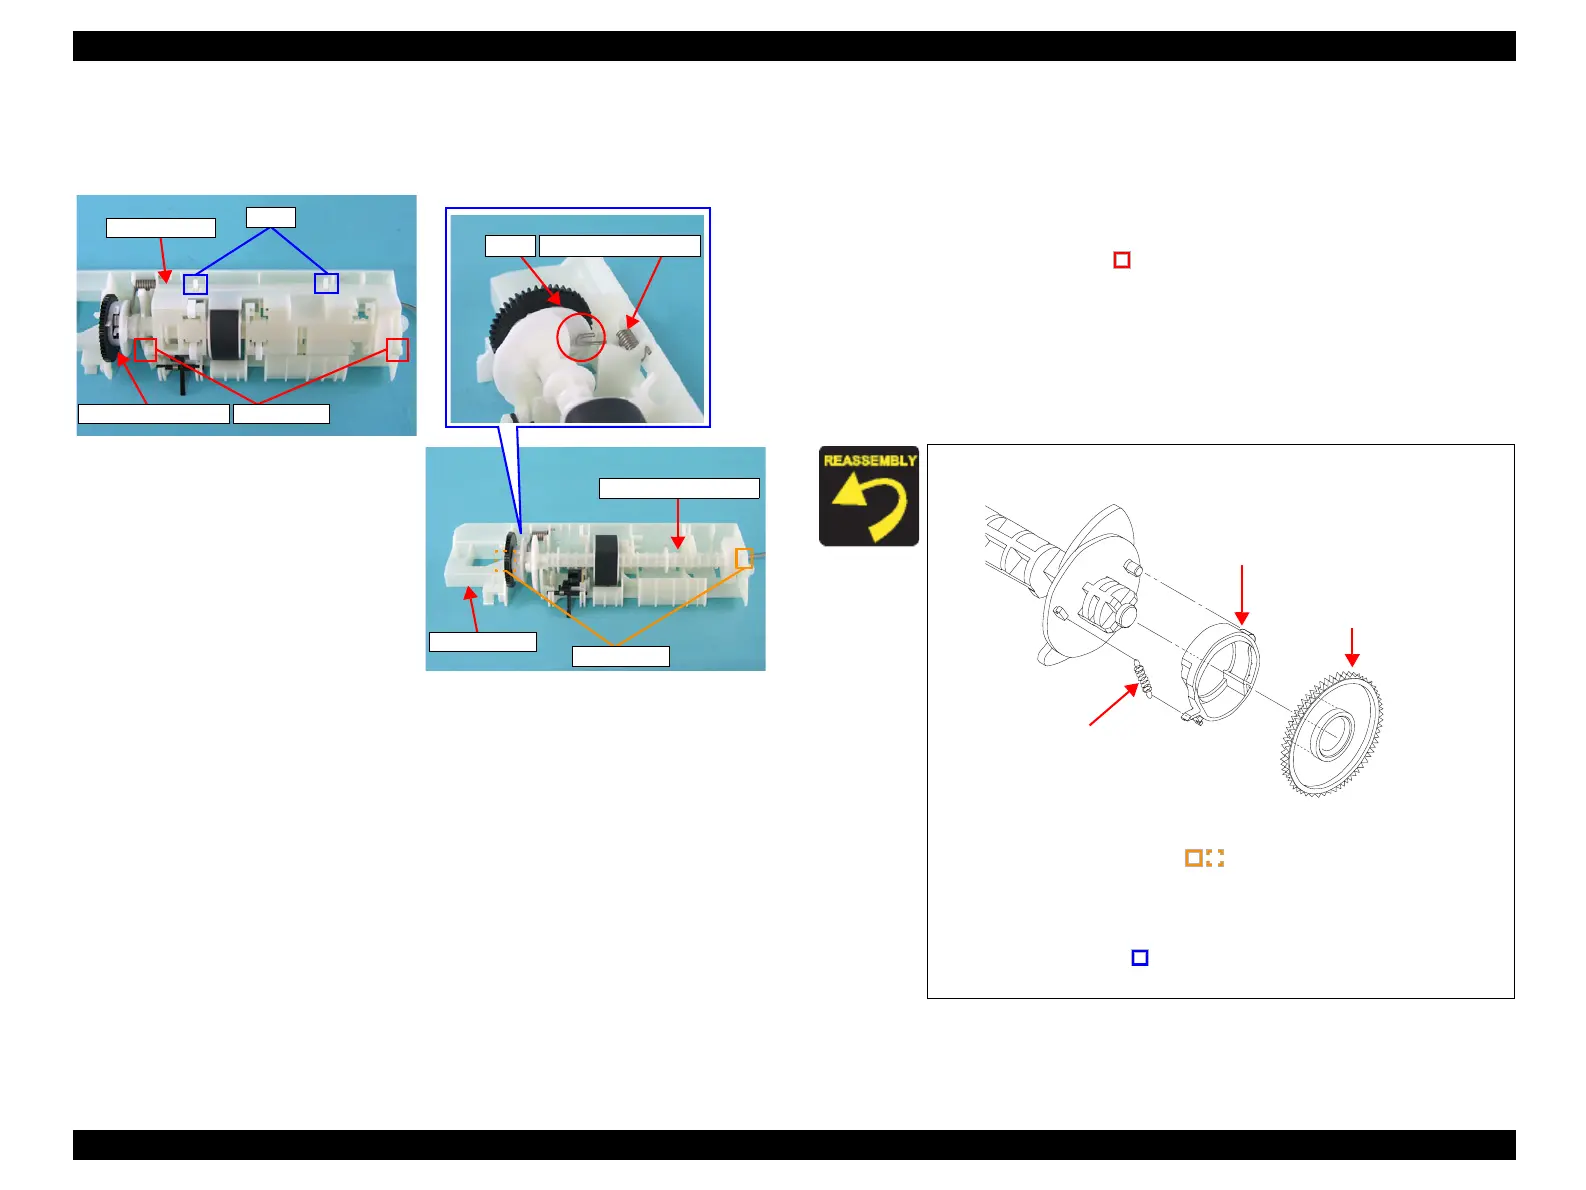
4.4.14 Spur Gear 36.8/Extension Spring 0.143/Clutch
External view
Figure 4-27. Removing Spur Gear 36.8/Extension Spring 0.143/Clutch
Part/Unit that should be removed before removing Spur Gear 36.8/
Extension Spring 0.143/Clutch
Document Cover / Paper Support Assy. / Scanner Unit / Panel Unit /
Housing, Upper / Printer Mechanism / ASF Unit / Holder Shaft Unit
Removal procedure
1. Release the guide pins (x2, ) that secure the Paper Block to the Holder
Shaft, and remove the Paper Block.
2. Remove the LD Roller Shaft together with the Clutch Mechanism from the
Holder Shaft.
3. Remove the Spur Gear 36.8 from the LD Roller Shaft.
4. Remove the Extension Spring 0.143, and remove the Clutch from the LD
Roller Shaft.
LD Roller Shaft Unit
Holder Shaft
Guide Pins
Torsion Spring 137.7Cam
Paper Block
Guide Pins
Ribs
Clutch Mechanism
Assemble the LD Roller Shaft Unit as shown below.
Figure 4-28. Assembling LD Roller Shaft Unit
Match the guide pins (x2, ) of the LD Roller Shaft with the
positioning holes of the Holder Shaft.
Hold down the Cam of the LD Roller Shaft with the tip of the
Torsion Spring 137.7.
Match the ribs (x2, ) of the Holder Shaft with the notches (x2)
of the Paper Block.
Clutch
Extension Spring 0.143
Spur Gear 36.8
 Loading...


