EPSON Stylus CX4100/CX4200/CX4700/CX4800/DX4200/DX4800/DX4850 Revision A
DISASSEMBLY/ASSEMBLY Printer Section 159
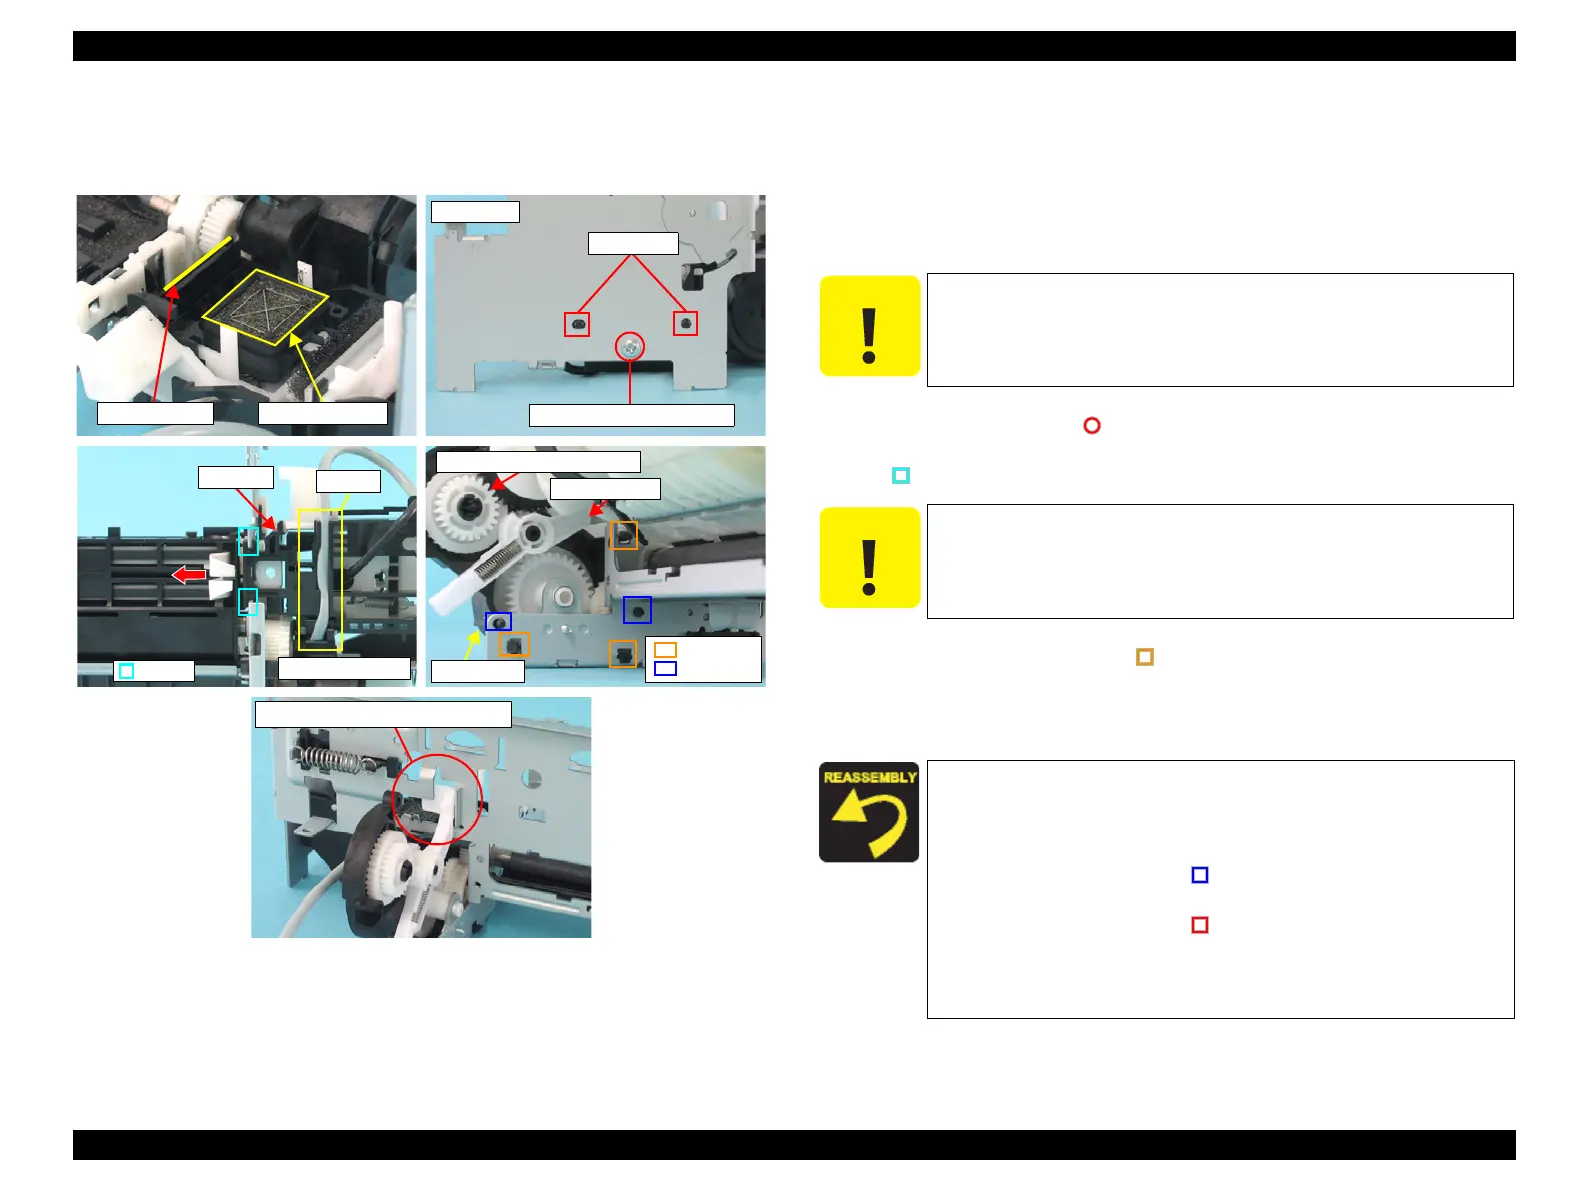
4.4.23 Ink System Unit
External view
Figure 4-43. Removing Ink System Unit
Part/Unit that should be removed before removing Ink System Unit
Document Cover / Paper Support Assy. / Scanner Unit / Panel Unit /
Housing Upper / Print Head / Printer Mechanism / Main Board Unit /
ASF Unit / Holder Shaft Unit / CR Guide Frame / CR Motor / Carriage Unit /
Front Frame
Removal procedure
1. Release the Ink Tube from the groove on the downside of the Cap Frame.
2. Remove the screw (x1, ) that secures the Cap Unit.
3. Slide the Cap Unit to the inside of the Main Frame, and release the tabs (x2,
) of the Cap Unit from the Main Frame.
4. Release the Carriage Lock from the notch of the Main Frame.
5. Carefully release the tabs (x3, ) that secure the Pump Unit to the Main
Frame, and remove the Pump Unit.
6. Remove the whole Ink System from the Printer Mechanism, and remove the
gears (x4) and the Pump Pulley.
Guide Pins
Right Side
C.B.P 3x8 F/Zn (4±1kgfcm)
Sealing Rubber
Head Cleaner
Lower right side
Tabs
Cap Unit
Groove
Pump Unit
Compound Gears 27.2, 19.2
Change Lever
Tabs
Guide Pins
Notch and Carriage Lock Position
C A U T I O N
Do not touch or damage the Sealing Rubber or the Head Cleaner
when performing the following work.
Mark the connection location before removing the Ink Tube.
C A U T I O N
When removing the Ink System Unit, be careful not to drop the
Change Lever and Compound Gears 27.2, 19.2.
When installing the Ink System Unit, follow the steps described
below.
1. Place the Carriage Lock inside the notch of the Main Frame as
shown in the figure.
2. Match the guide pins (x2, ) of the Pump Unit with the
positioning holes (x2) of the Main Frame.
3. Match the guide pins (x2, ) of the Cap Unit with the
positioning holes (x2) of the Main Frame.
4. Place the Ink Tube into the groove, and install the Ink System
Unit.
 Loading...


