EPSON Stylus CX4100/CX4200/CX4700/CX4800/DX4200/DX4800/DX4850 Revision A
DISASSEMBLY/ASSEMBLY Printer Section 158
External view (2)
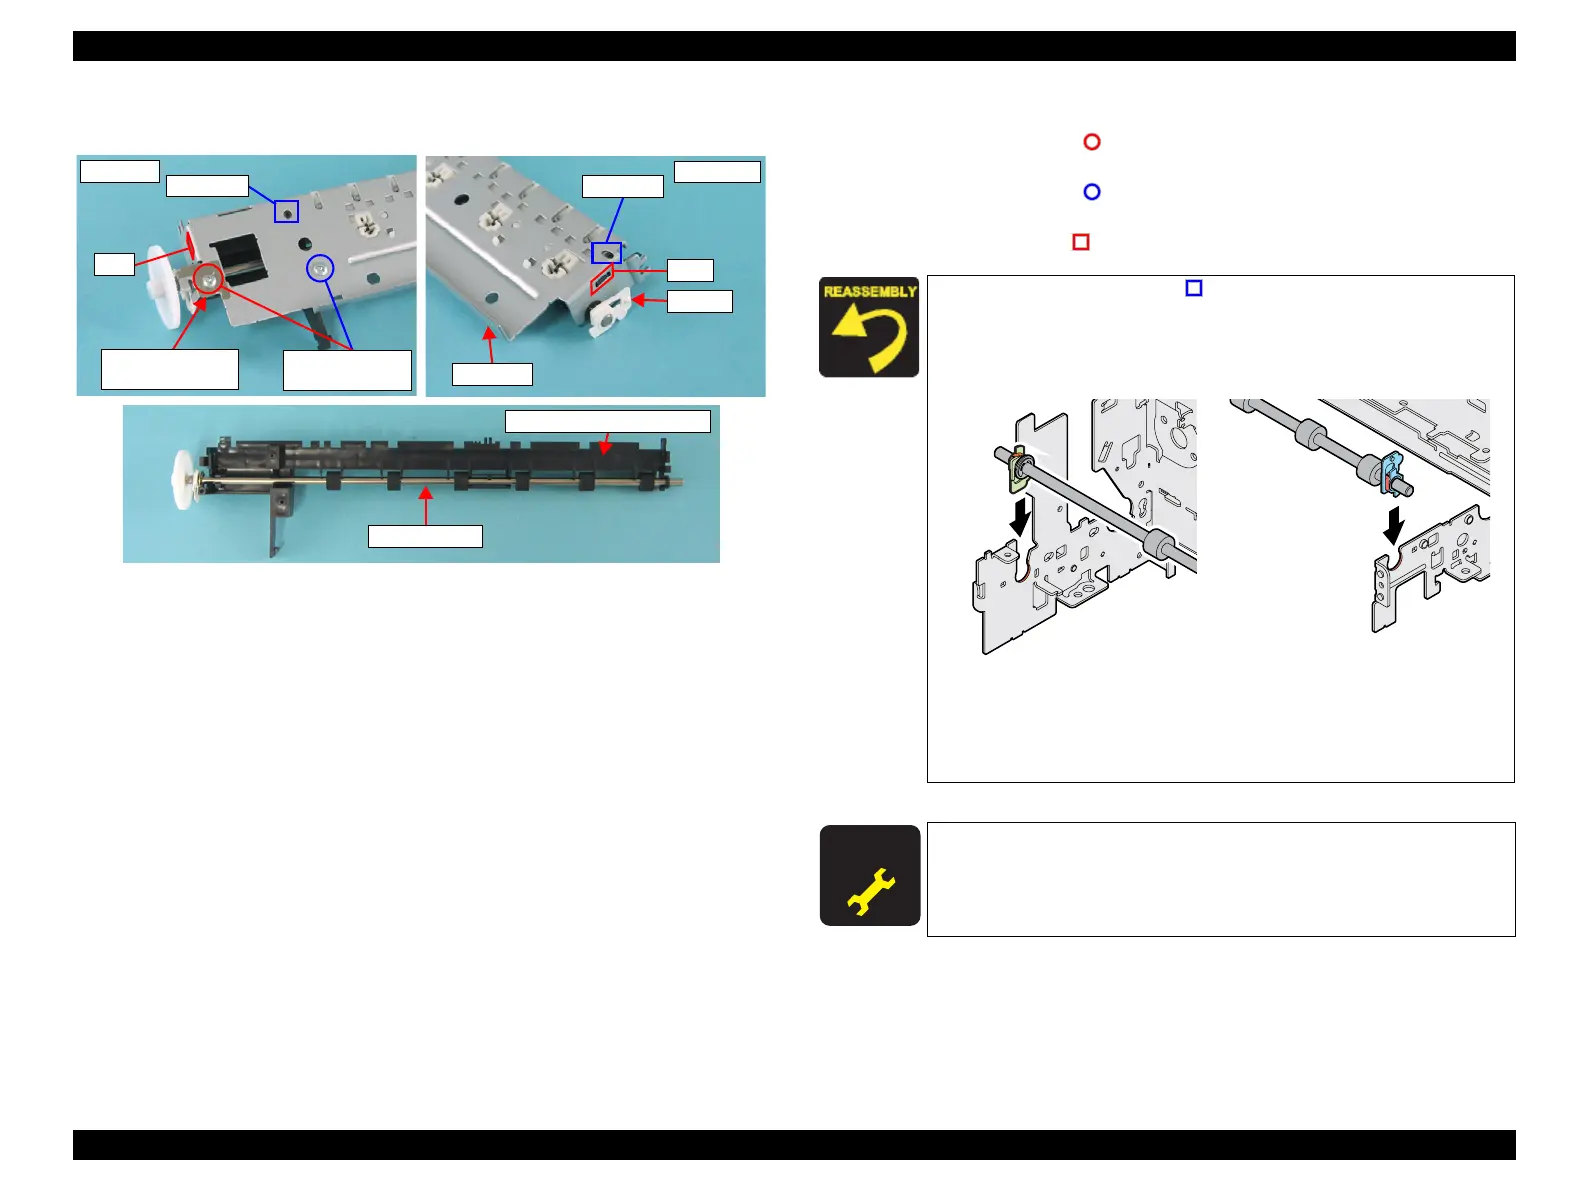
Figure 4-41. Removing EJ Roller Unit
6. Remove the right Bush 5 from the EJ Frame Unit.
7. Remove the screw (x1, ) that secures the EJ Frame Grounding Plate, and
remove the EJ Frame Grounding Plate.
8. Remove the screw (x1, ) that secures the Front Paper Guide Support.
9. Remove the Front Paper Guide Support together with the EJ Roller Unit while
releasing the tabs (x2, ) that secure the Front Paper Guide Support.
EJ Frame
Right Side
Guide Pin
Tab
Bush 5
Left Side
Tab
Guide Pin
C.B.P. 3x6 F/Zn
(4±1kgfcm)
EJ Frame
Grounding Plate
Front Paper Guide Support
EJ Roller Unit
Match the guide pins (x2, ) of the Front Paper Guide Support
with the positioning holes (x2) of the EJ Frame.
Confirm that Bush 5s on both sides are securely inserted into the
notches of the Main Frame.
Figure 4-42. Installing Bush 5s
Make sure that there is no gap between the EJ Frame Unit and
the Main Frame.
Check if the EJ Roller Unit moves smoothly.
A D J U S T M E N T
R E Q U I R E D
After replacing the Front Paper Guide Support with a new one,
always apply grease G-46 to the specified parts.
Refer to Figure 6-9 (p191) for details.
Left Side Right Side§
 Loading...


