EPSON Stylus CX4100/CX4200/CX4700/CX4800/DX4200/DX4800/DX4850 Revision A
DISASSEMBLY/ASSEMBLY Printer Section 142
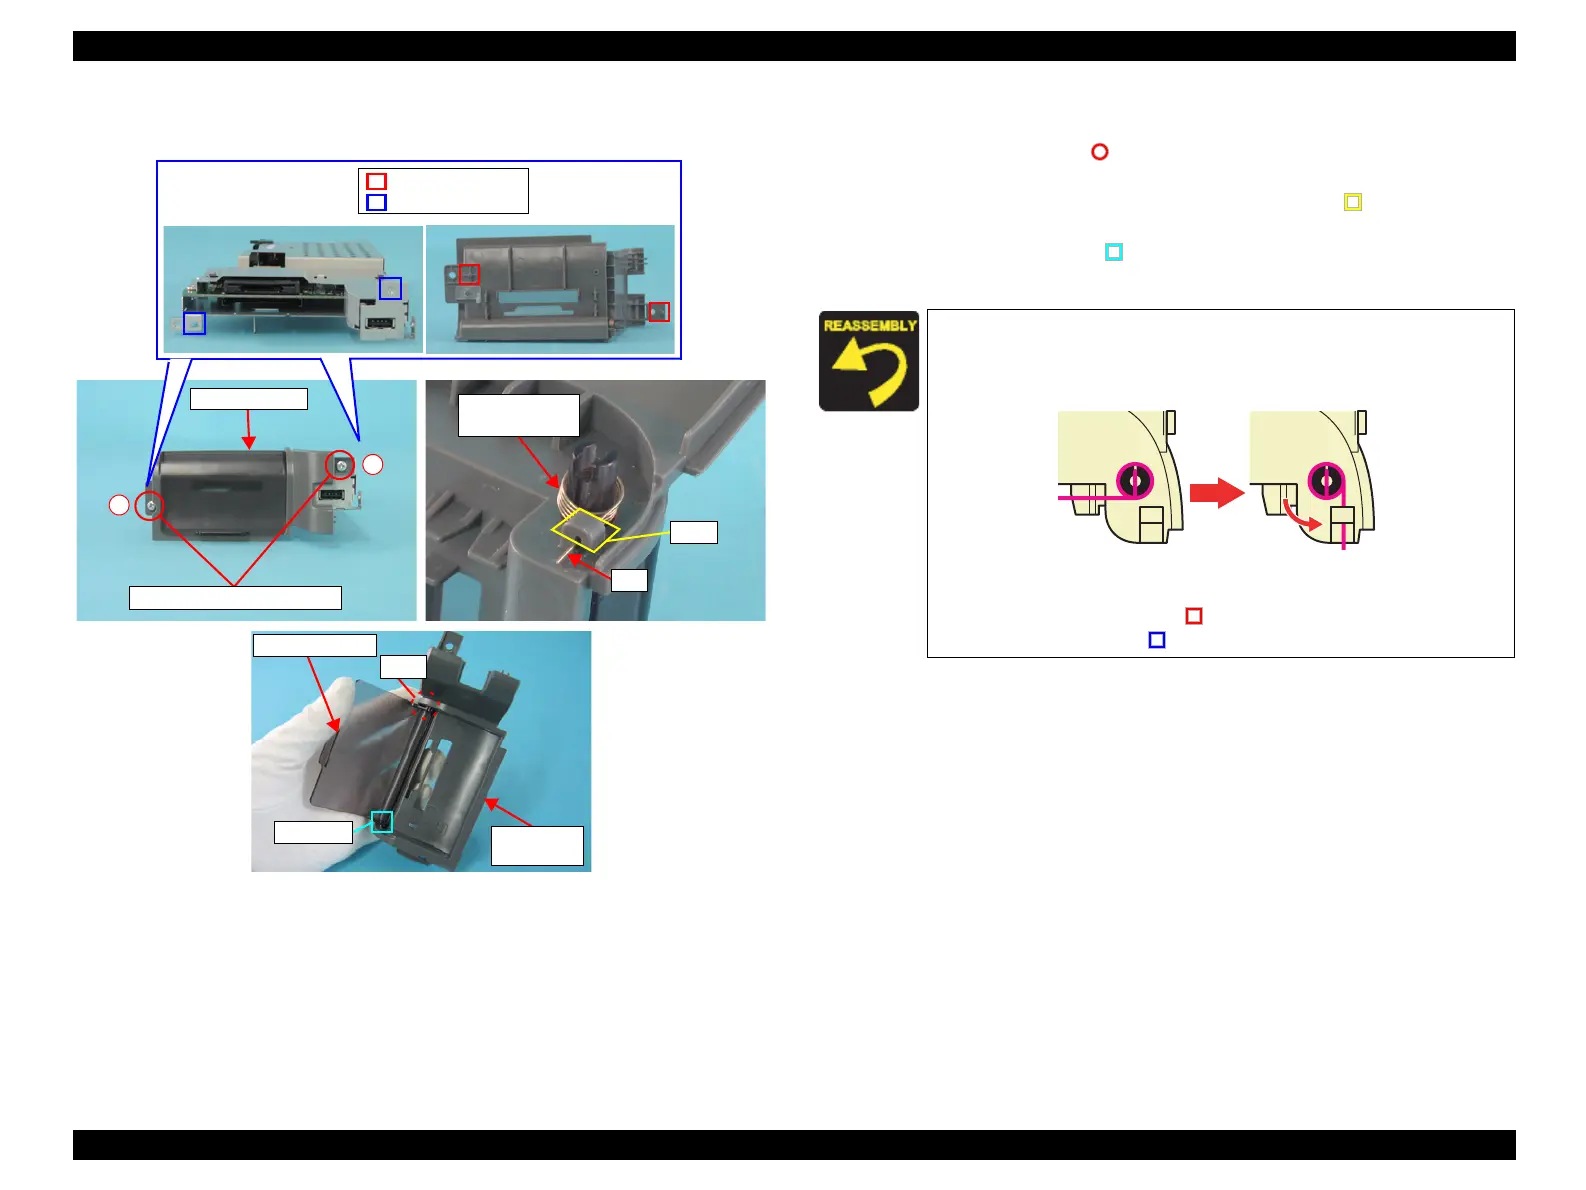
External view (2)
Figure 4-20. Removing Main Board Unit (2)
Card Slot Unit Removal (Only for Stylus CX4700/CX4800/DX4800)
1. Remove the screws (x2, ) that secure the Card Slot Unit, and remove the
Card Slot Unit from the Main Board Unit.
2. Release the tip of the Card Slot Spring from the tab (x1, ) of the Card Slot
Housing, and remove the Card Slot Spring.
3. Release the guide pin (x1, ) of the Card Slot Cover from the Card Slot
Housing, and remove the Card Slot Cover.
Card Slot Unit
C.B.S. 3x6 F/Zn (7±1kgfcm)
1
2
Card Slot Cover
Spring
Tab
Tip
Card Slot
Housing
Card Slot Cover
Shaft
Guide Pin
Guide Pins
Positioning Holes
Set the shaft of Card Slot Cover into the Card Slot Housing and
align the guide pin.
Install the Card Slot Spring as shown below.
Figure 4-21. Installing Card Slot Spring
Tighten the screws in the order as shown in the figure below.
Match the guide pins (x2, ) of the Card Slot Housing with the
positioning holes (x2,
) of the Main Board Unit.
 Loading...


