EPSON Stylus CX7300/CX7400/DX7400/NX200/TX200 series/SX200 series/Stylus CX8300/CX8400/DX8400/NX400/TX400 series/SX400 series Revision C
DISASSEMBLY/ASSEMBLY Disassembling the Scanner Unit 136
Confidential
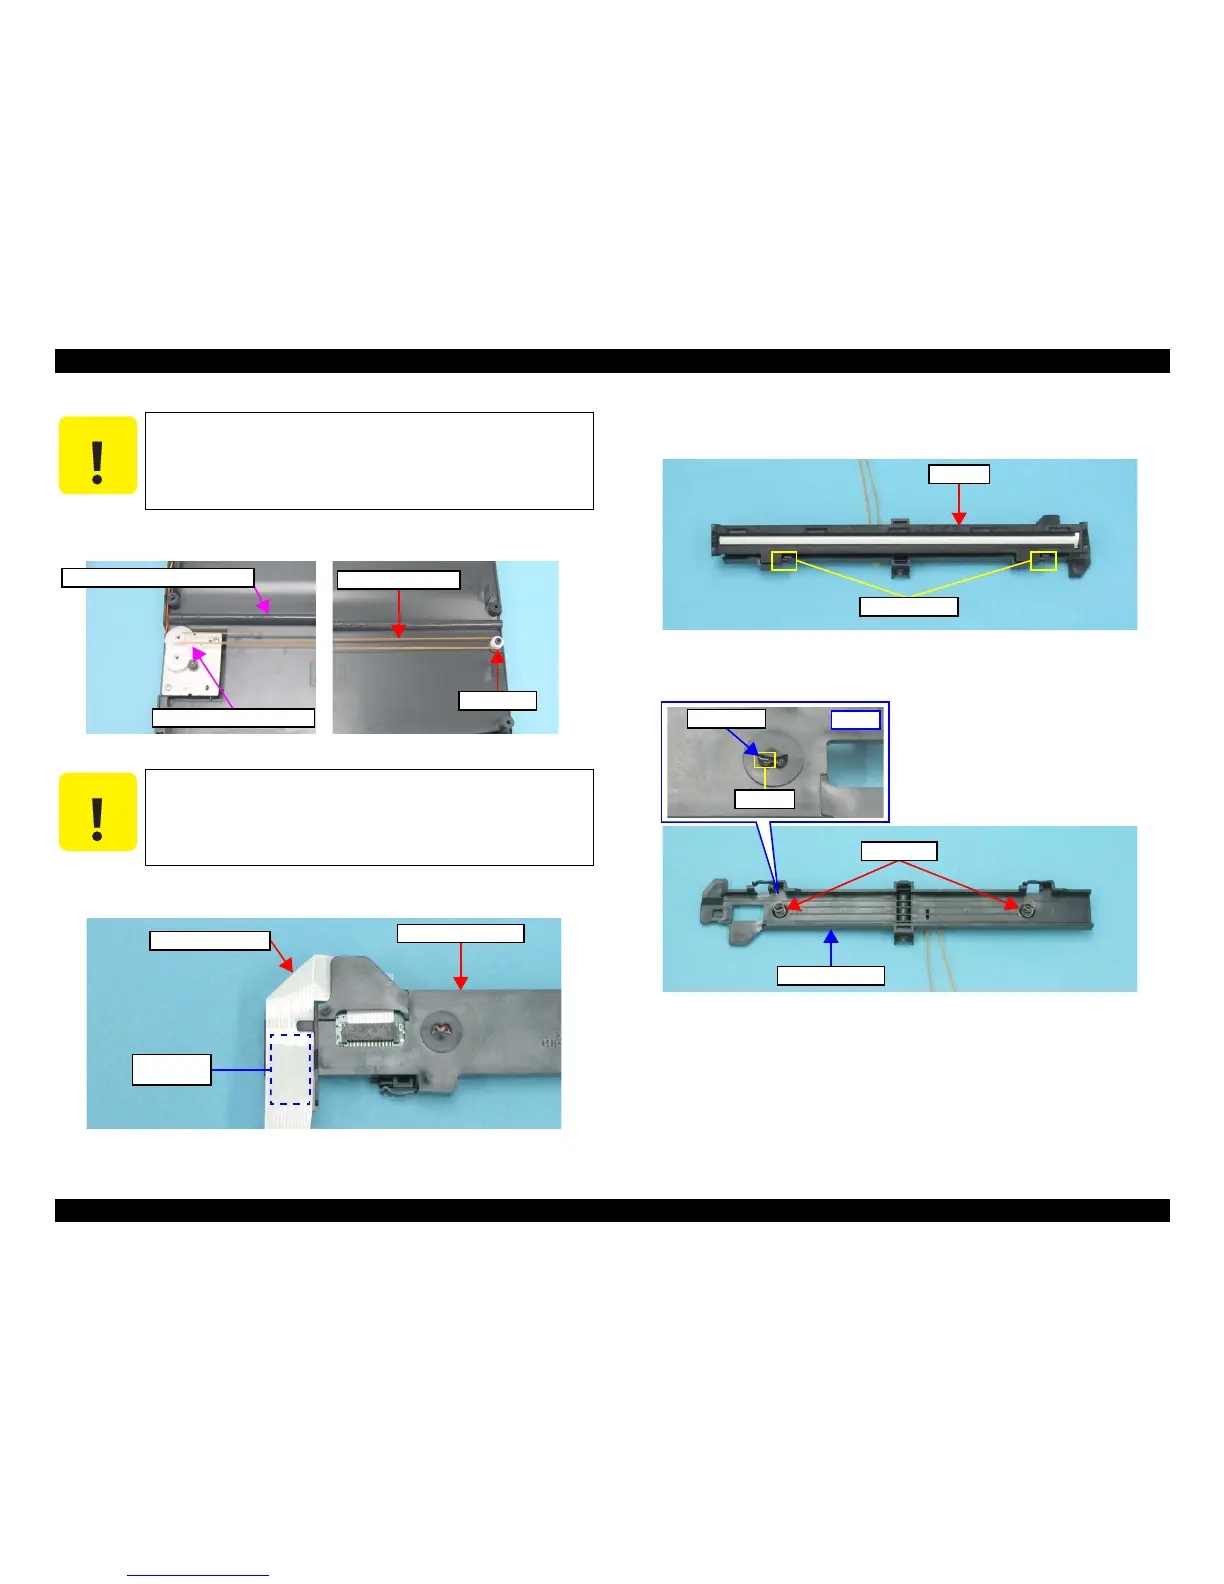
2. Release the Pulley from the Lower Scanner Housing, and release the Scanner
Timing Belt from the Combination Gear 22.8, 7.762 and the Driven Pulley.
Figure 4-109. Removing the Scanner Carriage Unit (1)
3. Release the Scanner Carriage FFC from the Scanner Carriage Unit, and
remove the Scanner Carriage Unit together with the Scanner Timing Belt.
Figure 4-110. Removing the Scanner Carriage Unit (2)
4. Release the tabs (x2) from the hooks (x2) on the Scanner CR Holder and
remove the CIS Unit.
Figure 4-111. Removing the CIS Unit
5. Remove the CIS Springs (x2) from the Scanner CR Holder.
Figure 4-112. Removing the CIS Springs
Take extra care not to contaminate the Scanner Timing Belt with
grease on the rail of the Lower Scanner Housing.
Driven Pulley
Scanner Timing Belt
Combination Gear 22.8, 7.762
Rail of the Lower Scanner Housing
 Loading...

