Adding Desks 9
Adding Desks
After you discover and configure the devices, you must add virtual desks within the software
to represent the hardware desks.
Step 1: Click the Program menu to go to the Cue Editing window.
Step 2: Click Add Desk. The Add Desk window opens.
Step 3: Type a name for the desk (20 characters maximum).
Step 4: Choose the number of channels on the hardware desk. For example, if you have a
12-channel hardware desk on the network, select a 12-channel virtual desk.
Step 5: Click Add Desk to create the desk. The desk displays in the Cue Editing window.
Step 6: Repeat steps 2–5 to add more desks as required. All desks are also shown in the Patch
window.
Editing Desk Names
Step 1: Click in the black area that contains the name.
Step 2: Edit the text and then press ENTER.
Deleting Desks
Step 1: Click Delete Desk. The Delete Desk window opens.
Step 2: Select the desk that you want to delete and then click Delete. The desk is deleted.
CAUTION:
When you delete a desk, any cues associated with that desk are also deleted.
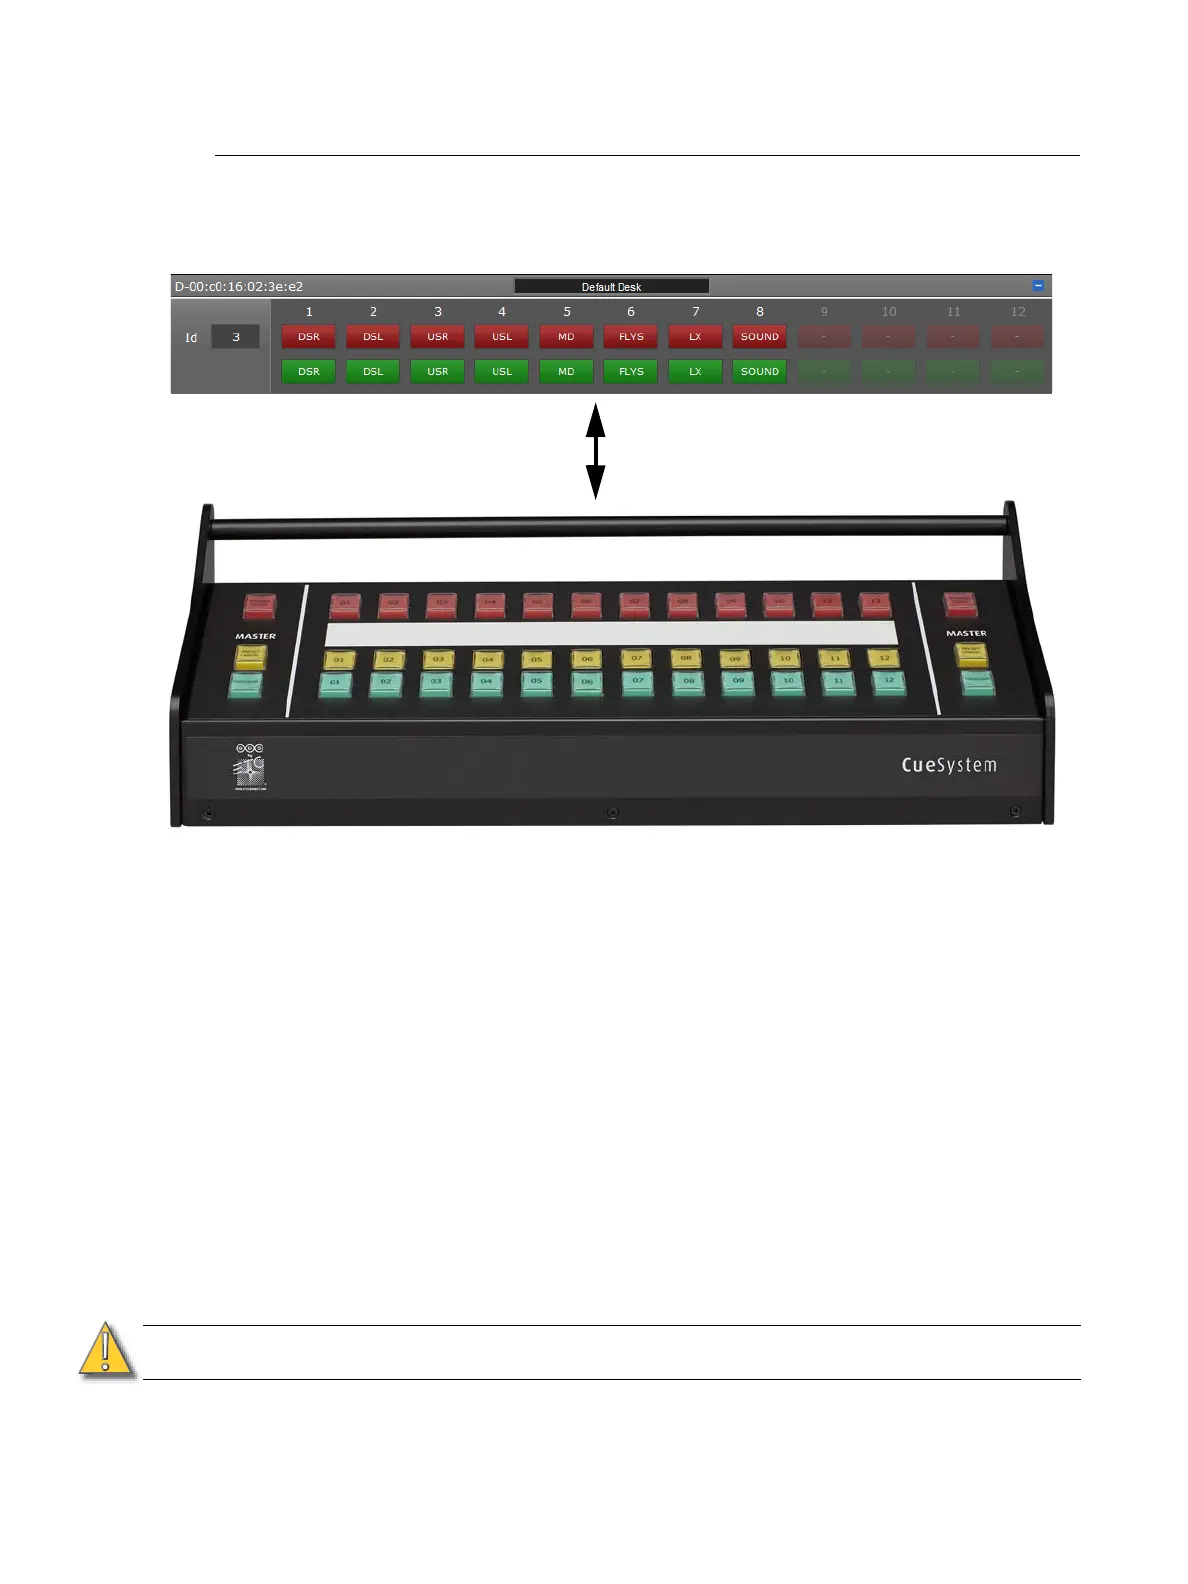
Virtual desk (above) represents the hardware
desk (below) within the PC software