The Harmonizer
®
Programmer’s Manual
© 1999-2008 Eventide, Inc. Page 66 of 97 Release 1.3
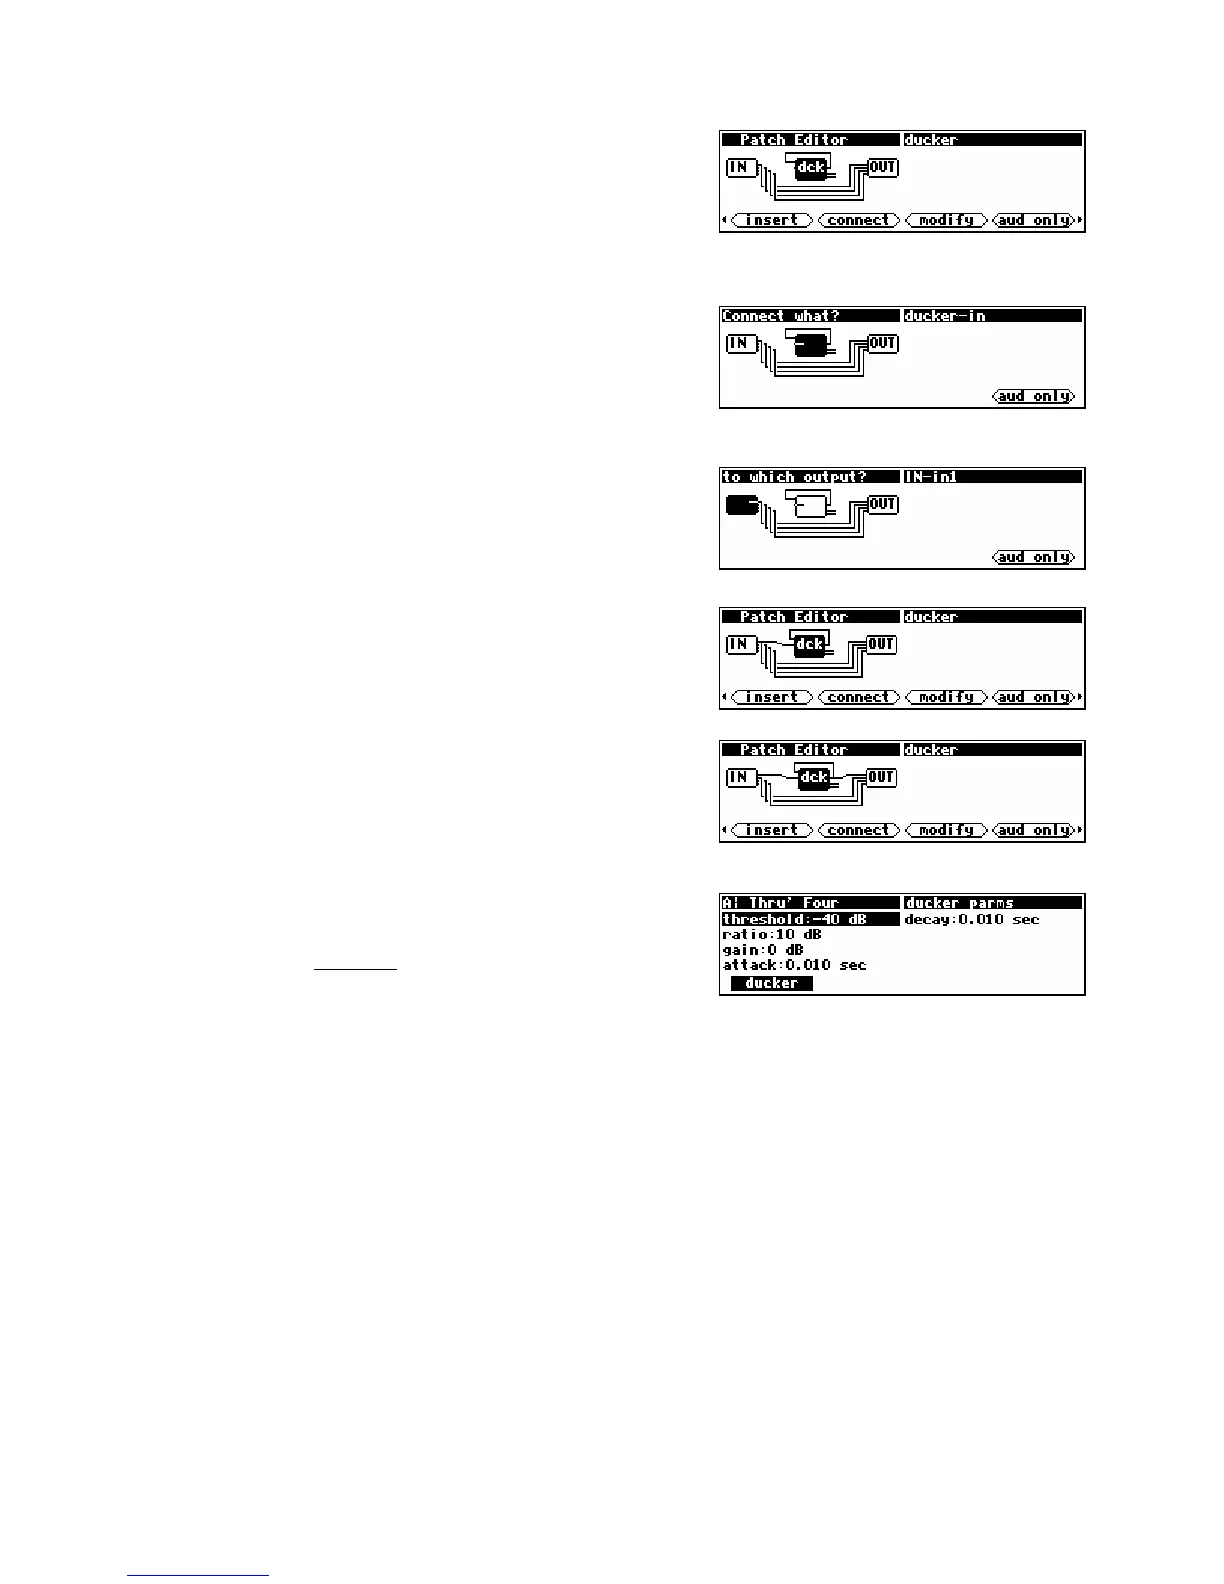
The display to the right shows the ducker highlighted, with its
output selected and its sidechain input ready to be selected.
Press the SELECT key.
There you have it. There’s a wire connecting the ducker’s
output to its sidechain input.
Now let’s connect the ducker’s
main input to the IN module.
Press the <connect> SOFT KEY and then the LEFT CURSOR key
twice. The ducker’s main input should be highlighted as
shown to the right.
Press the SELECT key to actually select the ducker’s main
input
. Now we need to select something to connect the
ducker’s main input to. As luck would have it, the IN
module’s
input 1 is the currently selected candidate.
Press the SELECT key to complete the connection.
The last thing we need to do is connect the OUT module to the
ducker so that we can hear what the compressor sounds like.
Press the <connect> SOFT KEY and then the SELECT key to
select the ducker’s output. Press the SELECT key again to
connect that to the OUT’s output 1.
Now the compressor will be heard on the first “channel” of the
DSP running the program, while the remaining three “channels”
go uncompressed. Press and hold the PARAMETER key to see the
ducker module’s menu page.
Now that you’re somewhat familiar with the mechanics of inserting and hooking modules up, let’s move
on to something a little more comprehensive.