COMPONENTS 50
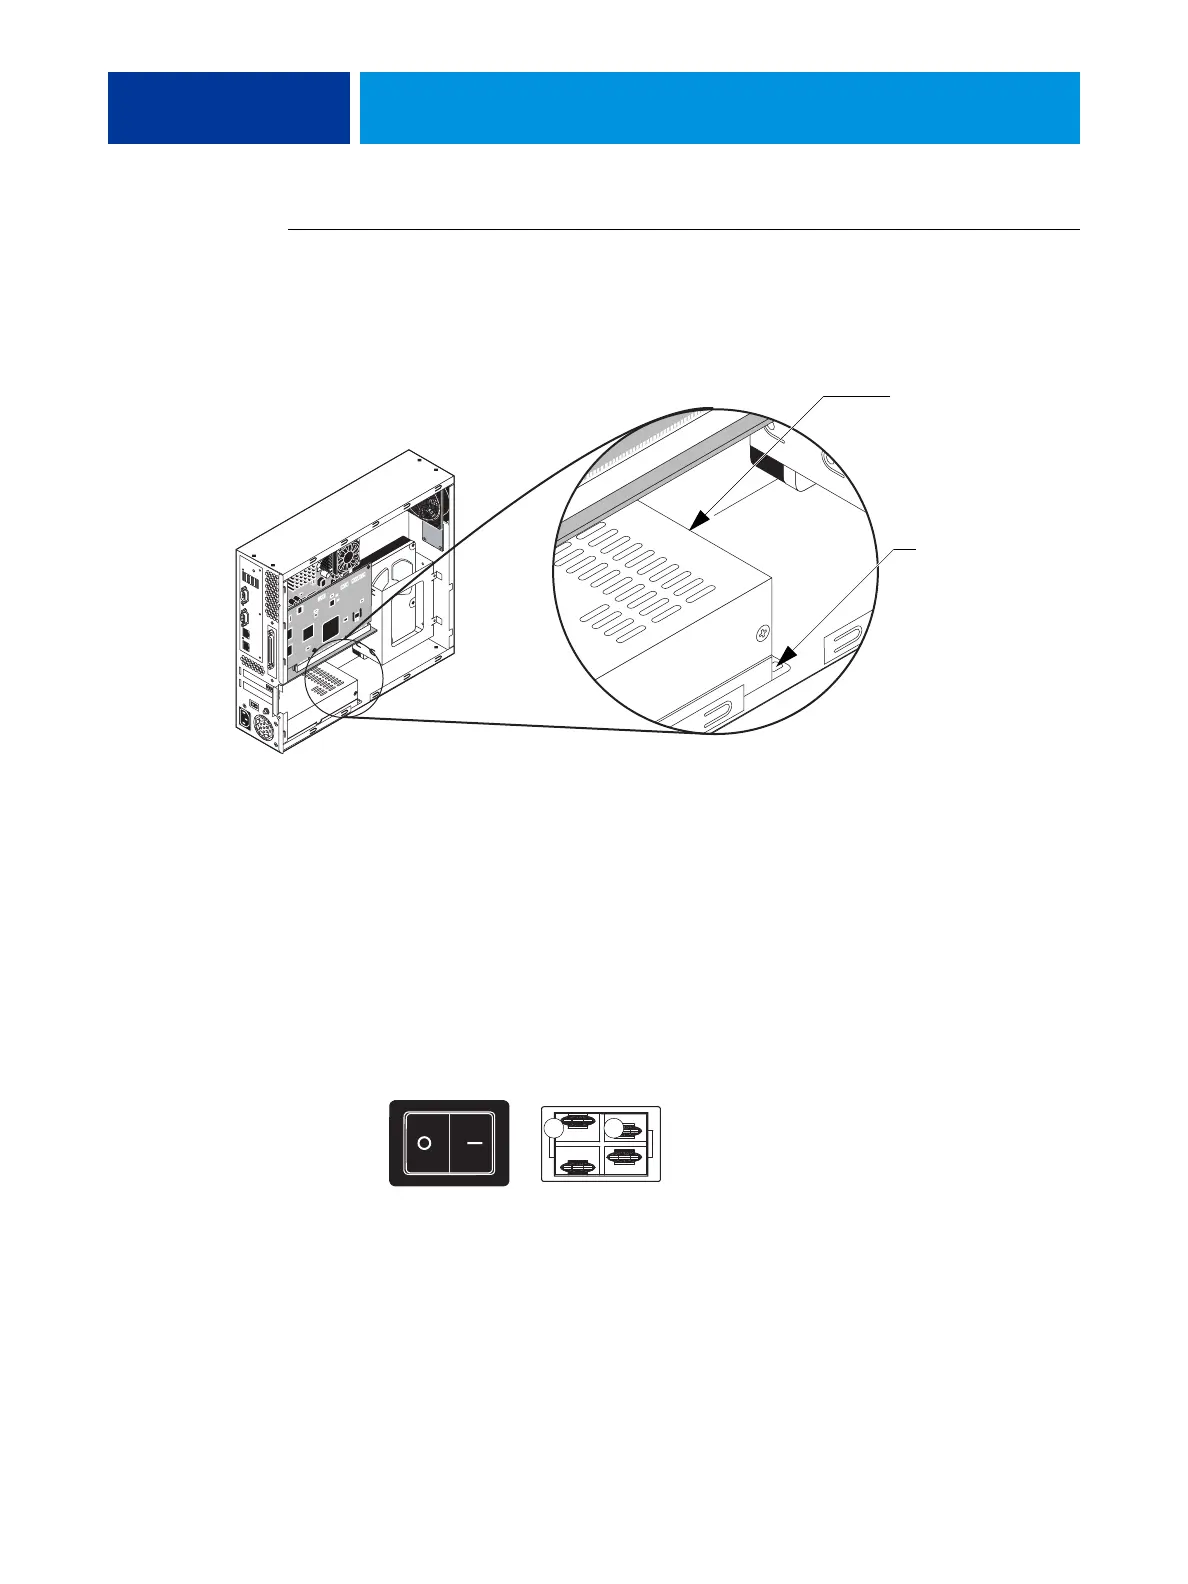
TO REPLACE THE POWER SUPPLY
1. Place the power supply into the chassis and secure it with the four screws that you removed
earlier.
When replacing the screw inside the chassis, see the following illustration.
FIGURE 26: Replacing the power supply
2. Arrange the cables inside the chassis and secure them with the cable clamps.
3. Connect power cables:
• 20-pin connector for motherboard power
• 4-pin connector for CPU power
• SATA power cable to the HDD
• Black and white power leads to the power switch.
Connect one wire to A and the other wire to B.
4. Reassemble the unit and verify functionality (see page 18).
Install a screw here.
It is not necessary to
install a screw in this area.
View from outside
A B
View from inside