COMPONENTS 45
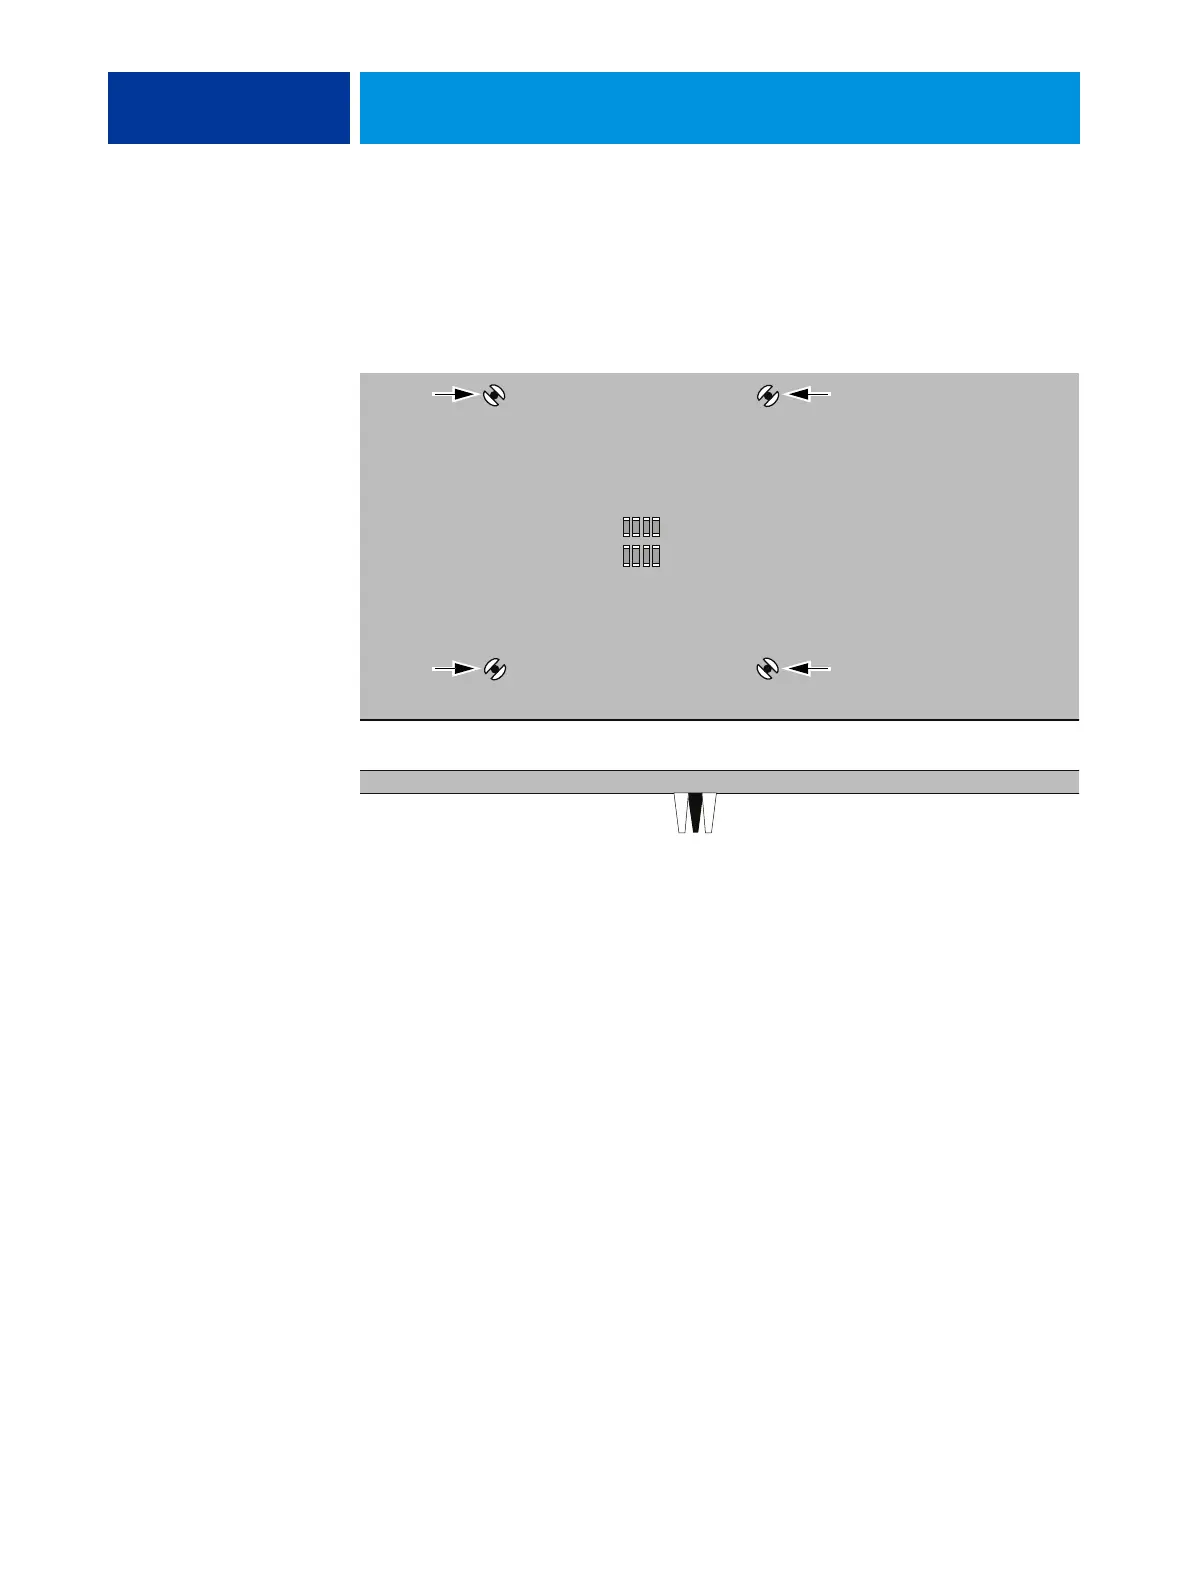
9. Turn the motherboard over and verify the following:
• Each black pin protrudes through the mounting hole on the underside of the
motherboard.
• Each black pin is flush with the tip of the peg.
FIGURE 22: Inspecting the cooling assembly pins on the underside of the motherboard
10. Connect the CPU fan cable to the motherboard connector CPUFAN.
The cable connector is keyed to fit only one way. Make sure that the connector on the cable is
securely attached to connector CPUFAN on the motherboard.
11. Install the motherboard in the chassis (see page 33).
12. Replace the power supply (see page 50).
13. Replace the motherboard components (see page 31).
14. If you installed a new CPU, clear the CMOS.
You should clear the CMOS after installing a new CPU to ensure compatibility between the
new component and previous settings stored in the BIOS.
NOTE: Be sure to remove the power cable from the E100 before clearing CMOS.
• Remove the battery (see page 34).
• Wait two minutes to allow the motherboard electrical components to fully discharge.
• Reinstall the battery (see page 34).
15. Reassemble the E100 and verify its functionality (see page 18).
NOTE: If you installed a new CPU, make sure to reset the date and time in Setup.
Straight-on view
Cross-sectional view