53
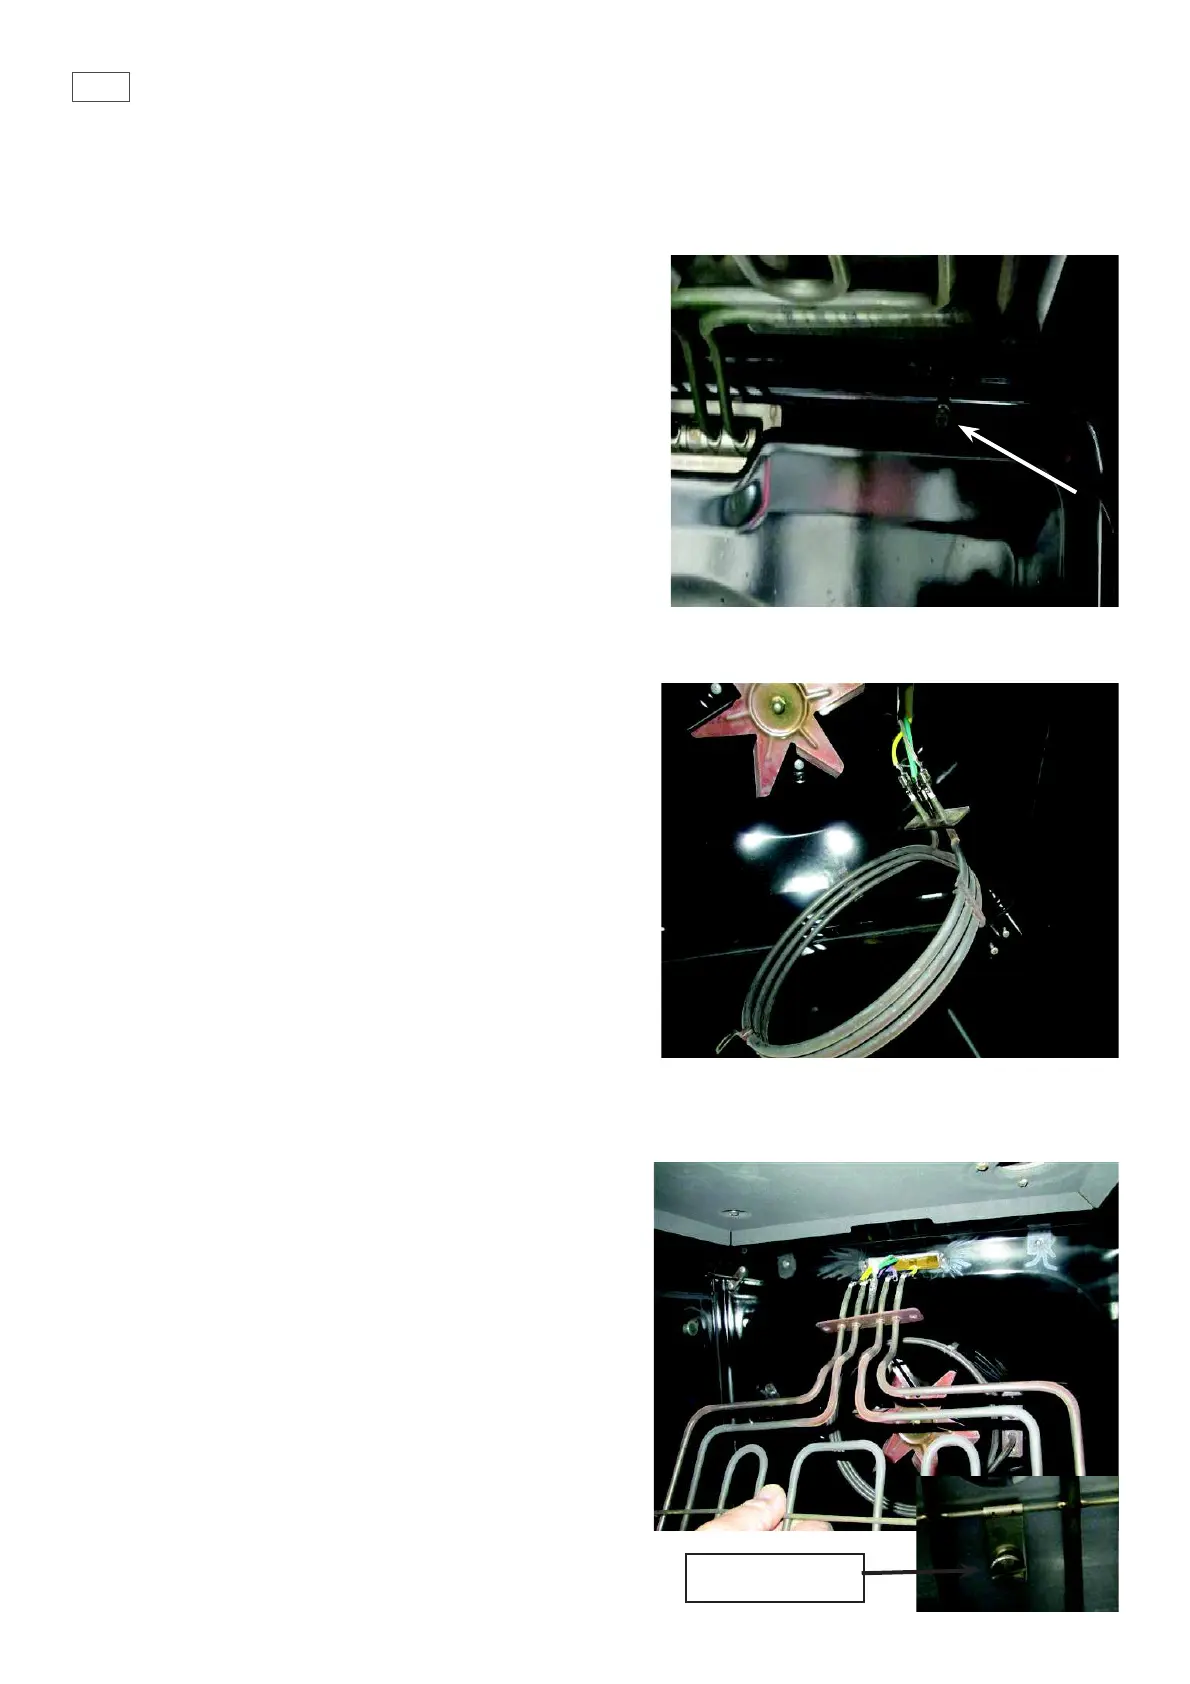
8.2 Removal of the Fan Shroud
•
Remove the oven shelves
• Remove the oven door (optional)
• Remove the 4 retaining screws at the top holding the
rear panel.
• Pull the panel forward.
• The panel will now be able to be removed.
8.3 Removal of the Fan Element
•
Remove the fan shroud as per instruction 8.2.
• Remove the 3 screws retaining the fan element to the
rear panel.
• Pull the element slightly forward to gain access to the
wiring.
• Remove the wiring and t to new element,
reassemble in reverse order.
8.4 Removal of the Grill Element
•
Remove the fan shroud as per instruction 8.2.
• Un-clip the retainers holding the element to the roof
of the oven cavity.
• (multi/mid models) Unscrew the retaining nut in the
centre of the element to release.
• Remove the two screws securing the element to the
rear wall of the oven cavity.
• Pull the element slightly forward to gain access to
the wiring.
• Remove the wiring and t to the new element,
reassemble in reverse order.
SL7 & 9 element
retaining nut
 Loading...