60
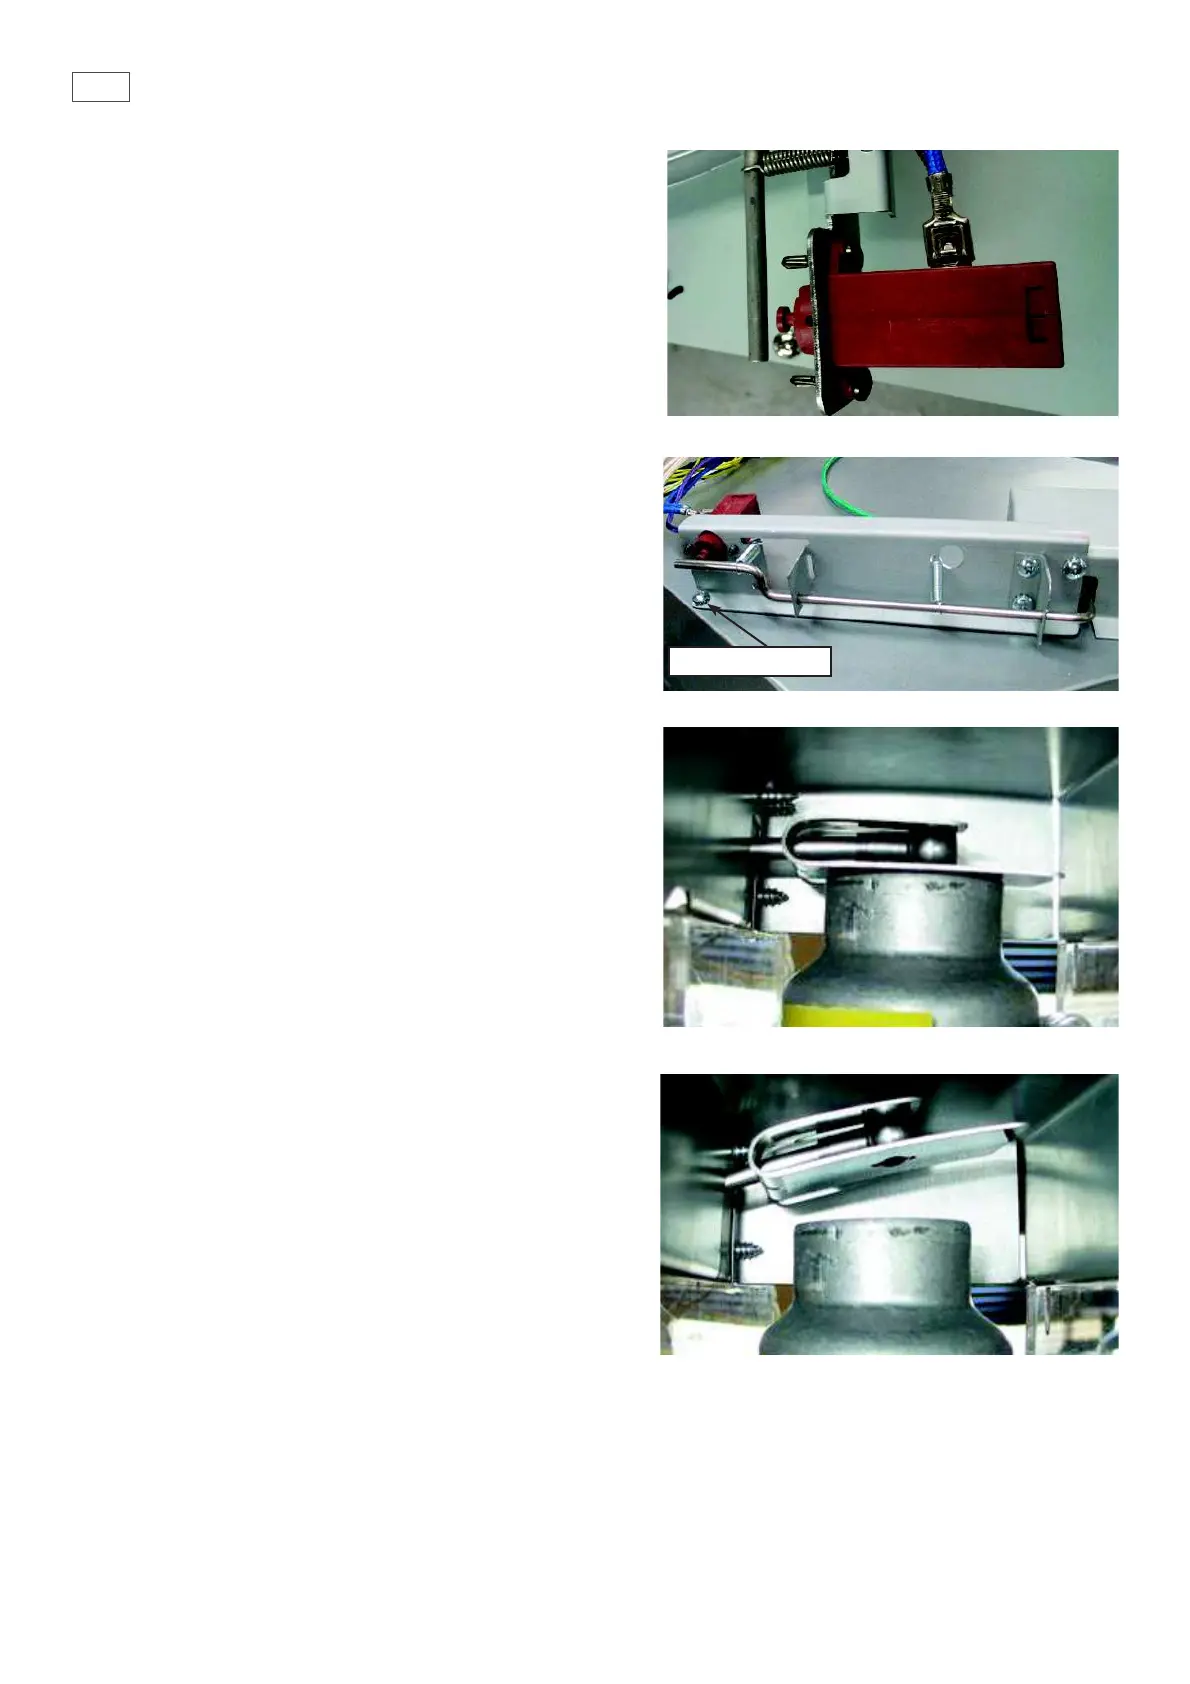
8.16 Removal of the outlet vent & actuator
•
Remove the product from the joinery to gain
access to the outlet duct assembly.
• Remove the top panel to access the outlet duct
assembly.
• To remove the wax actuator, remove the wiring
to the actuator and remove the 2 screws securing
the actuator to the duct assembly. (Fig 1)
• To remove the duct assembly, remove all the
screws retaining the duct assembly to the chassis
and the assembly will lift upwards. (Fig 2)
• When reassembling the top duct, it is important
to ensure the ap is sitting correctly on the cavity
outlet duct, as per Fig 3. In the open position it
should look like Fig 4.
Fig 1
Fig 2
Fig 3
Fig 4
retaining screws
 Loading...