Using the Main Menu13
To configure general settings:
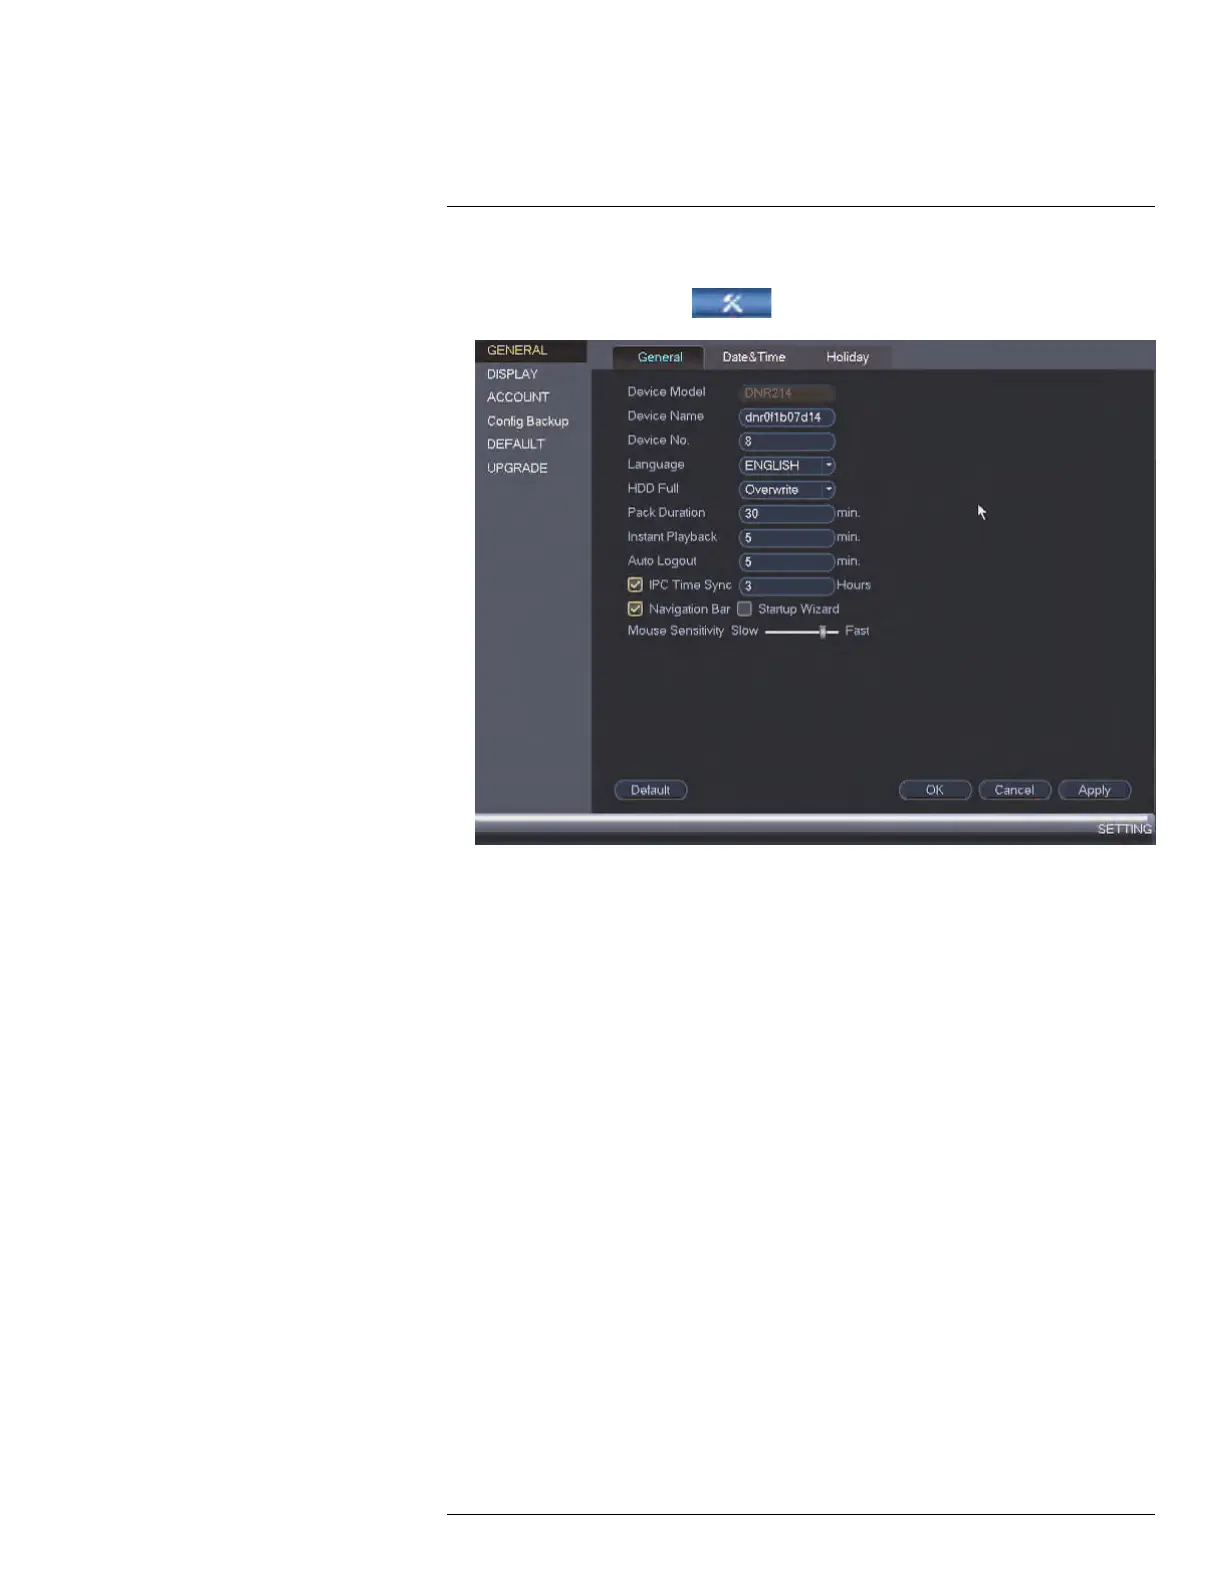
1. From the Main Menu, click
and then click Setting > General > General.
2. Configure the following:
• Device Name: Enter a name for your NVR.
• Language: Set the language for the NVR’s on-screen display.
• Video Standard: Select NTSC (North America) or PAL (Europe).
• HDD Full: Select Overwrite for the system to overwrite the oldest recordings when
the hard drive is full or select Stop Record for the system to stop recording when
the hard drive is full.
• Pack Duration: Select the length (in minutes) of video files stored on the system.
For example, if this is set to 30 minutes, the system will create a new video file for
each 30 minutes of continuous recording.
• Instant Playback: Select the amount of time (in minutes) the system will go back
when instant playback is activated in live view.
• Auto Logout: Select the idle time (in minutes) before the system will logout the cur-
rent user.
• IPC Time Sync: Select how often (in hours) the NVR will update the time on the
network cameras.
• Navigation Bar: Check to enable the Navigation Bar that comes up when you hov-
er the mouse cursor over the bottom of the screen in Live View.
• Startup Wizard: Check to enable a setup wizard when you start up the system.
• Mouse Sensitivity: Use the slider to adjust the mouse speed.
3. Click OK to save changes.
13.3.21 Changing the NVR’s Output Resolution
To optimize display, you can change the output resolution of your NVR to match the maxi-
mum supported resolution of your monitor. The Display menu allows you to configure the
systems monitor resolution and other display settings.
#LX400094; r.43927/43955; en-US
88