– 35 –
FS 913 M / FS 913 P
EN
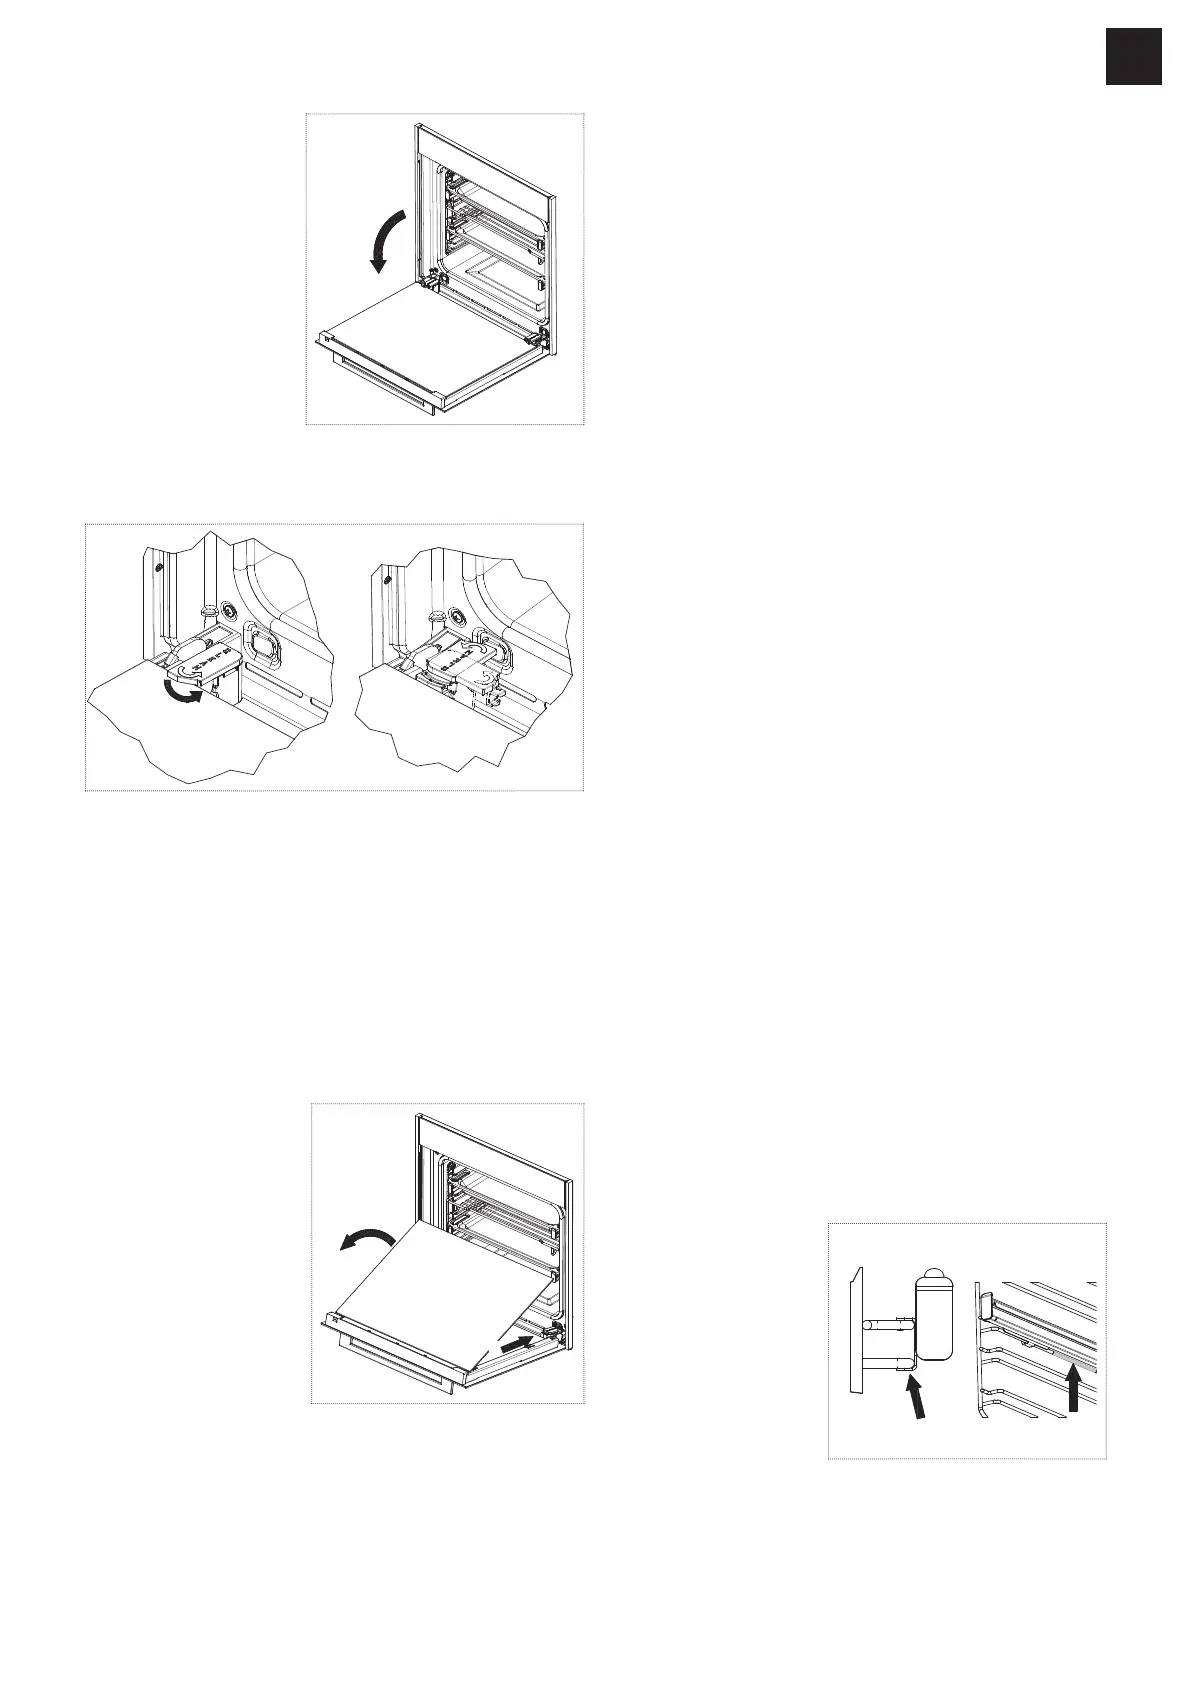
Open the oven
door completely.
Turn the two black blocks (with the word CLEAN,
at the bottom of the door) for 180° so that they fit
into the seats in the oven structure.
– Make sure to turn the black blocks completely.
The blocks click into their position.
CAUTION! Damage to the oven due to wrong
handling!
If the blocks are not turned completely, removing
the glass panel will cause the oven door to close
immediately.
Never try closing the door when one or both
blocks have partially or completely freed the glass
panel.
Carefully push the
internal glass panel
(1) towards the
oven. Then lift the
internal glass panel
(2).
The two black
blocks will
prevent the door
from closing.
1
2
Clean the internal glass panel.
Removing and cleaning the intermediate glass
panel of the oven door
After removing the internal glass panel, the
intermediate glass panel can be removed.
Carefully lift the intermediate glass panel out of
the rubbers on both sides.
Clean the intermediate glass panel.
Removing and cleaning the upper trims for
glass panels
For more thorough cleaning, the upper trims on the
oven door can be removed. The upper trims are fixed
with two screws, one in the upper right, one in the
upper left corner on the inside of the oven door. It is
only possible, to remove the upper trims when the
internal glass is removed.
Unscrew the fixing screws in the upper right and
left corner of the oven door.
Remove the upper trim.
Clean the upper trim.
Mounting the glass panels
The correct position of the mounted glass panels is
indicated by the wording TEMPERED GLASS which
must be perfectly legible.
If unmounted, put the upper glass trim back in
place.
If unmounted, put the intermediate glass panel
back in place within the rubbers.
Put the internal glass panel back in place.
Turn the two glass retaining blocks back to their
original position.
Close the oven door.
Cleaning the side frames and telescopic
guides
To clean the side frames and telescopic guides
thoroughly they can be removed from the oven.
Remove the telescopic guides
With the telescopic
guide in closed
position press
firmly (1) on the
middle of the wire
rack where the
bottom side of the
guide rests.
1
1