2 Safet
Instructions
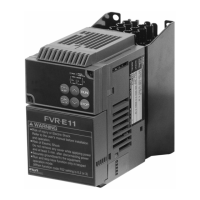
FVR-C11S-EN
Compliance with UL/cUL standards [Applicable to products with UL/cUL mark]
1. [WARNING] Take care of electric shock. Be sure to turn the
inverter off before startin
work.
2. [CAUTION] When the char
e lamp is lit, the inverter is still char
ed
at a dan
erous volta
e.
3. [WARNING] There are two or more live parts inside the inverter.
4. The inverter is approved as a part used inside a panel. Install it in-
side a panel.
5. Perform wirin
to the input, output and control terminals of the in-
verter, referrin
to the table below. Use UL certified round crimp
terminal to the input and output terminals with insulation cover or
covered with reduced tube to obtain the insulation distance. Use a
crimpin
tool recommended b
the terminal manufacturer when
fabricatin
crimp terminals.
6. Install a fuse in the power suppl
to the inverter, referrin
to the ta-
ble below.
Volta
e Inverter t
pe
Ti
htenin
torque
[Nm]
Applicable wire diameter
[AWG] (mm
2
)
1
Fuse
[A]
2
Recommended fuse
L1/L, L2/N
U, V, W
Control
section
L1/L, L2/N
U, V, W
Control
section
Gould
Compan
Bussmann
Compan
Sin
le-
phase
200V
input
FVR0. 1C11S-7EN
1.2
0.4
14 (2.1)
20 (0.5)
6 A4J6 JKS6
FVR0. 2C11S-7EN 6 A4J6 JKS6
FVR0. 4C11S-7EN 10 A4J10 JKS10
FVR0. 75C11S-7EN 15 A4J15 JKS15
FVR1. 5C11S-7EN 12 (3.3) 30 A4J30 JKS30
FVR2. 2C11S-7EN 1.8 10 (5.3) 40 A4J40 JKS40
1) Use copper wires of allowable maximum temperature 60 or75 °C.
2) Use UL certified "quick breakin
fuse".
7. Connect the power suppl
satisf
in
the characteristics shown in
the table below as an input power suppl
of the inverter. (Short
circuit ratin
)
Inverter t
pe Input max. volta
e Input current
FVR0. 1-2. 2C11S-7EN AC240V 5,000 A or less
CAUTION

 Loading...