Step 4
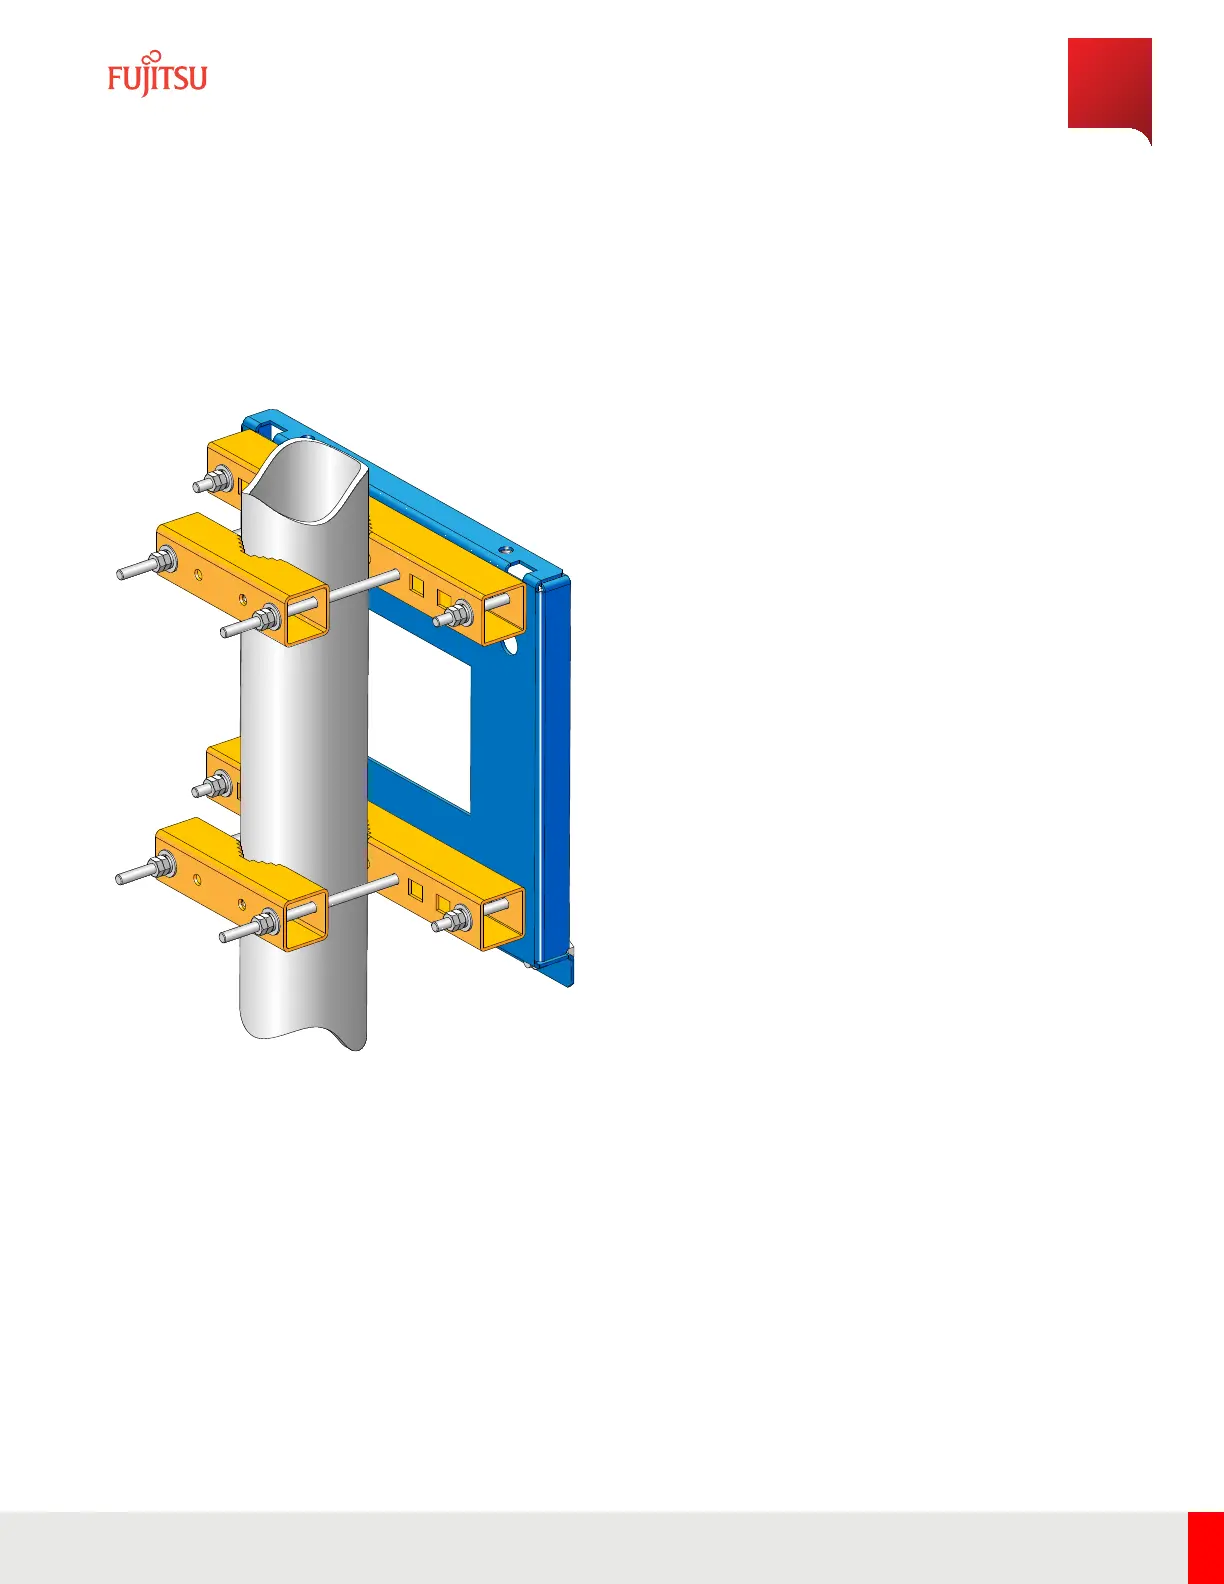
Connect the small crossmembers from opposite side of pole to the large crossmembers on the mounting plate
using four 3/8-16 x 10L bolts, washers, and nuts as shown in Figure 17. Secure them together using a 17 mm socket.
Note: Fujitsu recommends a second person assist with this step.
Figure 17
Pole Mount Crossmembers
Step 5
Add jam nuts to each 3/8-16 x 10L bolts and secure until tightened.
Step 6
Place large insulating bushings on the wall plate by performing the following substeps:
a) Peel the adhesive covering o of the large insulating bushings.
b) Align the sticky side of the insulating bushings with the threaded holes on the lower front lip of the wall plate
and stick them in place as shown in the following graphic.
Installation
RU Installation
101
Release 1.0 · Issue 1.1, May 2021
Fujitsu and Fujitsu Customer Use Only