9
RADIO INSTALLATION
Follow these guidelines to properly mount the servos, receiver and battery.
Make certain that the alignment tab on the battery, switch and servo connectors are oriented correctly and
them in. When unplugging connectors never pull directly on the wires. Instead, pull directly on the plastic
connectors. Doing so will prevent any damage to the wires.
If any servo wires are not long enough to reach the desired connection point, Futaba offers a complete range
of servo extensions which may be purchased separately for this application.
Servo
Rubber
grommet
Servo
Rubber
grommet
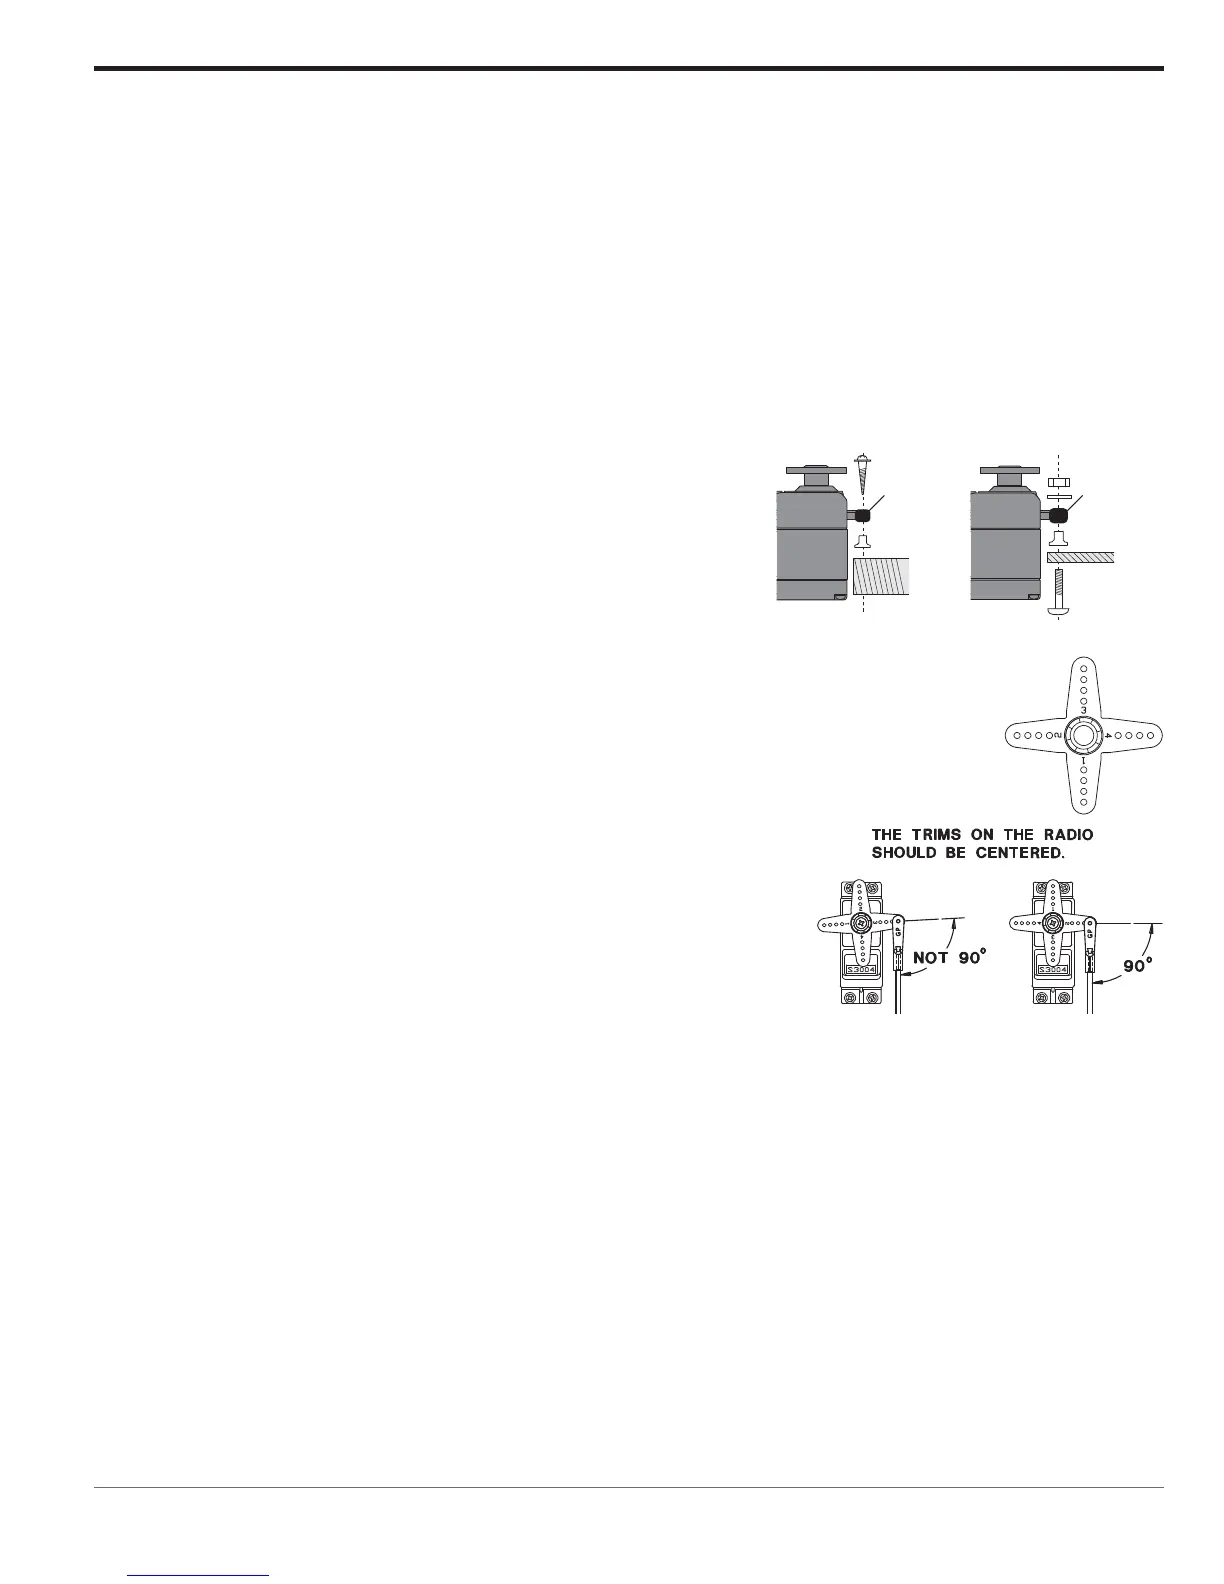
Always mount the servos with the supplied rubber grommets. Do
not over-tighten the screws. No part of the servo casing should
contact the mounting rails, servo tray or any other part of the
airplane/helicopter structure. If they do so, vibration will be
transmitted to the servo itself causing premature wear and/or servo
failure.
Note the small numbers (1-4) molded into each arm of the Futaba 4-arm servo arms. The
used to correct slight manufacturing deviances between servos and ensure the proper
geometric set-up for the aircraft.
To center the servos, connect them to the receiver and turn on
the transmitter followed by the receiver. Center the trims on the
degrees) to the pushrod when placed on the servo.
After the servos are installed, operate each servo over its full travel and check that the pushrods and servo
arms do not bind or contact each other. Also, make sure that the controls do not require excess force to
operate. If there is any objectionable buzzing sound coming from a servo, there is probably too much
Use the mounting plate from the receiver on/off switch as a template for the cutout and screw holes.
be inadvertently turned on or off during handling or storage of the aircraft. The cutout should allow for
a full range of motion from the switch in both directions. Be certain that the switch moves without and
When you install the switch harness in the helicopter, please use the switch cover. Generally, sandwich
the frame by the switch and switch cover and securely tighten the screws. Different models might require
different installations. In that case, please follow the directions supplied by the manufacturer.
 Loading...