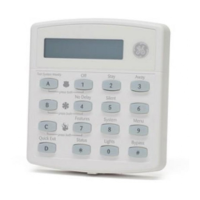
Concord 50
The following describes how to program the sensor settings that appear under LEARN SENSORS.
Handheld Wireless Touchpads Press the BYPASS button.
Keychain Touchpads
Press and hold the lock and unlock buttons together until the
touchpad LED flashes.
ELM Keychain Touchpads
1. Press and release the unlock button twice quickly, then
press and hold until the LED flashes three times.
2. Press and release the unlock button once quickly, then
press and hold until the LED flashes two times.
3. Press and hold the unlock button until the LED flashes
once.
Table 7: How to Trip Sensors
Sensor Steps to Trip Sensor
Learn Sensors (080)
Sensors (Default = none)
The following describes how to add (learn) hardwire
zones and wireless devices into panel memory.
Note
The panel comes with factory programmed onboard hard-
wire zones. Install 2k-ohm, end of line (EOL) resistors on all
unused factory programmed onboard hardwire zones. If you
don’t want to install EOL resistors, delete any unused zones
from memory. See Table 8 for onboard hardwire zone fac-
tory programming.
Sensors must be placed in a partition or sensor group. To
change the sensor group or partition assignment after add-
ing a sensor or zone, use the
EDIT SENSORS menu.
¾To Learn Sensors into panel memory:
1. With the display showing SENSORS, press # and the display
shows LEARN SENSORS.
2. Press # and the display shows SENSOR PTN 1.
3. Press # to select partition 1 or press 2 + # to select partition 2.
The display should show
SENSOR GROUP 0.
4. Enter the desired sensor group + # (see Table B1 in “Appendix
B” for a description of all sensor group characteristics). The
display shows
TRIP SENSOR nn, where nn is the displayed (next
available) sensor number.
5. To change the displayed sensor number, enter the desired sen-
sor number + #. The desired sensor number is displayed.
6. With the desired sensor number displayed, use the guidelines in
Table 7 to force the sensor or zone you are adding (learning)
into the panel memory to send a signal to the panel.
7. To add another sensor to the same sensor group and partition,
go back to step 5.
8. To add sensors to another sensor group or partition, press *
twice and go back to step 1 (
LEARN SENSORS).
Table 8: Onboard Hardwire Zone Factory Programming
Zone Input Group No. & Description
1 10–Entry/Exit
2 17–Instant Interior Follower
3 13–Instant Perimeter
4 13–Instant Perimeter
5 13–Instant Perimeter
6 13–Instant Perimeter
7 13–Instant Perimeter
8 13–Instant Perimeter
Note
If the panel memory is cleared, all onboard hardwire zone factory programming will be erased.