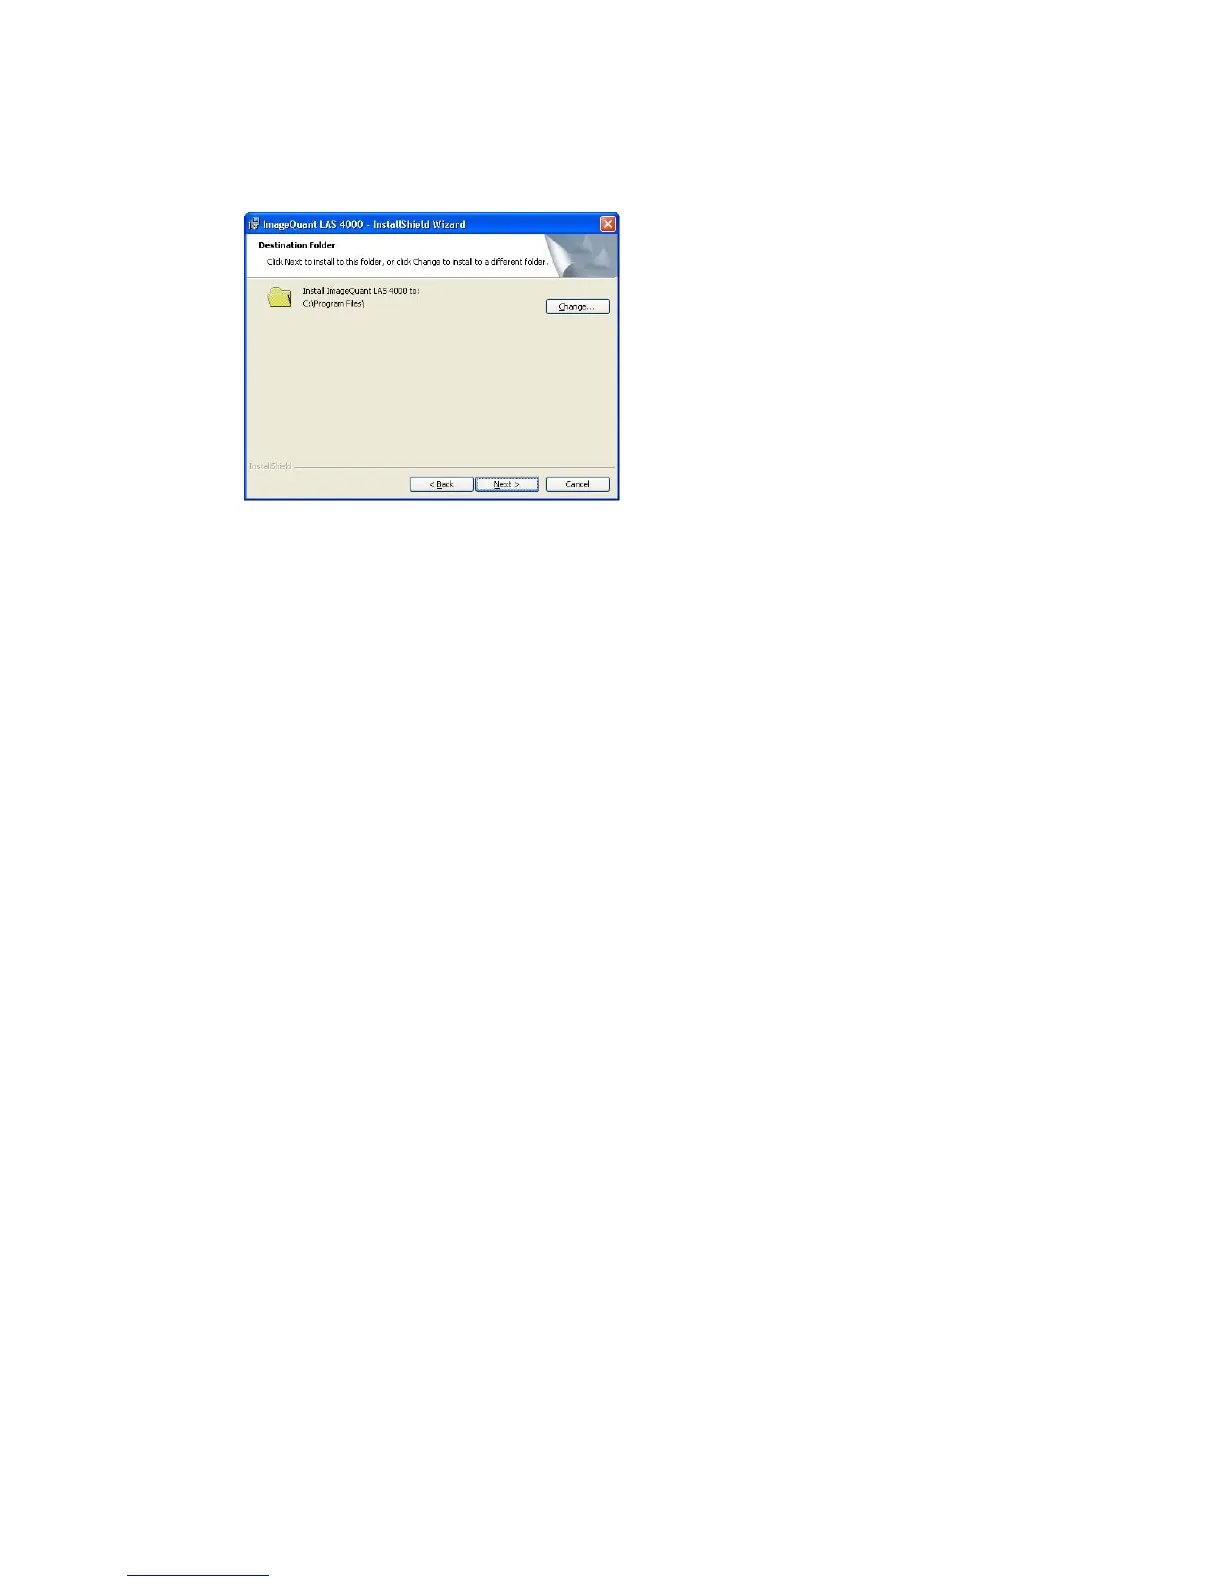
5
Select destination folder in the dialog:
•
Click the Next button to install the software at the default folder C:\Program Files.
•
Click the Change button to install to a different folder.
6
Click the Install button.
7
Click the Finish button.
The installation of ImageQuant LAS 4000 Control Software is now completed.
3.4.2 Installation (Windows Vista)
Installation is performed in the following sequence.
1
Installation of FUJI USB Control driver
2
Installation of FUJI USB Function driver
3
Installation of ImageQuant LAS 4000 Control Software
3.4.2.1 Installation of the USB Control Driver (Windows VISTA)
Note:
The computer and ImageQuant LAS 4000 must not be connected with a USB cable
during the operation.
Note:
During software installations, you may be asked to confirm your actions in a dialog with
the text Windows needs your permission to continue. Enter an administrator password,
if prompted, then click Continue to proceed with the installation.
1
Open the control panel and click Classic View in the upper left corner.
2
Open the Add Hardware tool.
3
In the Add Hardware dialog, click the Next button.
4
Select Install the hardware that I manually select from a list (Advanced) and click the Next button.
30 Getting Started with ImageQuant LAS 4000 28-9607-59 AB
3 Installation
3.4 Installation of the software
3.4.1 Installation (Windows XP)
 Loading...